# Bloomreach
Bloomreach is a combines the power of unified customer and product data with AI optimization, helping deliver personalized customer journeys and analytics.
## Overview
Bloomreach combines the power of unified customer and product data with AI optimization, helping deliver personalized customer journeys.
## \*\*API Information \*\*
The Base URL used for the Bloomreach connector can be, for example, simply\*\* ,\*\* but in many cases, this would be your own custom URL. More information can be found on their main [API documentation](https://documentation.bloomreach.com/engagement/reference/authentication) site.
## Authentication
Within the builder, click on the Bloomreach connector to display the connector properties panel. Select the **Auth** tab and click on the **New authentication** button.
In the Tray.io authentication pop-up modal name your authentication in a way that will quickly identify it within a potentially large list. For example, whether it is a Sandbox or Production auth, etc.
Consider who/ how many people will need access to this authentication when choosing where to create this authentication ('Personal' vs 'Organisational').
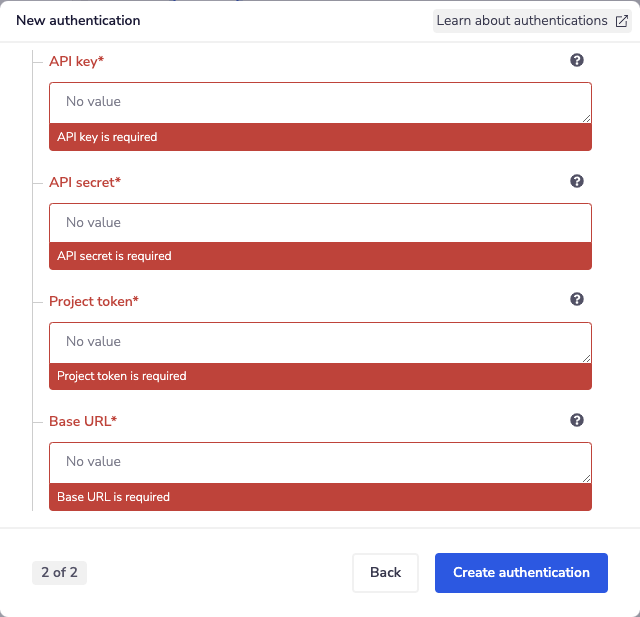
The next page asks you for your API key, API secret, Project token and Base URL credentials.
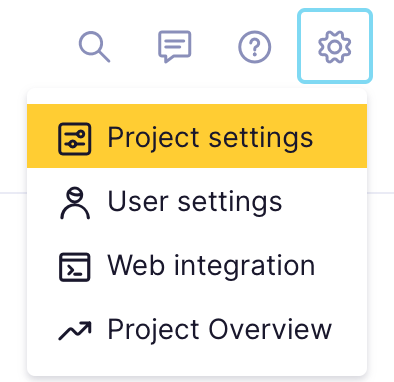
To get these fields, head to the Bloomreach Engagement interface. Navigate to the settings section of your Bloomreach dashboard, found at the gear icon. Click on 'Project settings'.
You can see your Project token within the General project settings.

To find your API key, API secret, and base URL, click on 'Access management' and then 'API'.
You will need to generate an API key and API secret. Once they have been generated, you won't be able to view the API secret again. However, you can generate a new one here if you need to.
You can also view your Project key on this screen.

Once you have added these fields to your Tray.io authentication pop-up window click the **Create authentication** button.
Your connector authentication setup should now be complete. Please run the simplest operation available to test and ensure you can retrieve data as expected.
## Available Operations
The examples below show one or two of the available connector operations in use.
Please see the [Full Operations Reference](#operationsFull) at the end of this page for details on all available operations for this connector.
## Notes on using Bloomreach
The operations in Bloomreach are designed to be very customisable so as not to limit the schema you can send to the API. Please note that due to this, there may be some required fields required in some operations that are not obvious from the workflow input panel.
Note also, that the output examples for each operation are for example only. The operation may return different or additional parameters when the operation is actually run, depending on your inputs.
## Using the Raw HTTP Request ('Universal Operation')
As of **version 1.0**, you can effectively create your own operations.
This is a powerful feature that you can use when there is an endpoint in Bloomreach that is not used by any of our operations.
To use this you will, first of all, need to research the endpoint in the [Bloomreach](https://documentation.bloomreach.com/engagement/reference/welcome) API documentation to **find the exact format** that Bloomreach will be expecting the endpoint to be passed in.
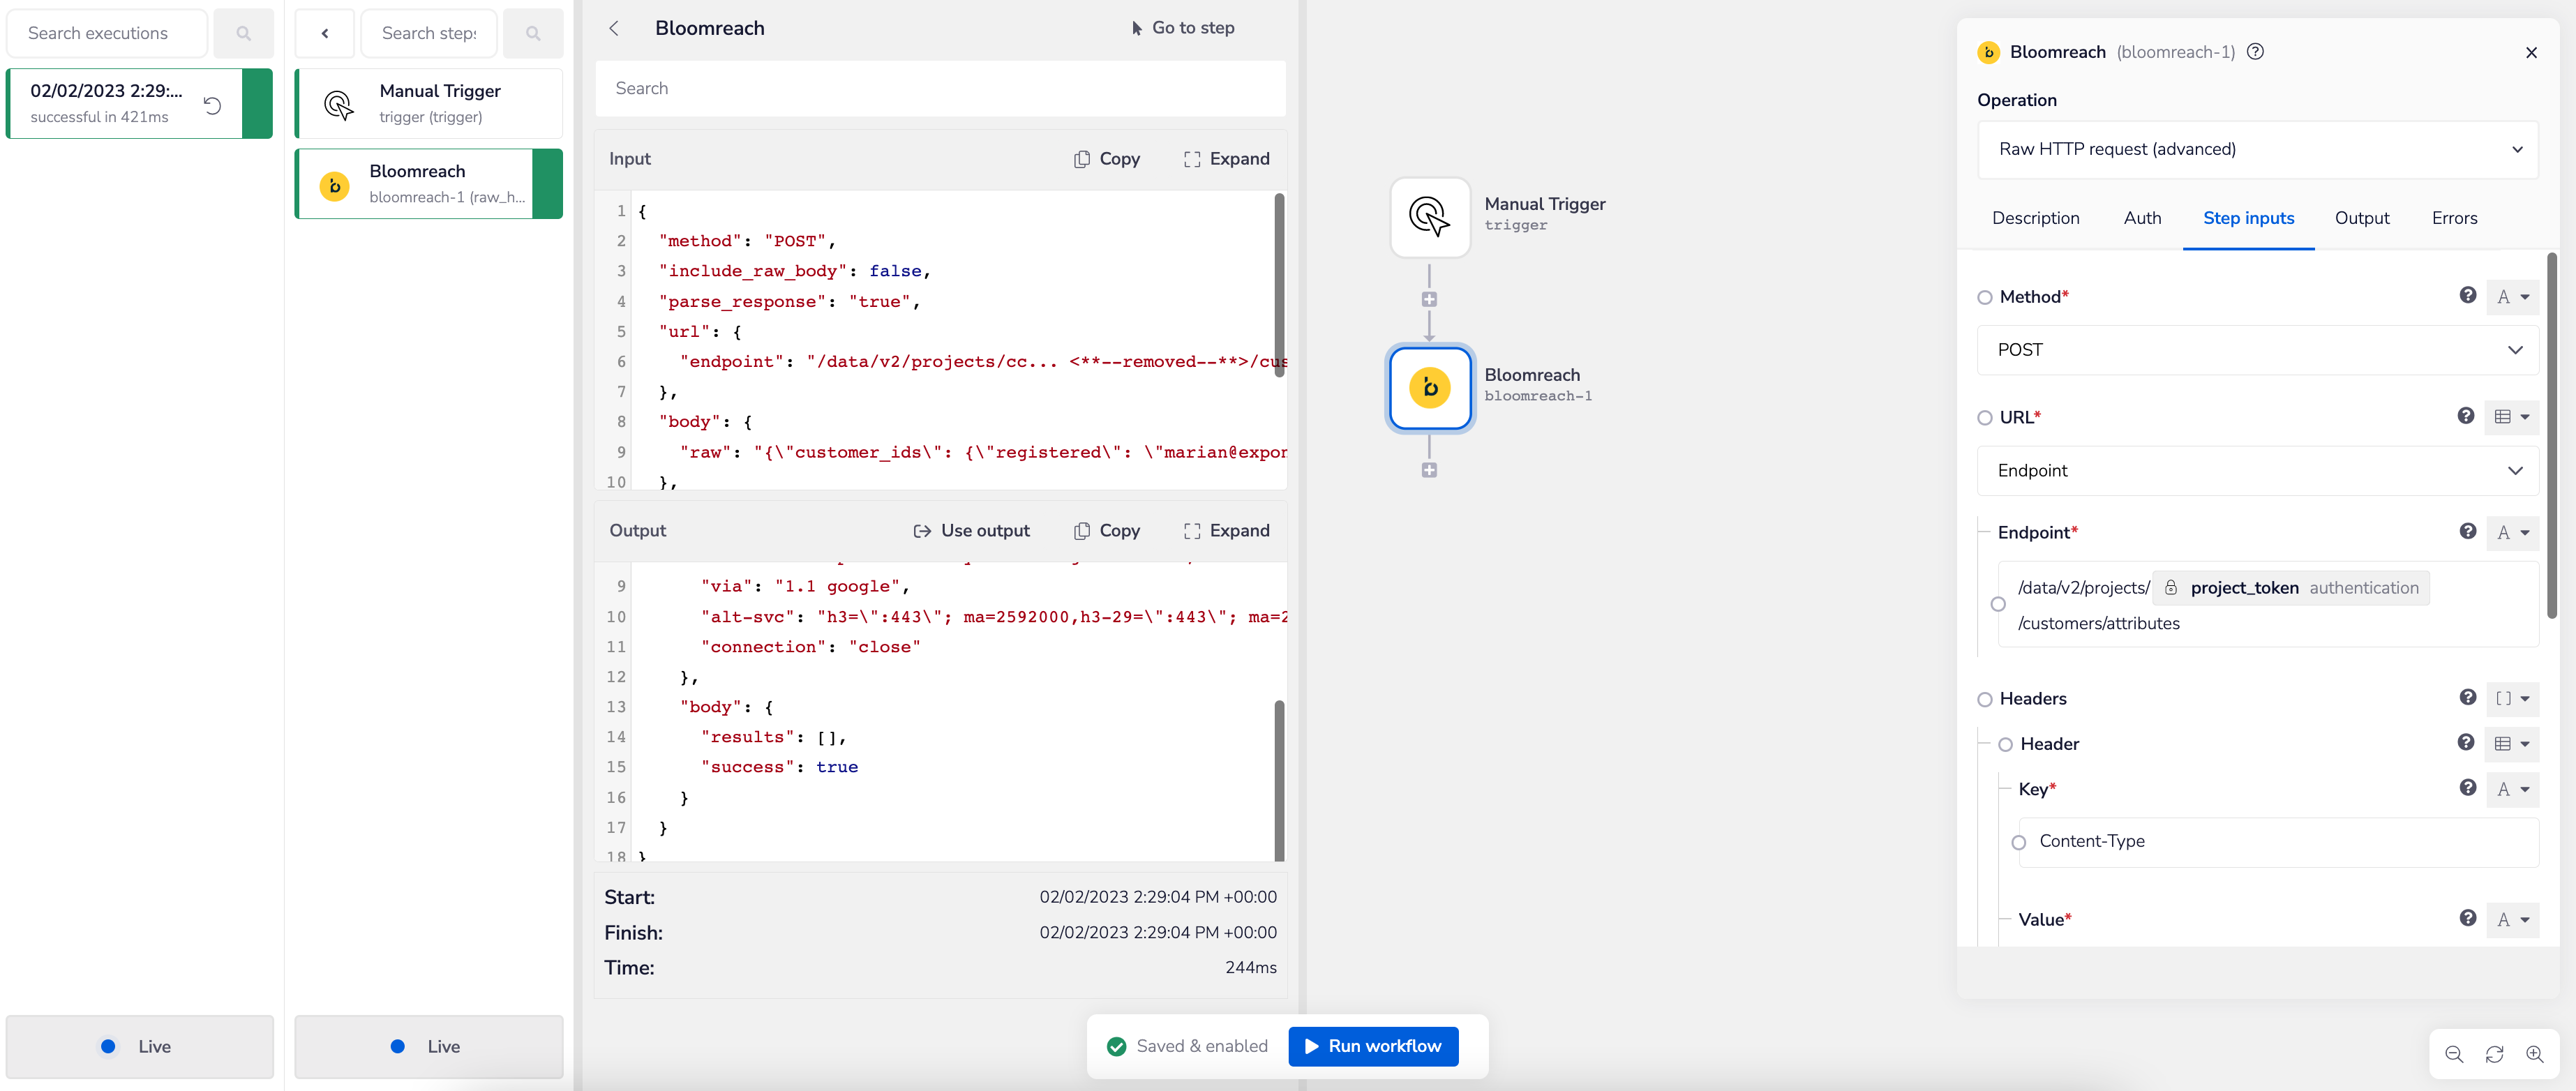
For example, say that the **'Retrieve customer attributes'** operation did not exist in our Bloomreach connector, and you wanted to use this endpoint. You would use the Bloomreach API docs to find the relevant endpoint - which in this case is a POST request called:\*\* `/data/v2/projects/{projectToken}/customers/attributes`.\*\*`** **`
More details about this endpoint can be found [here](https://documentation.bloomreach.com/engagement/reference/customer-attributes-2).

Based on the information provided in the above API call doc, you need to configure the following attributes on your Tray platform:
* **Method: POST**
* **Headers:**
* **Key: Content-Type**
* **Value: application/json**
* \*\*URL: \*\*
* **Endpoint : /data/v2/projects/{projectToken}/customers/attributes**
* \*\*Body Type: \*\*
* **raw**
* **\{"customer\_ids": {"registered": "\"\}}**
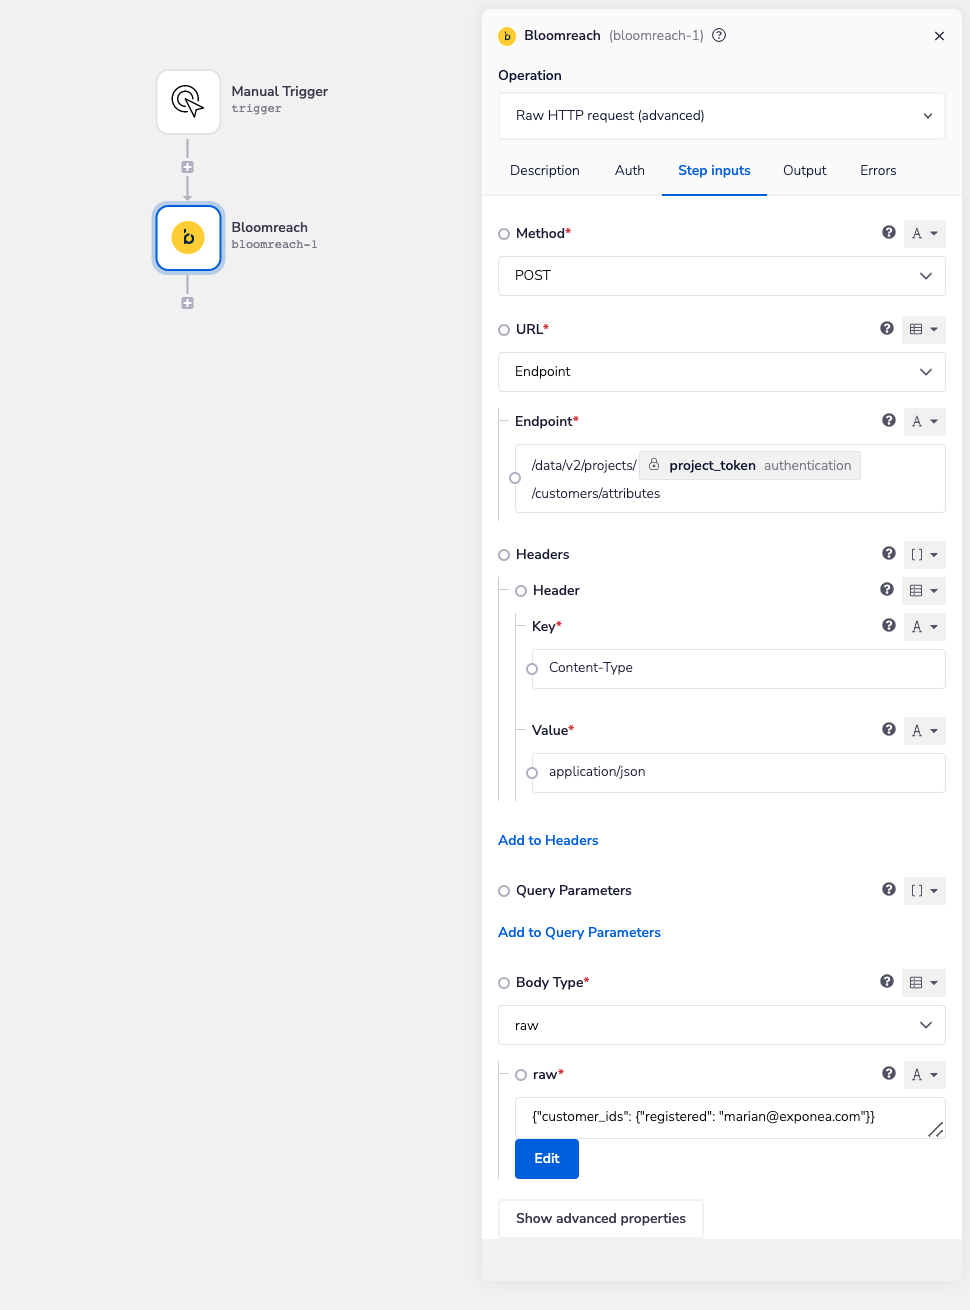
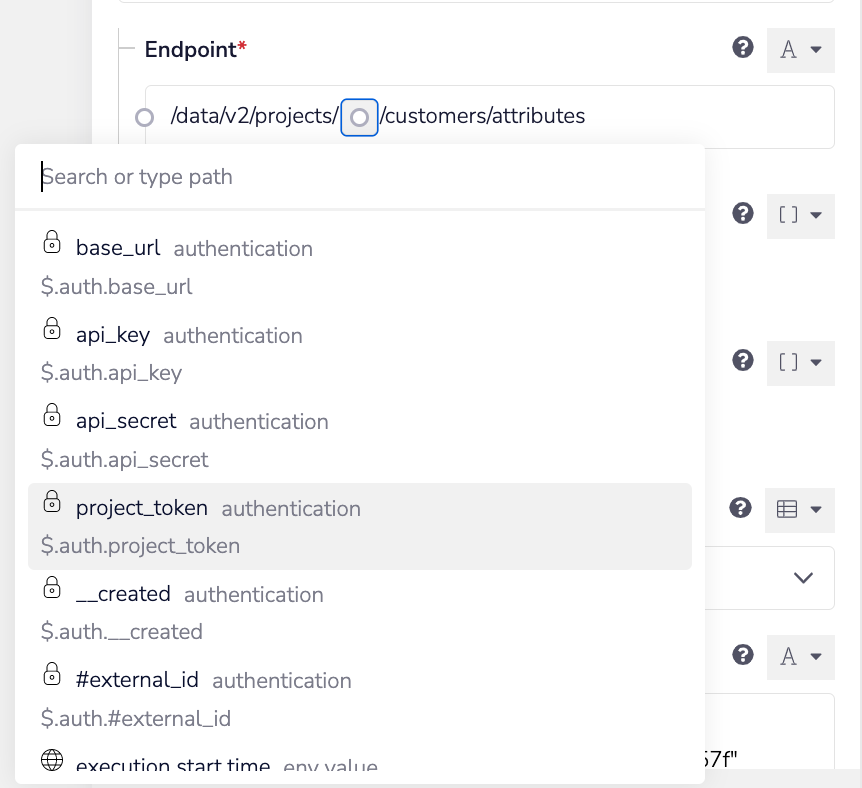
Note that the endpoint URL requires your Bloomreach Project token. If you have created a Bloomreach authentication, select it for this connector. This will allow you to use the base URL, and also allow you to interpolate the Project token from your authentication into the endpoint URL via jsonpaths. A shortcut for interpolation is to start typing `{$` in the input field. You can then choose the value you want from the drop-down.
Once the API call is executed successfully, you should get the following results:
## Bloomreach Example Usage
> **Info:** **TRAY POTENTIAL:** Tray is extremely flexible. By design there is no fixed way of working with it - you can pull whatever data you need from other services and work with it using our core and helper connectors.
Below is an example of a way in which you could potentially use the Bloomfields connector 'Batch commands' operation, to update a customer's properties and add an event for a customer, at the same time.
The overall logic of the workflow is:
1. Setup using a manual trigger and Bloomreach connector
2. Set your Bloomreach connector to the 'Batch commands' operation
3. Configure the operation inputs
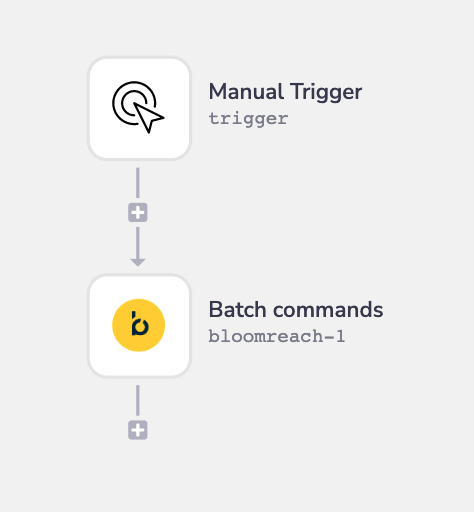
Your completed workflow should look similar to this:
### Step-by-step Explanation
### Step 1 - Setup using a manual trigger and Bloomreach connector
Set up your workflow with a manual trigger. Add a Bloomreach connector step to the end of your workflow.
### Step 2 - Set your Bloomreach connector to the 'Batch commands' operation
Select the 'Batch commands' operation. This operation allows you to perform multiple commands at once. You can perform either 'Add event' or 'Update customer properties' operations using 'Batch commands'.
The Bloomreach endpoints are highly customizable, so some params may be required which are not shown on the workflow input panel. Please refer to the API documentation to ensure you have included all required or relevant fields.
### Step 3 - Configure the operation inputs
We can use this operation to perform both the 'Update customer properties' and 'Add event' operations. We can see from the API documentation that the 'name' property is required, and refers to the API command route.

To set up the 'Update customer properties' operation first set the 'Name' property to `customers`.
We can see from the API documentation that `customer_ids` and `properties` params are required for this operation.

To add the `customer_ids` value, select 'Add property to Customer IDs'. You will be asked for the key value of the property. For this endpoint, the most common key value is 'registered'. Once your key has been added, you can insert the value.

Use the same method to add the keys and values for the `properties` parameter. Ensure that any custom keys being added are in the APIs expected format, for example snake case.
To set up the 'Add events' operations, add a second item to the 'Commands' array. Set the 'Name' property to `customers/events`.
We can see from the API documentation that the `customer_ids`, `properties`, and `event_type` parameters are required.

Set up the 'Customer IDs' and 'Properties' parameters as we did previously. To add the `event_type` parameter, select 'Add property to Data'. Enter the key of `event_type` and then enter your value. You can do the same thing to add a `timestamp` property if you wish to.
Note you can also add a 'Command ID' property to any 'Commands' items. It will allow you to easily match any errors in the response to the input item.
Your input panel should look something like this:

> **Info:** \*\*BEST PRACTICES: \*\*Whenever you do decide to create your own workflow, be sure to check out some of our key articles such as:- [Using callable workflows](https://tray.ai/documentation/platform/automation-integration/building-workflows/composable-workflows/calling-other-workflows)
> - [Pagination](https://tray.ai/documentation/platform/automation-integration/advanced-use-cases/batching-queueing/pagination)
> - [Data transformation guide](https://tray.ai/documentation/platform/automation-integration/building-workflows/mapping-data/data-transformation-guide)