Customer marketing starts with uncovering the most delighted customers. But this is a challenge for most organizations. If you have lots of clients that are happy, how do you find the thrilled ones that will jump at the opportunity to sing your praises?
● Who would be willing to submit that product review on G2 Crowd?
● Who will participate in that customer success story?
● How do you make sure that you don't burn out your most supportive customers with too many requests?
These are just some of the questions we would ask ourselves regularly. Usually, we were too swamped to create a better way to do this. So we'd "get scrappy" and interrupt our colleagues in Sales or Customer Success to search for happy customers. We'd get lucky sometimes and uncover a great champion, but often we'd strike out. I had a hunch that there was a silent majority of happy customers that, if asked, would participate in customer programs.
A better way: Using the Tray platform to integrate and automate net promoter score into our CRM.
Step-by-step: how to integrate and automate net promoter score into your CRM
We were already sending customer satisfaction surveys on a monthly basis. The survey response data was sitting in Promoter.io but nowhere else. While we use Salesforce as our CRM and the single source of truth for all customer related data, we didn't have any customer success fields in Salesforce. Here are the steps I went through:
- Decide which object (or tab) in Salesforce to store customer satisfaction data. Since we survey users, we decided to add customer satisfaction data to the Contact object. You might consider adding it to the Account object instead. We also send surveys to free-trial users, so that meant that we also had to add customer satisfaction fields to the Leads object.
- Decide which fields from your customer satisfaction survey that you want to see in your CRM. For us, we wanted to keep it simple and add just three fields: customer satisfaction response date, net promoter score (NPS), and customer satisfaction comment.
- Determine if you’ll need to add a batch-update to bring in historical data. You can set up a Tray workflow to listen for any new survey responses. If you have responses that have happened in the past, then you can set-up a separate, one-time workflow to populate your CRM with data from the past. See the bonus section at the bottom of this post for a step-by-step on setting up a one-time batch update.
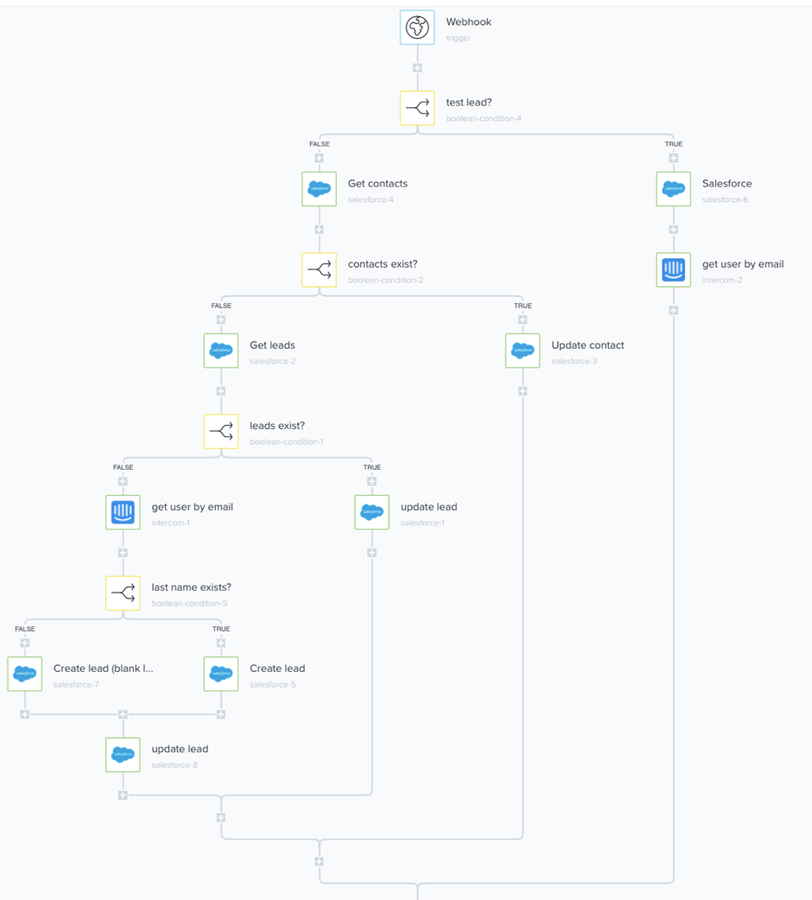
Here’s what our continuous workflow looks like:
Workflow step 1: Webhook trigger
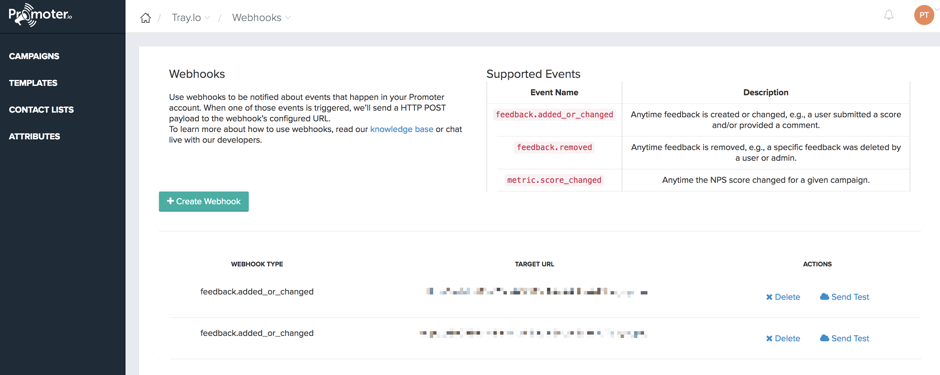
Because the customer survey tool we use, Promoter.io, supports webhooks, we can use this trigger. It listens for changes in data, then automatically posts that data to a Target URL that Tray uses to kick-off a workflow.
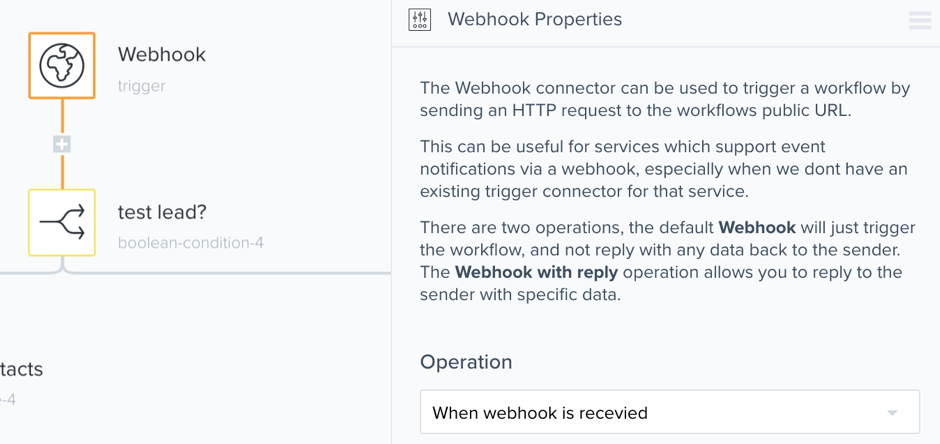
Our Promoter.io webhook details the Supported Events (e.g., changes in fields) and the target URL (pixelated out in this screenshot for privacy reasons).
Step 2. Test lead?
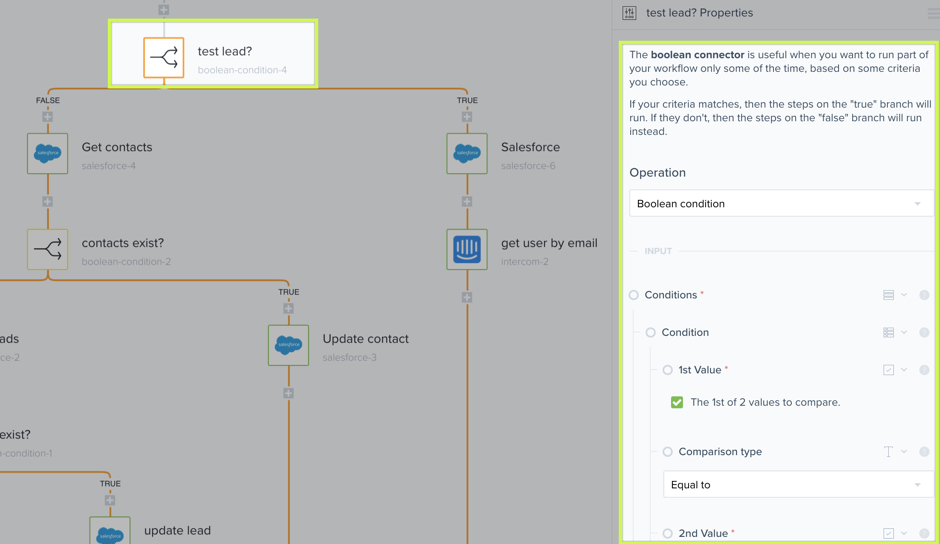
This boolean-condition-4 is an optional step, but a good idea for testing your workflow. With this test, I can spot check data for a particular user, based on an identifier like her email address, is getting passed correctly from Promoter to Salesforce. The Boolean Condition is "if/then" conditional logic.
Step 3. Get contacts
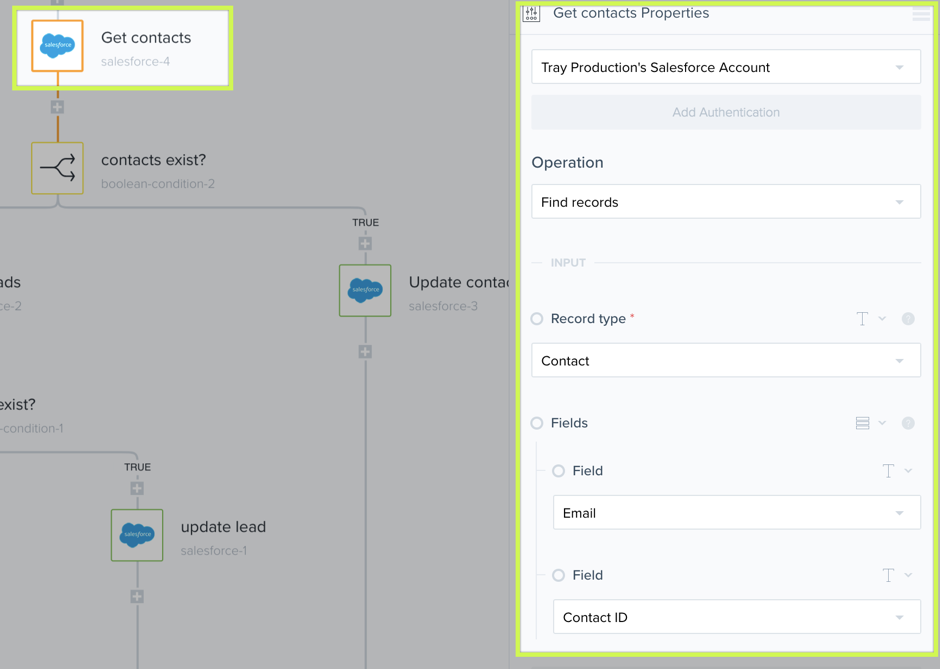
This salesforce-4 step finds the Salesforce record based on an email from Promoter.io and used the Salesforce Contact ID.
Step 4. Contact exists?
This boolean-condition-2 step is optional. Because we send surveys to people that could exist in our Salesforce instance as a lead, a contact or perhaps don't exist yet in Salesforce, we need first to check to see if we have them in Salesforce and check for the object where they live. This is important so we don't create duplicate data.

Step 5. Get leads
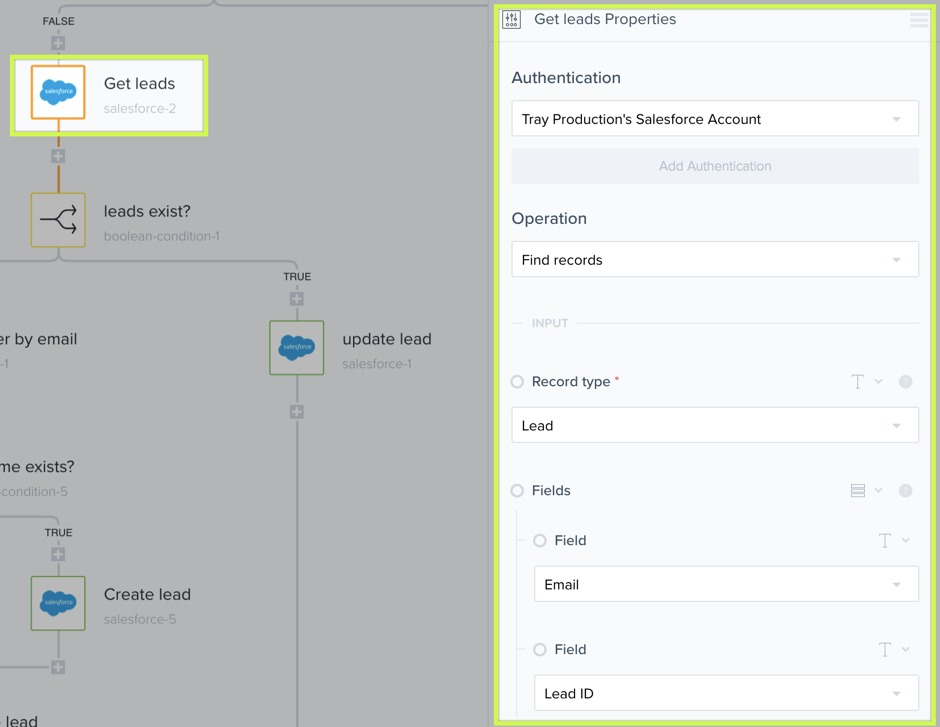
This salesforce-2 step finds the lead record in salesforce based on email address and also grabs the salesforce Lead ID.
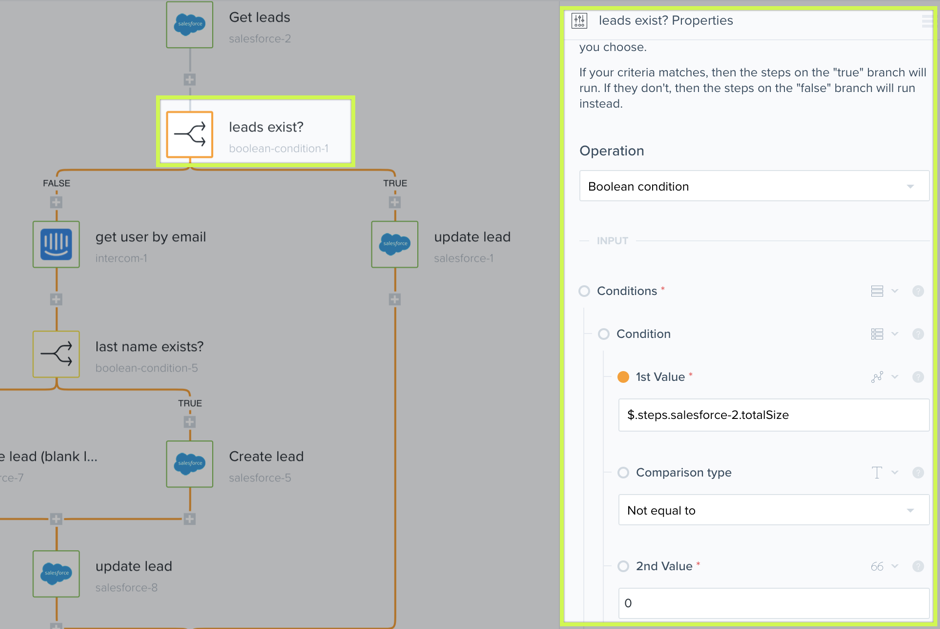
Step 6. Leads exist?
Similar to the "Contacts Exist" step, this boolean-condition-1 step checks to see that the lead exists in Salesforce. By using a boolean to see if the lead is not equal to zero (it exists), then go to the TRUE side of the branch to and execute the next step which is to Update the Lead (salesforce-1). If the lead equals zero (doesn't exist), then go to the FALSE side of the branch and execute the next step.
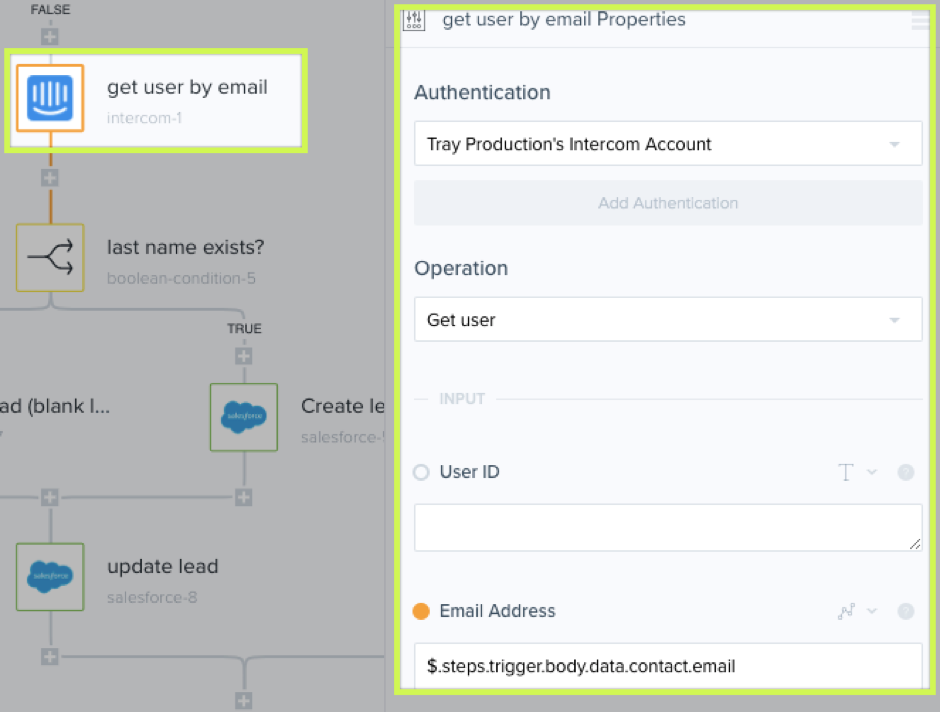
Step 7. Get user by email
This step, Intercom-1, gets the user by email from our customer chat software (Intercom). In a perfect world, we'd have all Intercom data in Salesforce and visa-verse.
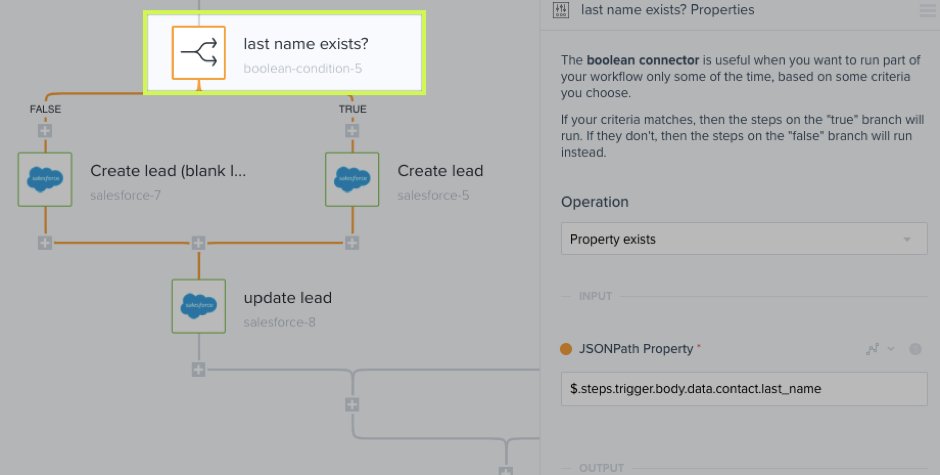
Step 8. Last name exists?
In this step, Boolean-condition-5, we're using our old friend the boolean connector to determine if the last name in Promoter.io exists in the Salesforce lead object and then if we don't have the last name to go and get it out of Intercom, and if we do, create the lead by adding the email, first name, last name, and company name.
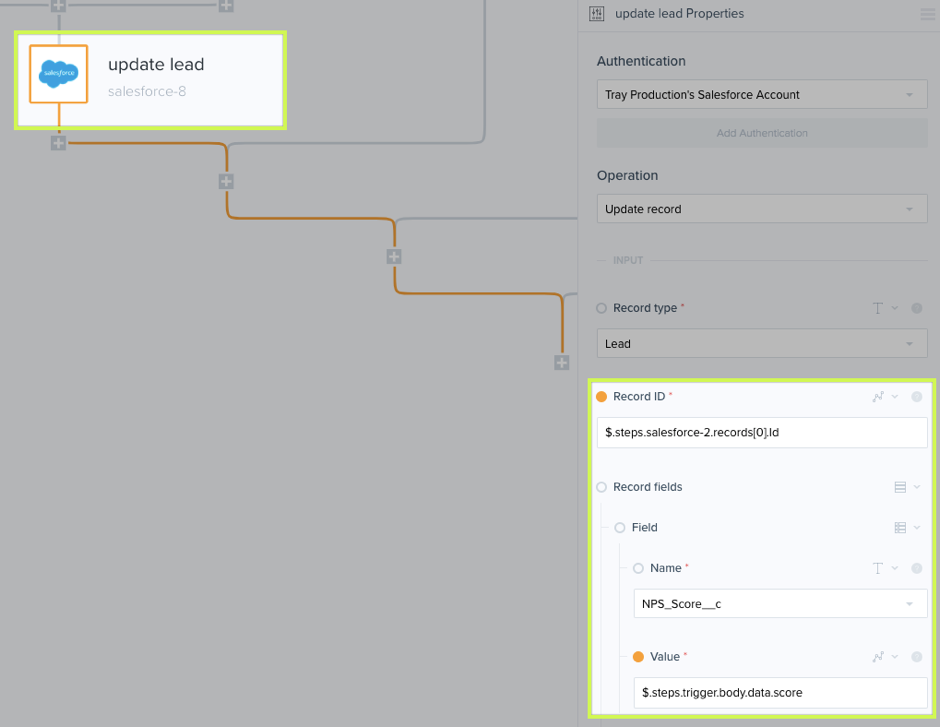
Step 9. Update lead
This, folks, is what we’ve been working towards. Now that we know exactly where to put the data in Salesforce, we can now add the data from Promoter.io to Salesforce. Here, we're updating the Salesforce custom field NPS_Score_c (my naming) with the data from Promoter.io webhook. (body.data.score). Similarly, we’re updating the custom field “Cust Sat Comment” with the “body.data.comment” value. Finally, we're adding the body.data.posted_date value from Promoter.io to Salesforce’s “Cust sat response date.”
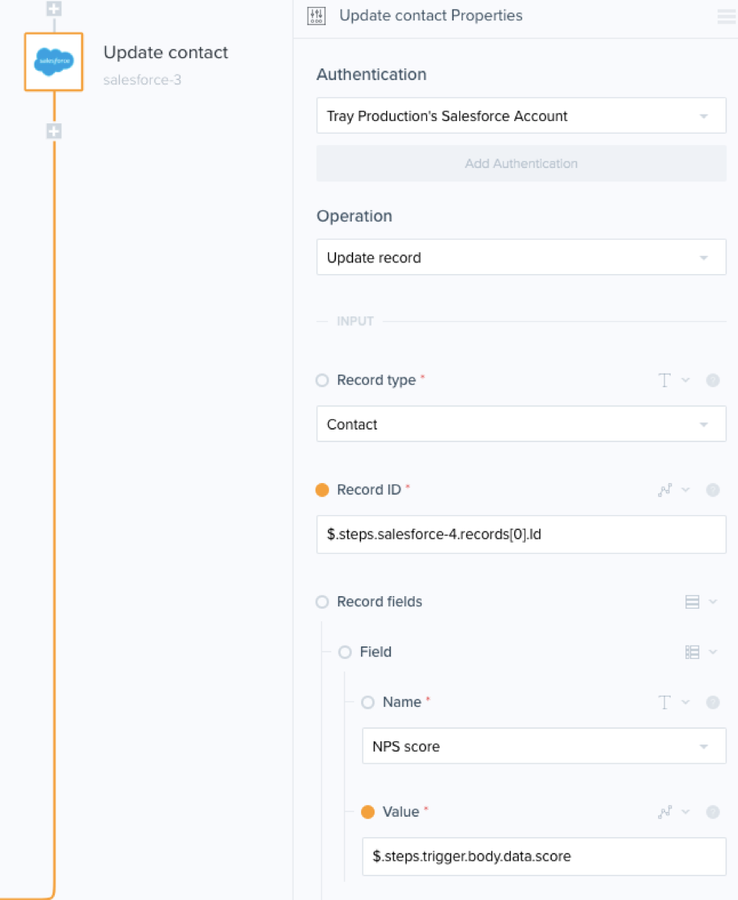
Step 10. Update contact
Similar to the “update lead,” here we’re mapping the values from Promoter to the corresponding ones in Salesforce. Once mapped, anytime there is a new survey response Salesforce will get automatically populated.
Touchdown: NPS in a CRM report
Now we’ve reached the goal! We have one master report in Salesforce with customer satisfaction survey data and other data that updates automatically. A 20-minute investment in getting this setup has saved me considerable time in looking for our happiest customers and has improved the quality of our customer marketing programs.
Bonus Round: Batch-update Workflow
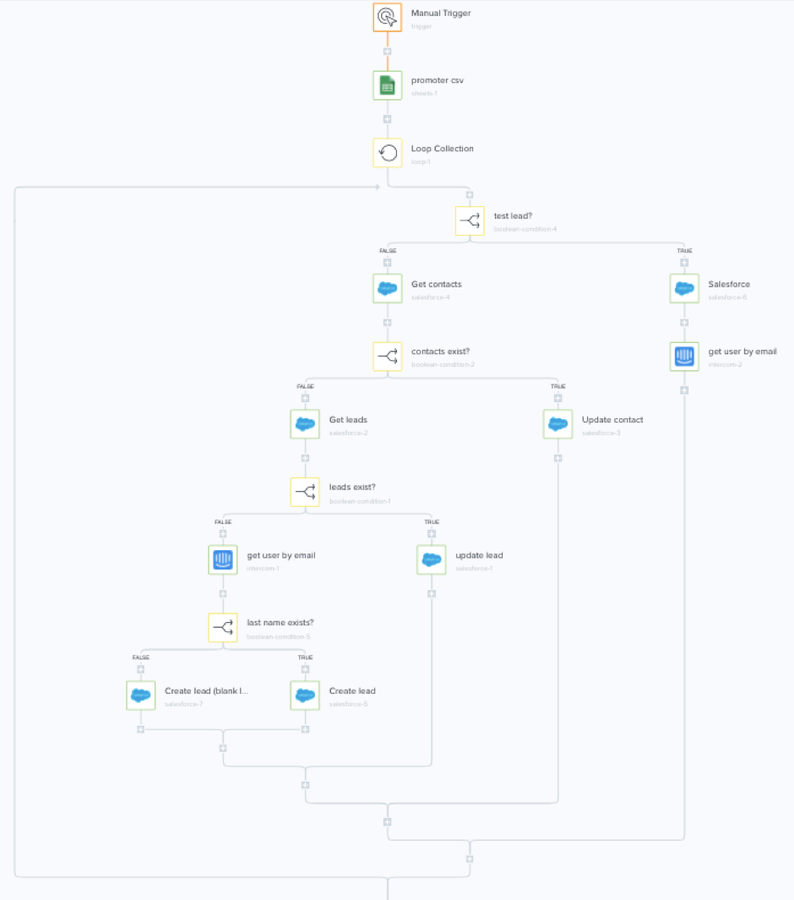
Here’s the full view of our workflow to add historical data from Promoter.io to Salesforce. Only the first three steps are different than the above continuous workflow.
Workflow Step 1. Manual trigger
This one is pretty self-explanatory. This is a useful trigger to use for test workflows or execute a one-time workflow. To run it you just press the "RUN WORKFLOW NOW" button. Once we update the historicals, there is no need for this workflow. The continuous workflow will take care of any future data flows.
Step 2. Export data to a CSV file and Paste Into Google Sheets
One of the fastest ways to get historical data in is to export it out of your customer survey tool to a CSV, then copy and paste the data into Google Sheets. You’ll notice in the screenshot that I only needed six fields.

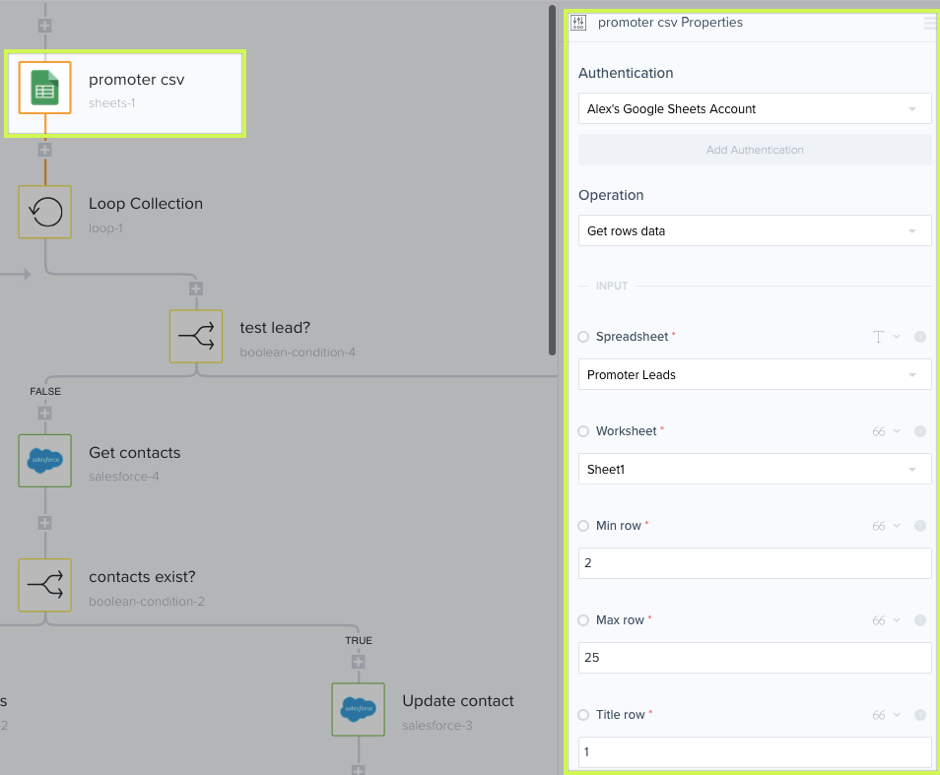
Step 3. Google Sheet Integration - Promoter CSV
Tray offers a handy Google Sheets connector that sucks data into your workflow. This step gets data from each row. We just need to specify the Worksheet name and the max number of rows, so it knows when to stop and whether or not there is a title row.
4. Loop Collection
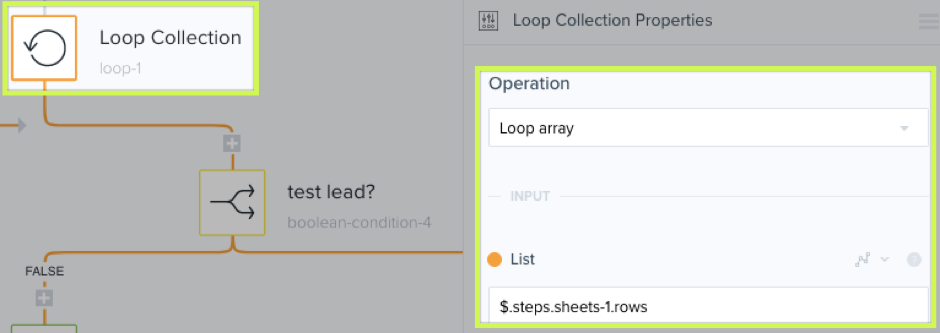
In this step, the Loop operator runs through the Google Sheet, row by row, sifts through the data, and moves it through the appropriate workflow branches. The remaining steps in this batch workflow are identical to the ones in the continuous workflow. Tray has a convenient feature to "Clone" a workflow which is what we did. Then we just removed the first Webhook trigger step and replaced it with above three steps.
In Summary: In 20 minutes you can have a "happiest customer detection system."
A big part of marketing is automating away tedious tasks so that can focus your time and resources on higher-value work.
