Overview
By deploying this template you can quickly build a RAG pipeline which crawls markdown documentation from a GitHub repository.
This can act as the foundation for AI knowledge agents and AI-powered integrations.
It is the same method we use to build our own docs knowledge agent:
 Please see our documentation on Building knowledge agents for a step-by-step explanation of how a RAG pipeline works in Tray
Prerequisites
To deploy this template you will need to have:
- A GitHub repository which contains a source 'documentation' folder populated with subfolders containing markdown documentation files (you can replace this with your knowledge base of choice)
- An Amazon Bedrock account (you can replace this with your AI Vendor of choice)
Getting Live
After deploying the template, you will need to take the following steps:
1 - Add authentications
- Create a new or use an existing GitHub authentication for the relevant steps in the '1 - pull markdown files from GitHub' workflow
- Create a new or use an existing Google Sheets authentication for the relevant step in the '3 - create embeddings' workflow
- Create a new or use an existing Amazon Bedrock authentication for the relevant step in the '3 - create embeddings' workflow
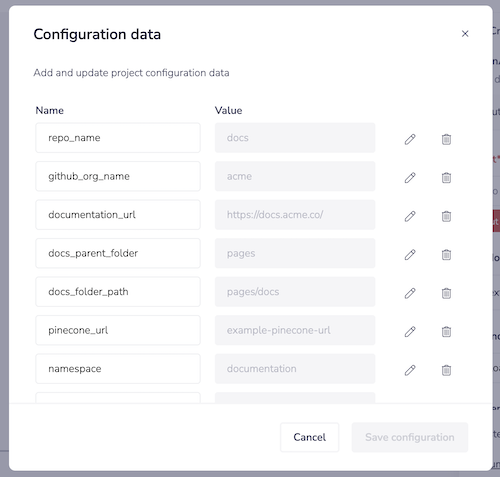
2.1 - Set project config
In order to make this template work you will need to edit the project config to match your GitHub setup:
2.2 - Create a new native Vector Table in your project
The dimensions depend on the model you are using and we provide a quick guide. Always best to double check the model card information for the service you are using.

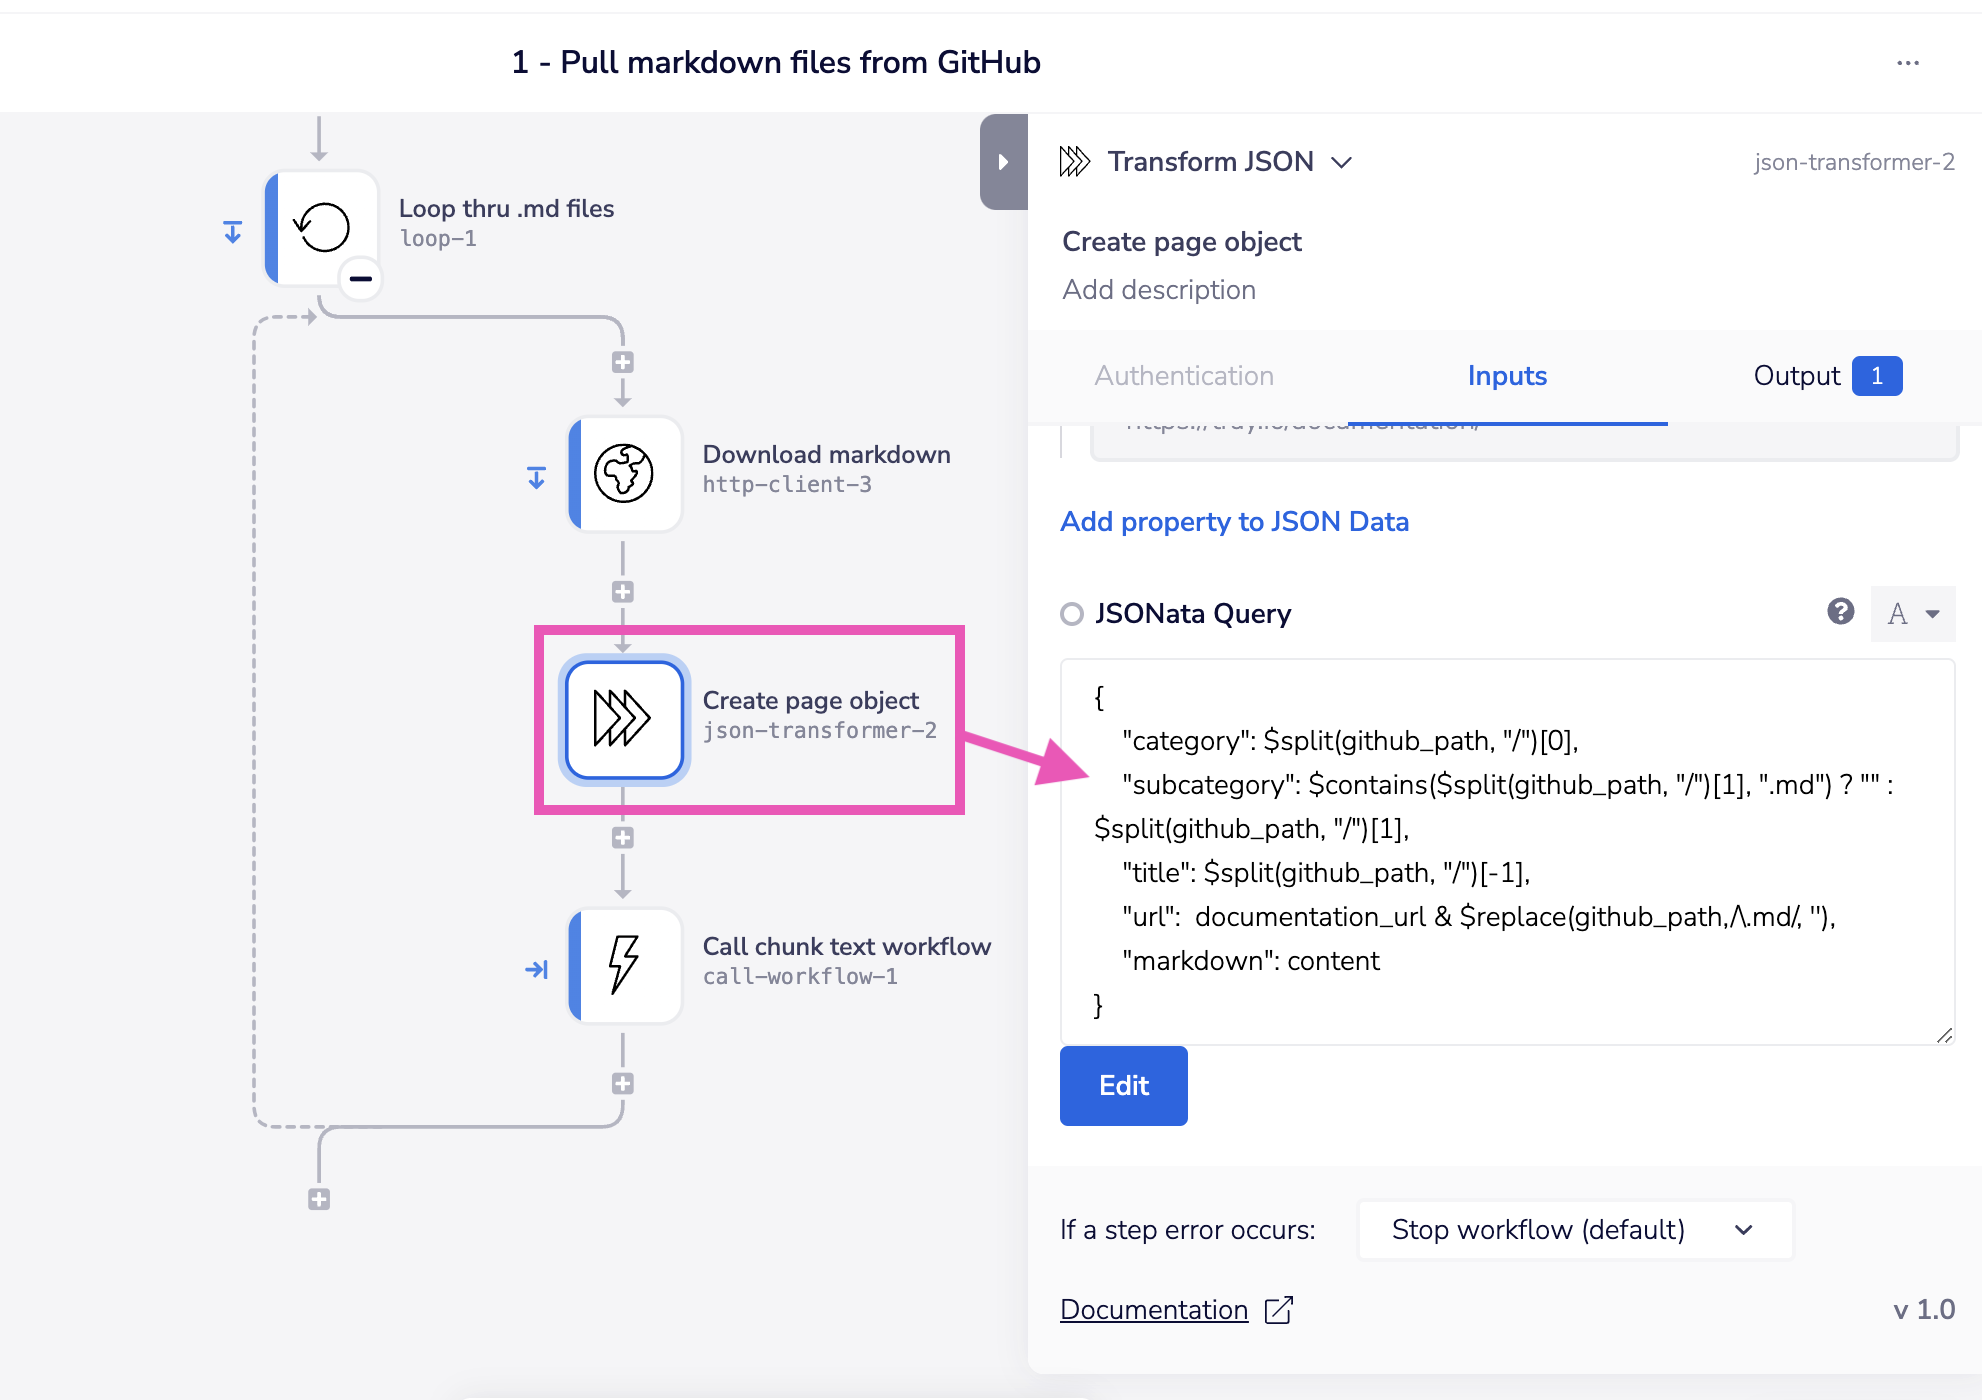
3 - Edit metadata creation steps
With the 'Create page object' step we have made some assumptions about the metadata you want to capture and add to Pinecone, and we have used a JSONata script to construct a public page url based on the GitHub folder structure.
You may need to edit this according to your needs:
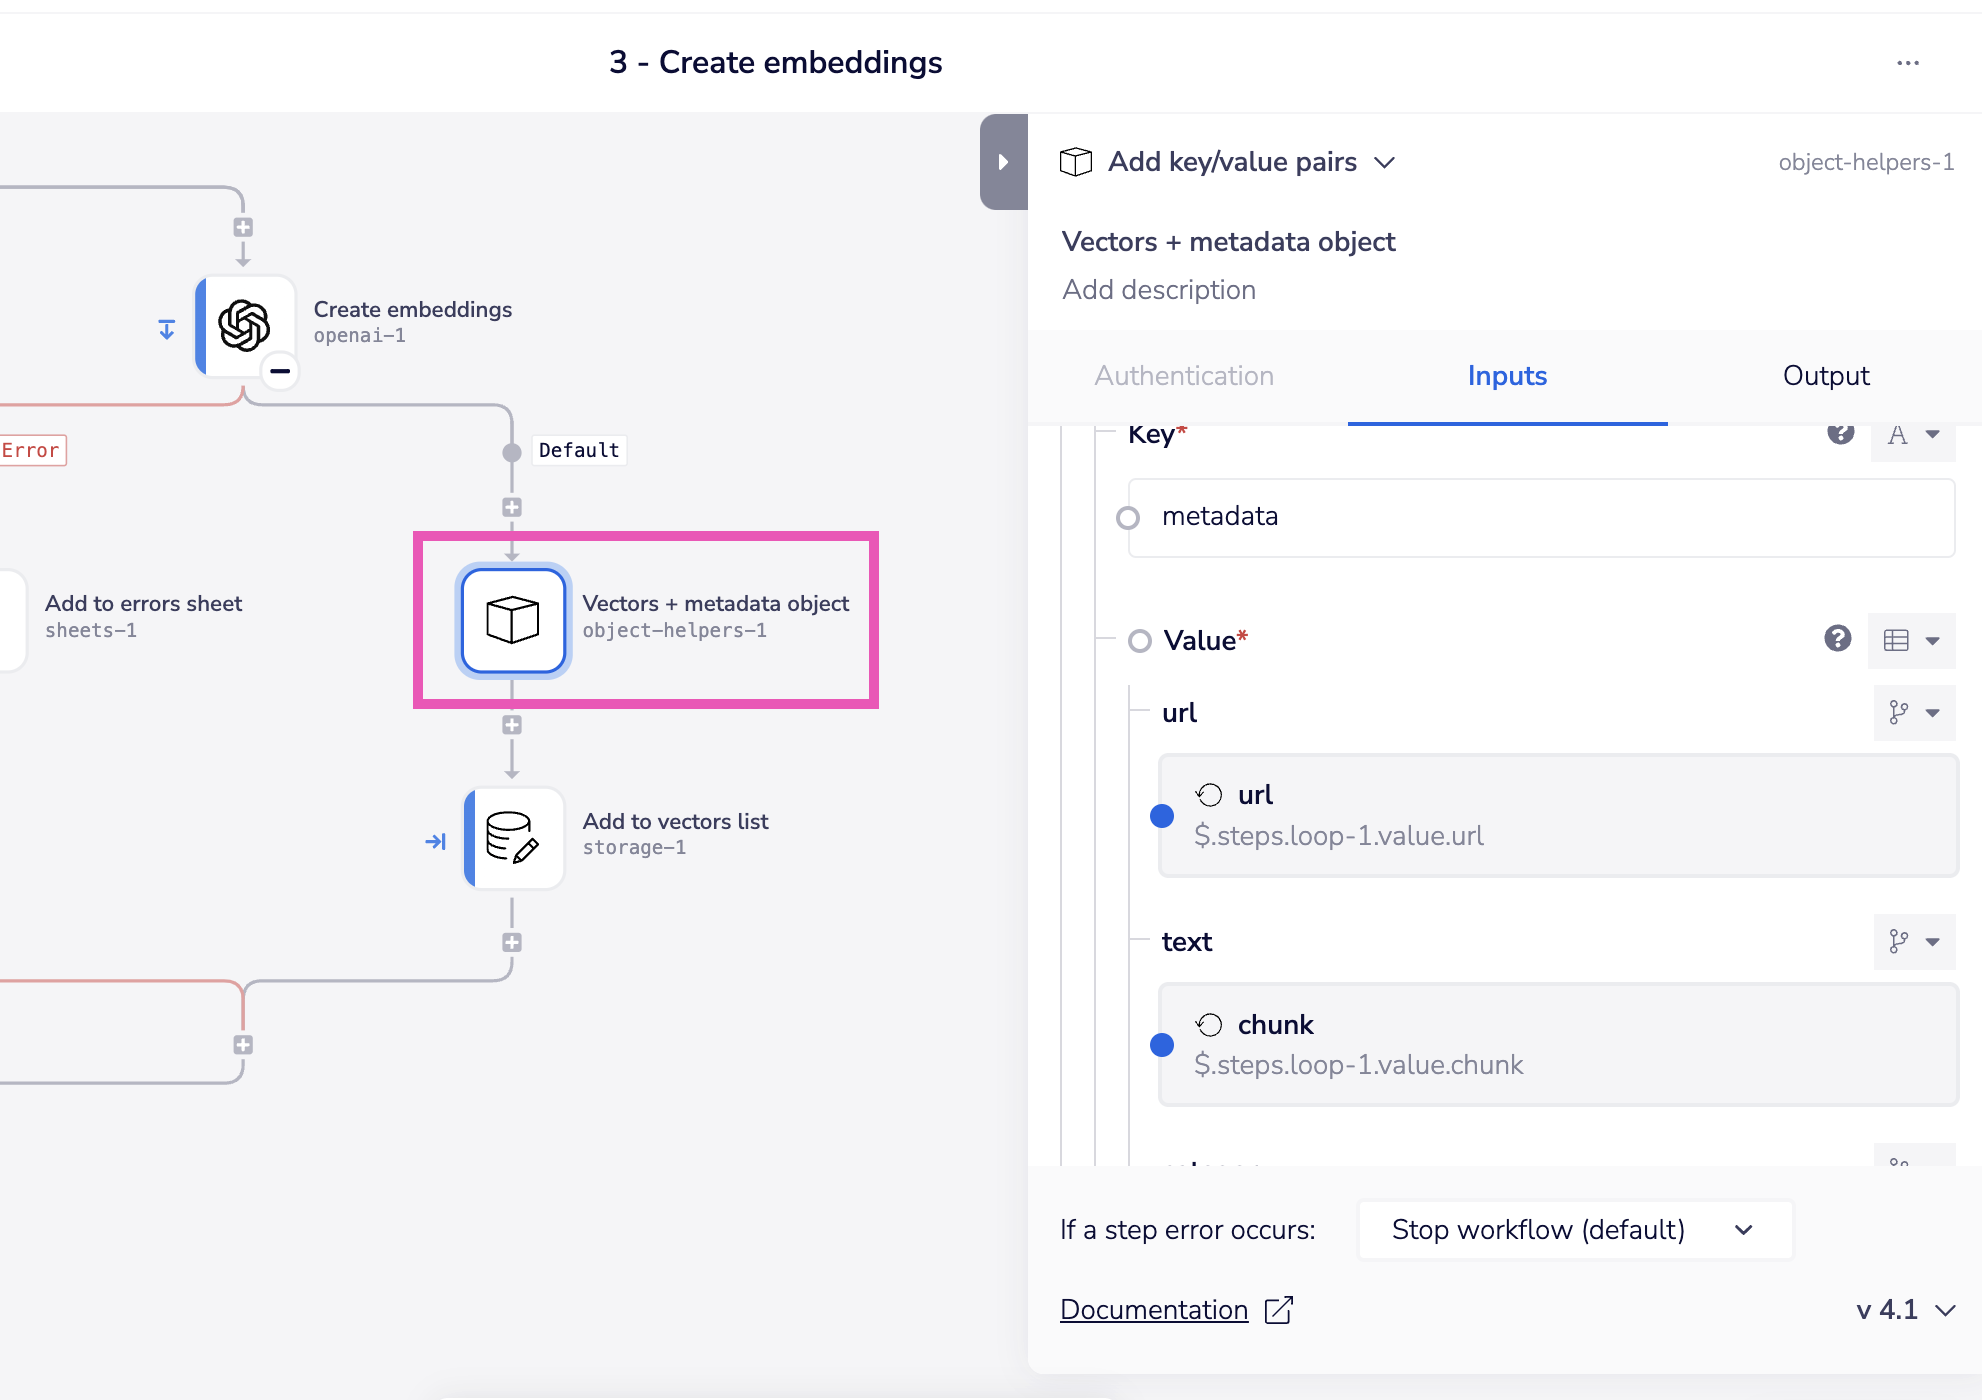
 This metadata structure is then reflected in the 'Vectors + metadata object' step:
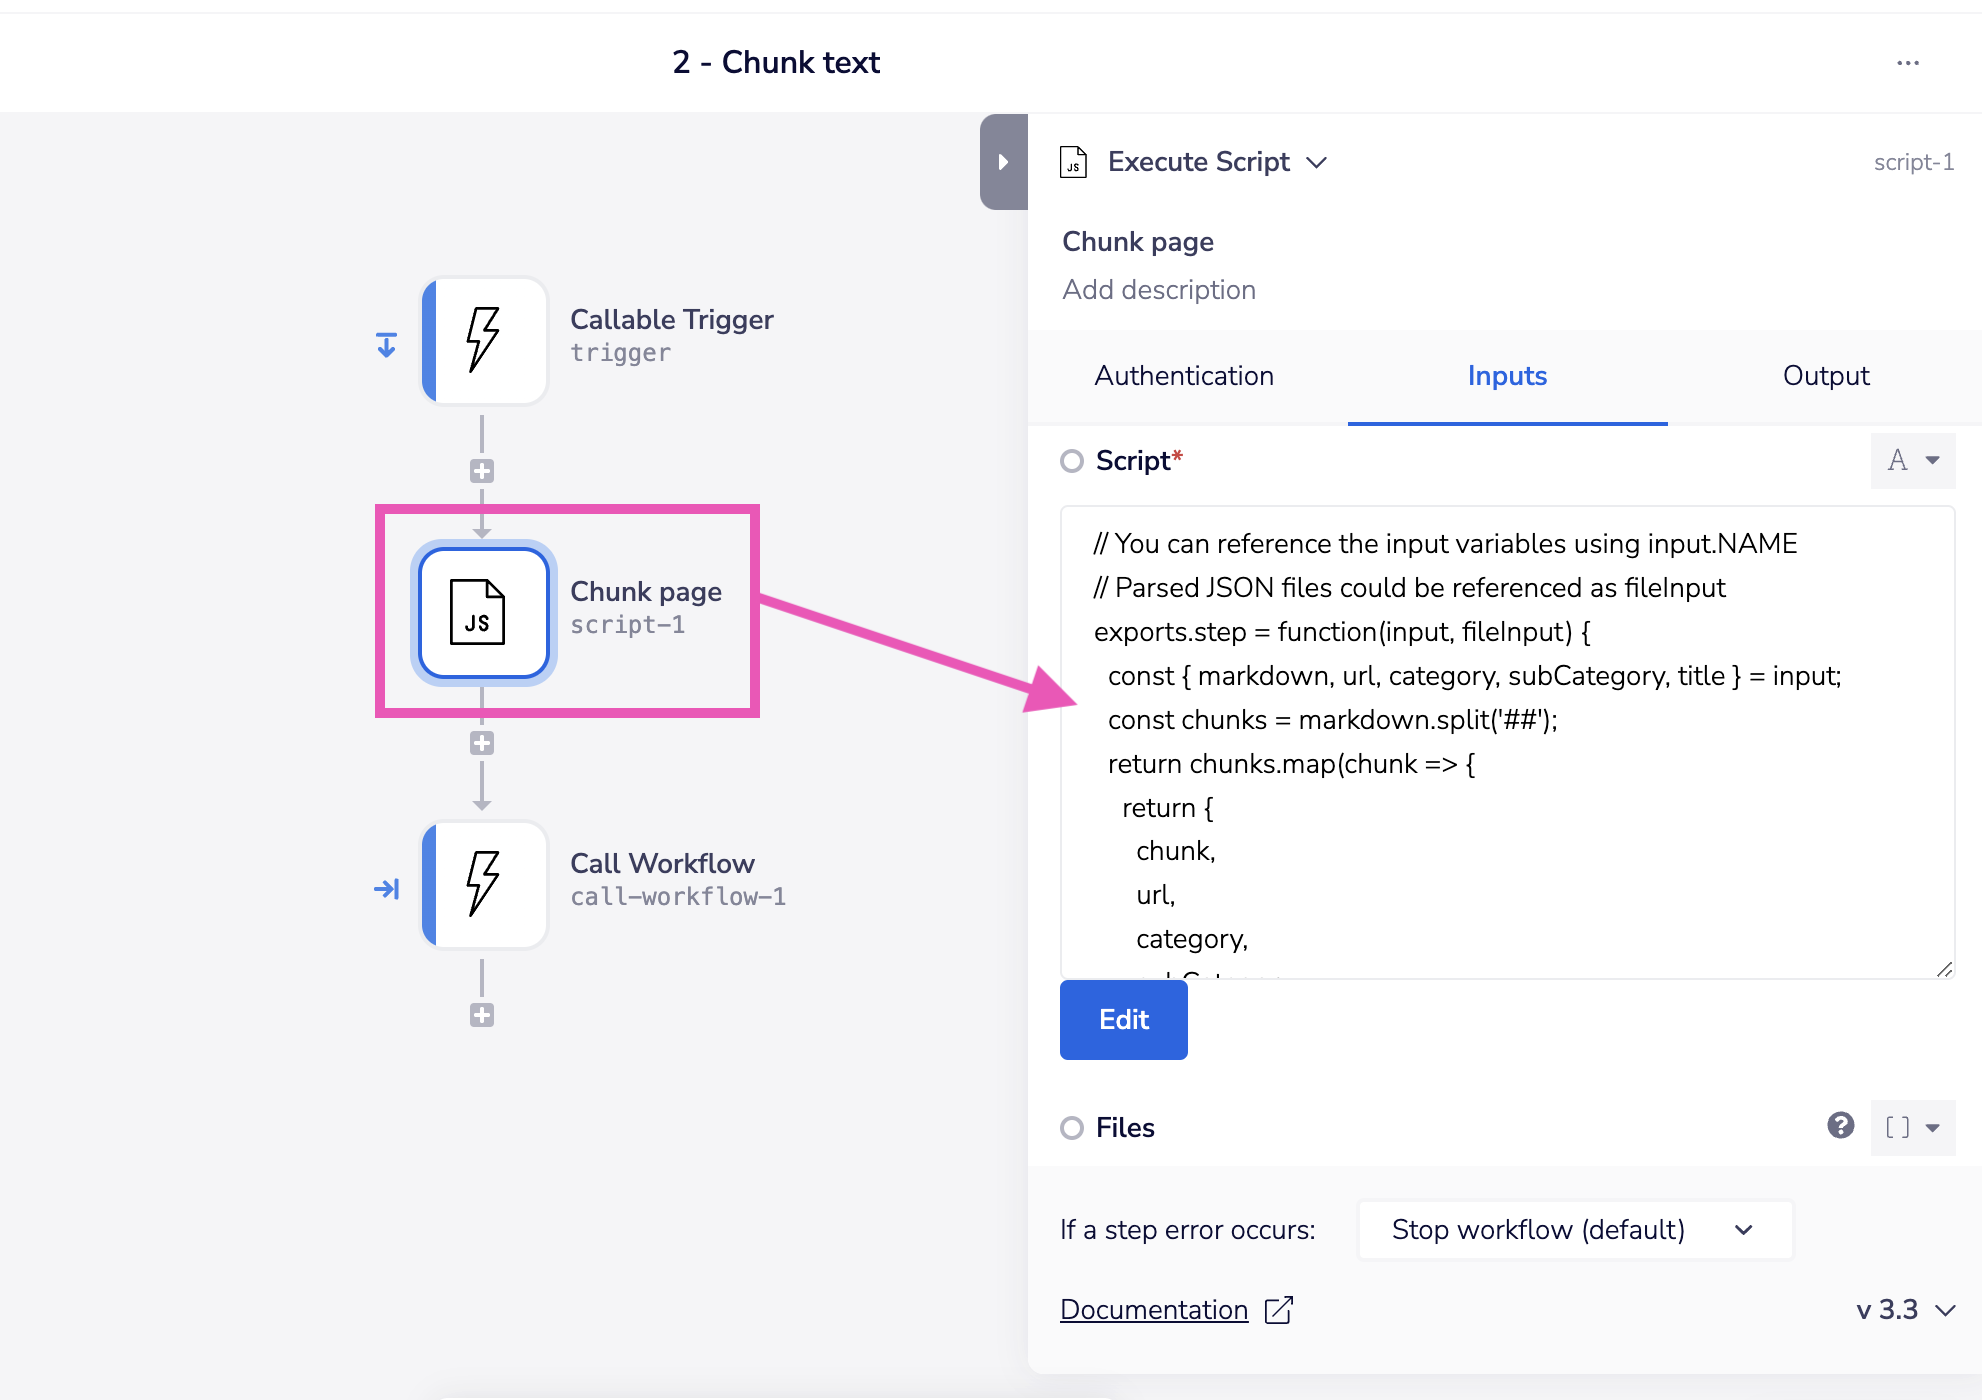
4 - Edit chunking script
The 'chunk page' step splits each page into chunks separated by '##' (h2) headers to make manageable chunk sizes for the LLM to process when they are retrieved.
You can adjust this script according to your needs:
Next steps
Chat completions
In order to make use of the native Vector Table you created, you will need to create a 'Chat completion' workflow which acts as an endpoint for your application interface. This workflow should:
- Accept a user query
- Create a vector from that query
- Find the closest matching chunk vectors in your Native Vector Table
- Ask an LLM to formulate a response to the query based on the matched chunks of info
- Return that response to the user
Updating the your Native Vector Table
When new or updated content is added to your docs repo you will need a process to update the Vector Table. One simplistic approach is to simply periodically erase the Vector Table completely and run the crawl pipeline again. More likely, you will want to build a system which is triggered by updates to the repo. In this case, it is recommended that you:
- Attach a unique identifier to each markdown file in GitHub
- Store this identifier as metadata for each chunk in Vector Tables
- When a page is updated delete all Vector Table entries that have that page's identifier
- Store the chunks for the updated page