Microsoft Dynamics 365
Microsoft Dynamics 365 is a powerful cloud based Customer Relationship Management tool.
Overview
Microsoft Dynamics 365 is a powerful cloud based Customer Relationship Management tool. The Tray.io connector works by providing the ability to create, update, get and list numerous types of entities within MS Dynamics, including accounts, users, cases and activities such as phone calls. In configuring a Tray app to integrate with Dynamics365 there are two very important steps to be taken:
- The user who will be authenticating with Microsoft Dynamics 365 must have the right level of authority to register the Tray app with Azure.
- Be aware of the individual permissions/scopes that the Tray app will access and set these accordingly. The Tray authentication dialog is programmed to mirror the permissions of the user who is authenticating. So when you authenticate with the Tray app it will ask for the permissions that user has in Azure AD.
Authentication
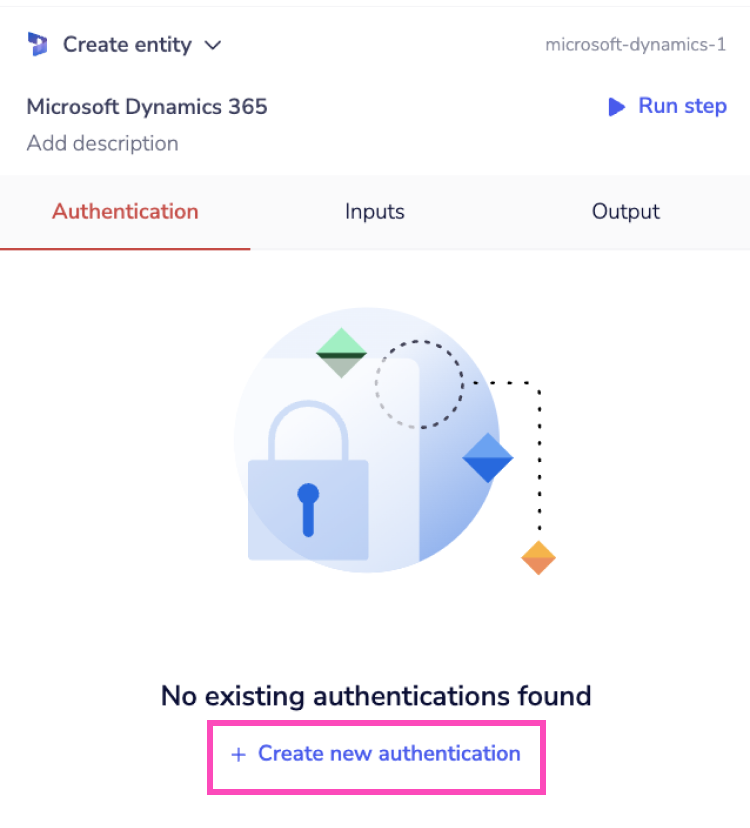
When using the Dynamic 365 connector for the first time, you need to create a new authentication.
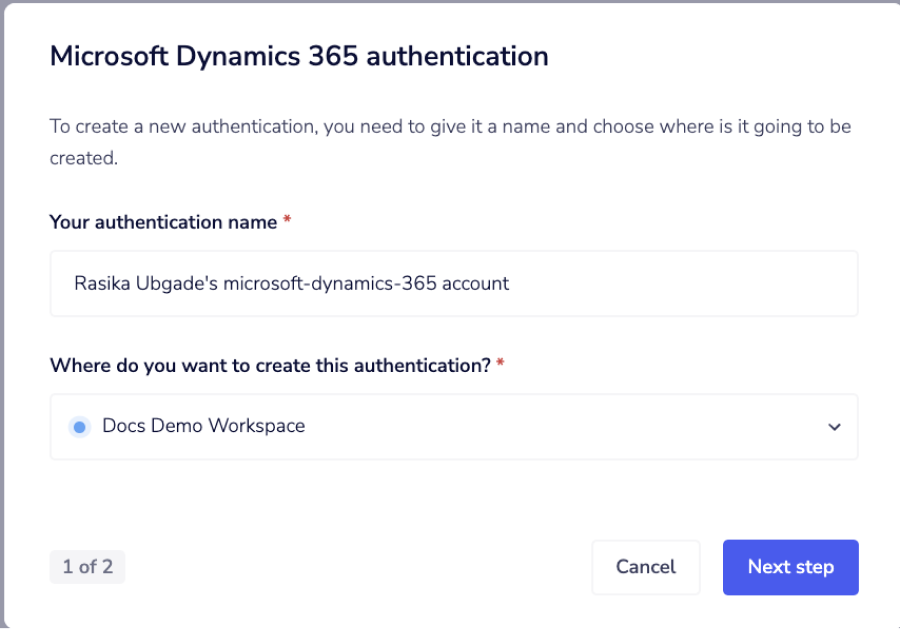
 Name your authentication and specify the type ('Personal' or 'Organizational').
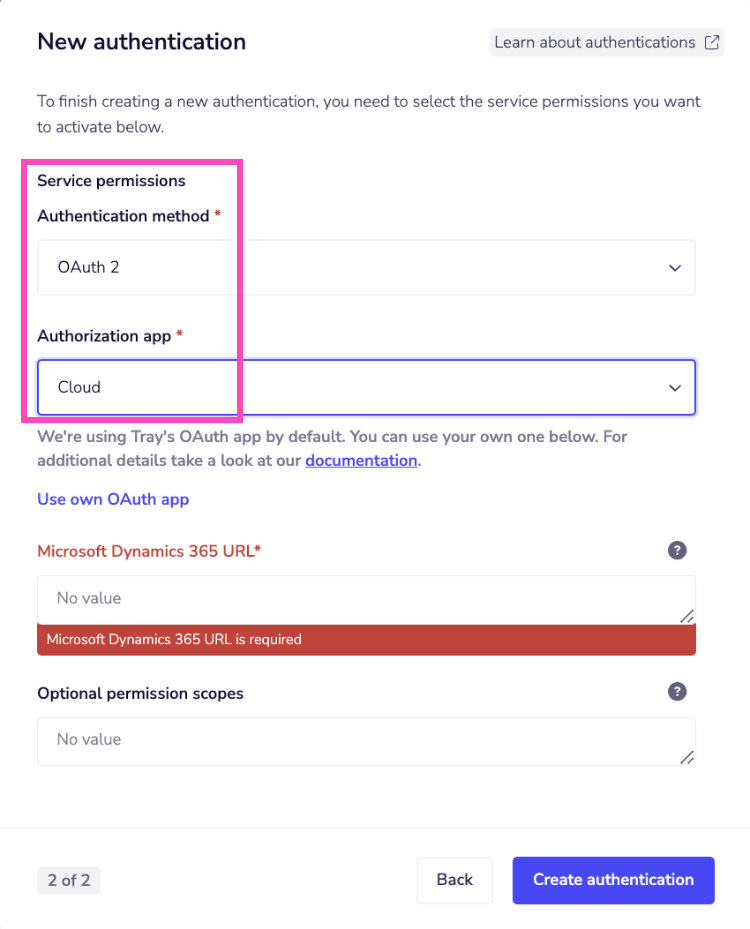
 In the next step you have to choose Authentication method and Authorization app:
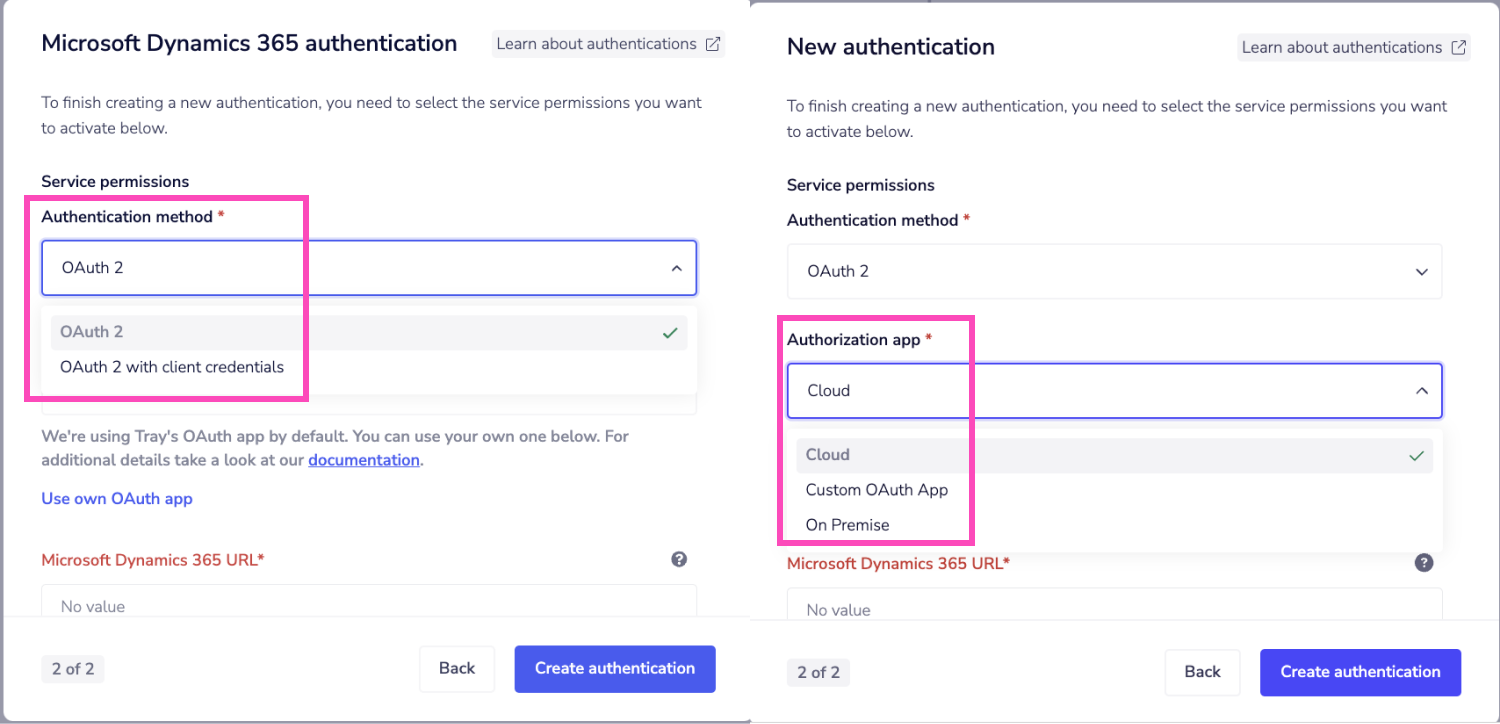 Depending on the options you select, there are four ways to authenticate with the Microsoft Dynamics 365 connector. Follow the instructions provided in the setup process based on your selected options.
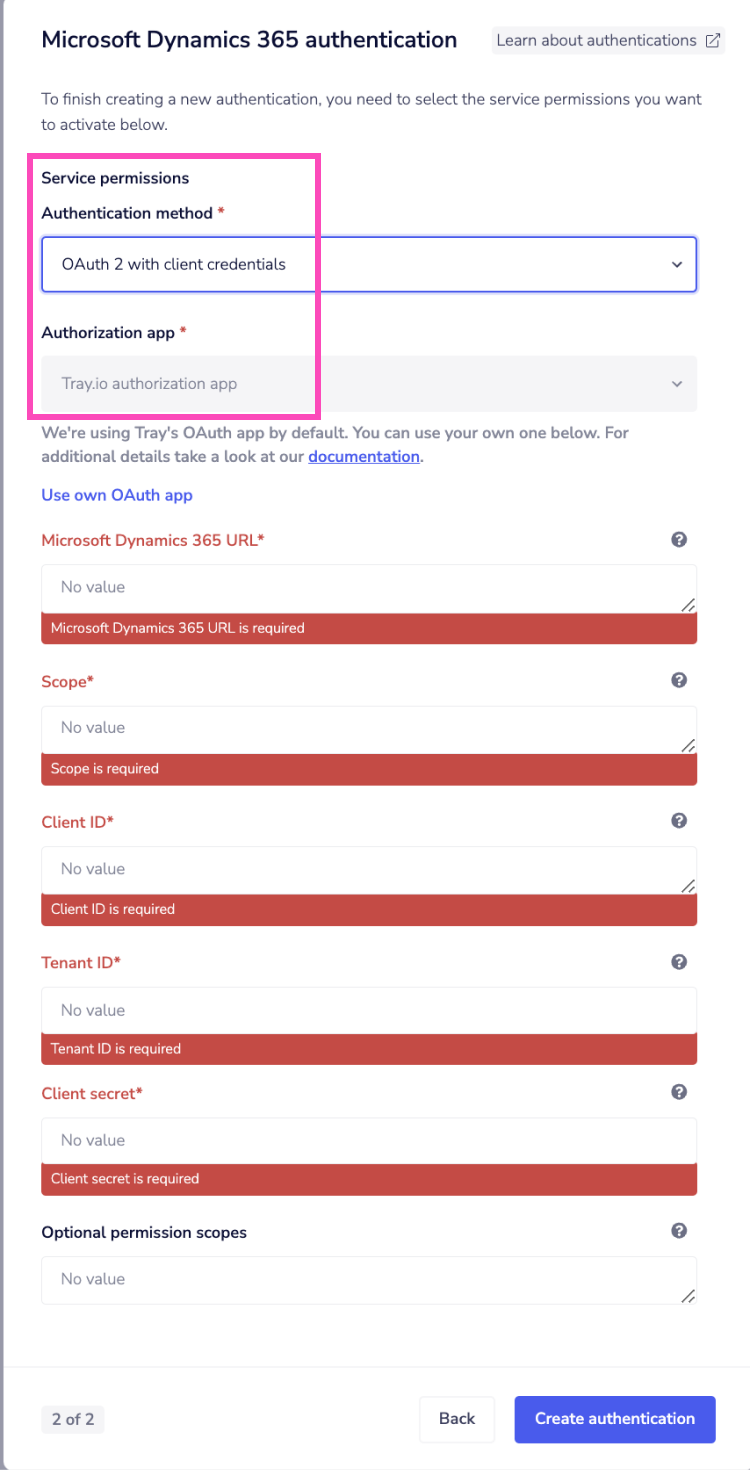
OAuth 2 with client credentials
OAuth 2 with client credentials authentication requires several parameters: Microsoft Dynamics 365 URL, Scope, Client ID, Tenant ID, and Client secret.
 To obtain your Client ID, Client Secret, and Tenant ID, access your Microsoft Dynamics app in Azure Active Directory.
The Microsoft Dynamics 365 service requires a scope in the following format:
To obtain your Client ID, Client Secret, and Tenant ID, access your Microsoft Dynamics app in Azure Active Directory.
The Microsoft Dynamics 365 service requires a scope in the following format: <Dynamics 365 URL>/.default, e.g., https://org0df2d90b.crm11.dynamics.com/.default.
Add these fields to your Tray.io authentication popup window. Click Create authentication.
Finally, return to your settings authentication field within the workflow builder properties panel, and select the newly added authentication from the dropdown options.
Your connector authentication setup is now complete.
OAuth 2 authentication
OAuth 2 authentication requires the full URL to your Microsoft Dynamics 365 instance. For example: https://trayio.crm11dynamics.com
 Click Create authentication to sign into your Microsoft account and complete the OAuth flow.
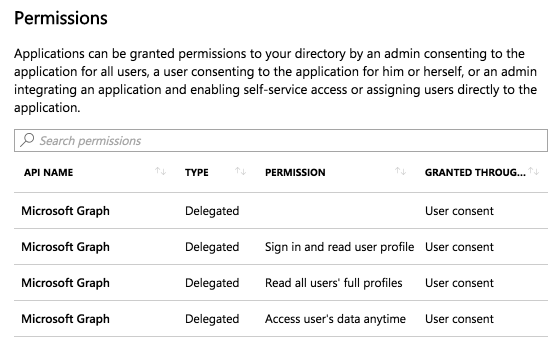
IMPORTANT: The permissions that Tray will request will exactly mirror those of your configured role in Dynamics 365 (set up according to the above guidelines).
The Azure Active Directory administrator can confirm the permissions delegated to the app in Azure Active Directory by navigating to Azure Active Directory > Users > Select the specific user > Applications > Click on the app > View Granted Permissions.
Microsoft Dynamics on premise authentication
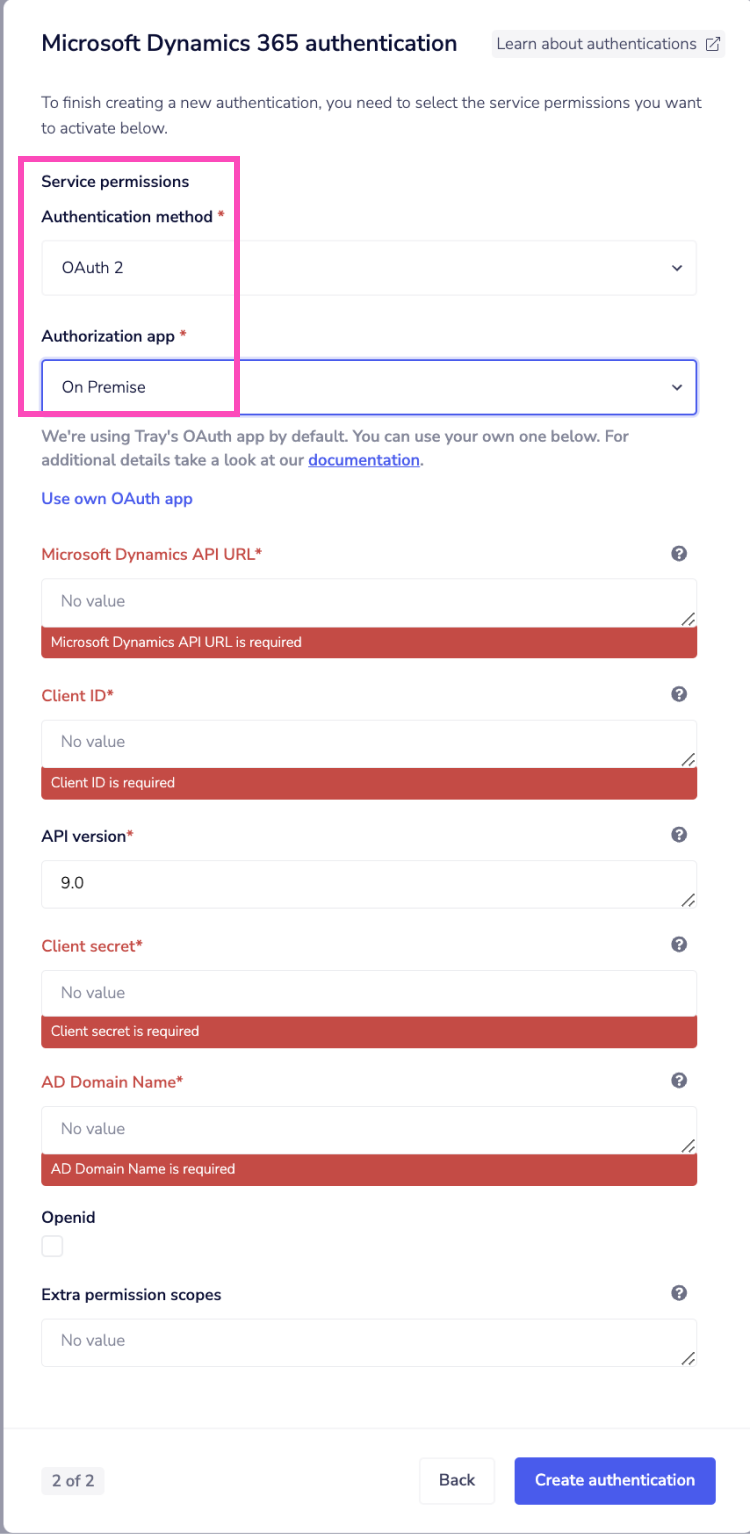 To create an authentication for connecting to an on-premise hosted instance of Microsoft Dynamics ensure you have an OAuth client set up with Active Directory Federation Service (ADFS) on your Dynamics server.
We suggest creating an application group with the following setup to establish a successful connection from Tray.io:
To create an authentication for connecting to an on-premise hosted instance of Microsoft Dynamics ensure you have an OAuth client set up with Active Directory Federation Service (ADFS) on your Dynamics server.
We suggest creating an application group with the following setup to establish a successful connection from Tray.io:
- Server Application:
- **Redirect URI: **
https://auth.tray.io/oauth2/token - Use the **Client ID ** and **Client Secret **generated for the server application in the authentication settings for Tray.io.
- **Redirect URI: **
- Web API Application:
- Relying Party Identifiers: Include the URL(s) relating to the base API domains you will connect to. When creating the authentication in Tray.io, ensure the value you enter for
Microsoft Dynamics API URLmatches one of the URLs you enter here. - Under Client Permissions, select the appropriate scopes that your OAuth clients need to successfully access the API. Extending Refresh Token Expiration Time When creating an authentication against an OAuth client registered in ADFS, consider the following:
- Relying Party Identifiers: Include the URL(s) relating to the base API domains you will connect to. When creating the authentication in Tray.io, ensure the value you enter for
- Tray.io receives an **access token **(used for API calls) and a **refresh token **(used to generate a new access token when the current one expires).
- Both access tokens and refresh tokens have expiration times. If a refresh token expires, the authentication cannot be automatically refreshed, causing automations to stop. This results in a
400error code in the debug logs, and you’ll need to re-enter your username and password to generate a new set of access and refresh tokens. - Unlike other OAuth providers, when a new access token is generated using a refresh token in ADFS, the refresh token is not regenerated. Therefore, new access tokens can only be automatically regenerated for as long as the original refresh token is valid.
- The default refresh token lifetime is 7 hours. To ensure your workflows run continuously without requiring intervention, we recommend extending your refresh token expiration time or setting it to unlimited.
- You can apply and scope these settings to an OAuth application instead of applying them to the entire organization. For further guidance, you may find these resources helpful:
- Configurable Token Lifetimes in the Microsoft Identity Platform (Preview)
- AD FS Single Sign-On Settings
Become admin and verify domain
This step may need to be carried out by your organisation's IT team, if they have not already done so. Please check with them to see if they have Azure admin privileges. If they have, then skip to step 2. First you must become admin in the Azure portal in order to allow your organisation's users to gain access through the Tray.io app. To become admin in the Azure portal, you must verify that the domain name of your Azure portal login e.g. example@companyname.com, (the domain is companyname.com in this example) is owned by you. To verify ownership of the domain, the following Microsoft guide can be used: https://support.office.com/en-us/article/do-an-admin-takeover-in-office-365-b9707ec8-2247-4e25-9bad-f11ddbc686e4#ID0EAACAAA=_Step_1
Ensure the user has the authority to register the Tray.io app in Azure
If you are using an Azure account which has admin privileges, then you should already be able to access your Dynamics data through the Tray.io platform. If not, then an Azure admin will need to set up access for the Tray app in one of three ways:
- Give all users the ability to consent to 3rd party apps accessing company data
- The Azure admin can login to Tray themselves in order to create the Authentication with their account
- An Azure admin can create a specific 'Tray app' user in Azure AD and give this user a specific role
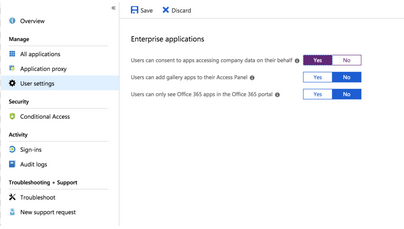
The first option grants all users in your organisation the ability to log into Microsoft services through any 3rd party application. To enable this setting, an admin must sign into the Azure portal > Navigate to Azure Active Directory in the left hand navigation > Click on User Settings in the menu then Click on Enterprise applications > Manage how end users launch and view their applications > Click on yes to "Users can consent to apps accessing company data on their behalf"
 The second option requires an Azure admin to log into the Tray UI to create an Authentication and consent on behalf of the organisation. This means no other user for your organisation should have to consent to the Tray.io app accessing data in your organisation's Azure AD instance.
The third option requires creating a 'Tray app' user in Azure and then going to Users > Select User > Directory Role > Add Role:
The second option requires an Azure admin to log into the Tray UI to create an Authentication and consent on behalf of the organisation. This means no other user for your organisation should have to consent to the Tray.io app accessing data in your organisation's Azure AD instance.
The third option requires creating a 'Tray app' user in Azure and then going to Users > Select User > Directory Role > Add Role:
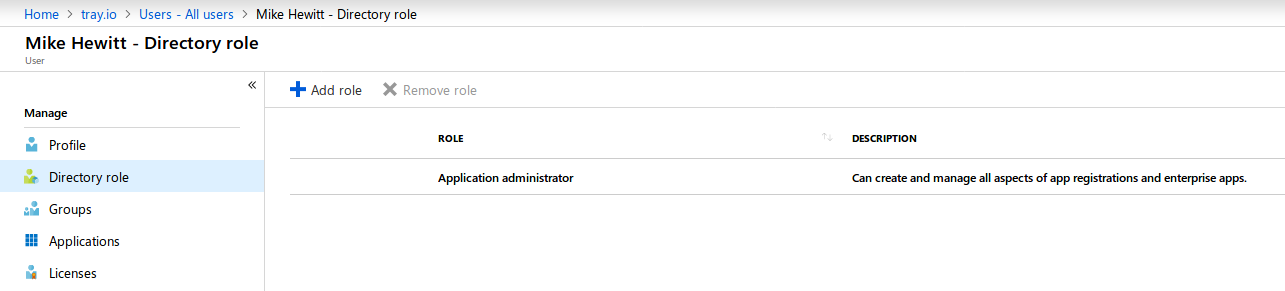 For this user you will want to assign it the 'least privileged role' in order for it to be able to carry out the operations you want.
There is a useful Microsoft guide on what roles are required for what tasks here
For this user you will want to assign it the 'least privileged role' in order for it to be able to carry out the operations you want.
There is a useful Microsoft guide on what roles are required for what tasks here
Using webhooks
Webhooks are events sent out by external services which can be consumed by the tray.io platform to trigger workflows. Workflows can then use the data contained within those event messages. However, Microsoft Dynamics must first be set up to send these events out.
In Microsoft Dynamics, events can be sent out using workflows and custom workflow activities (these are just custom workflow steps that have been registered in the Dynamics instance).
A custom workflow activity is responsible for sending events out to an external URL, which in this case would be the public URL of the workflow you would like to trigger.
The first step is to register the Webhook in MS Dynamics (this sets up where the URL the events should be sent to). Once this has been done, you can then register the custom step or custom workflow activity. This is where the event message and information about the entities can be configured.
These steps are completed through the Plug-in Registration tool. It can then be placed in a workflow in Dynamics. Please see this link for more information about registering webhooks within MS Dynamics.
Once Dynamics is set up to send out events, the Webhook trigger connector can be used to listen for these events.