Shopify
Shopify is an E-commerce platform for online stores and retail point-of-sale systems.
Overview
The Shopify connector currently provides operations to manage orders, fulfillments and customers in your shop be it online, on social media, or in person.
API Information
The Shopify connector uses the GraphQL Admin API with the following base URL: https://<your-shop-name>.myshopify.com/admin/api/2026-01/graphql.json. More information can be found on their main API documentation site. Details regarding their API limitations can be found here.
Authentication
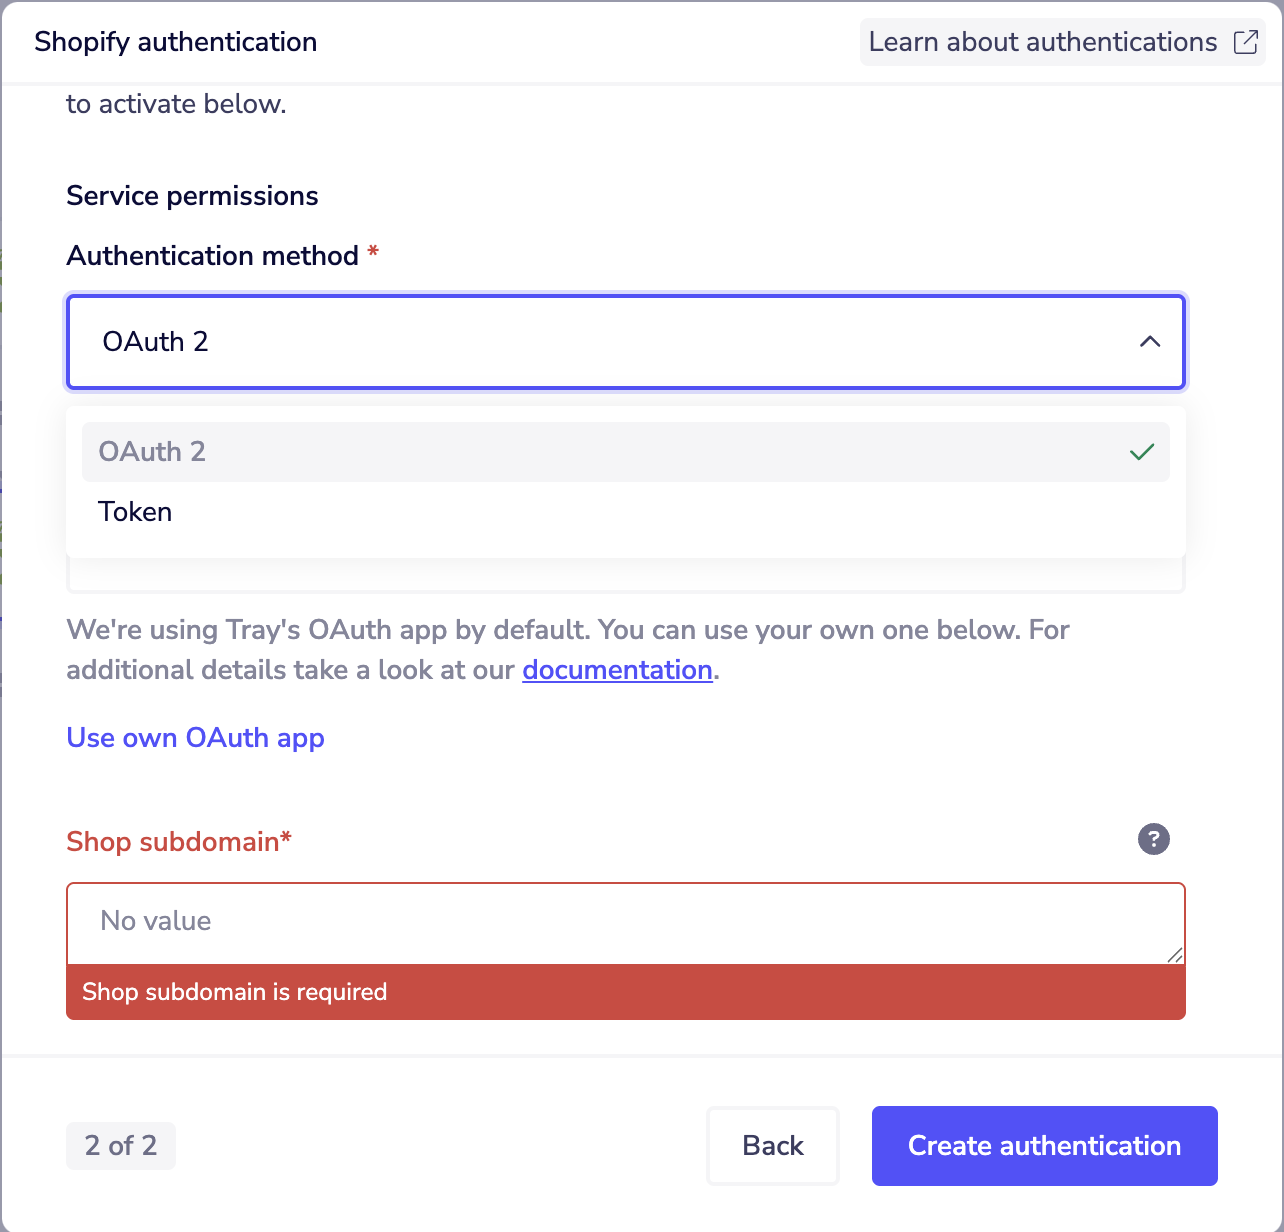
The Tray Production OAuth app has been deprecated and should not be used for authentications. You must now create your own OAuth app via the Shopify Dev Dashboard. See the OAuth2 setup instructions below.
When using the Shopify connector, the first thing you will need to do is go to your Tray account page, and select the workflow you wish to work on. Once in the workflow dashboard itself, search and drag the Shopify connector from the connectors panel (on the left hand side) onto your workflow.
With the new Shopify connector step highlighted, in the properties panel on the right, click on 'Create New Authentication' which is located under the 'Authentications' tab.
The Shopify connector now uses OAuth2 as its primary authentication method.
Setting up OAuth2 via Dev Dashboard
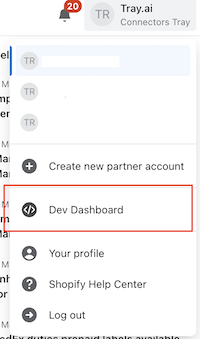
To set up OAuth2 authentication, you will need to create an app inside the "Dev Dashboard". You can access it from either the Partner Dashboard or the Admin Dashboard by clicking your profile from the right-hand side of the screen.
Then hit the Create app button to create a new app.
You can also create the app via Shopify CLI; here we'll only cover the Dev Dashboard approach.
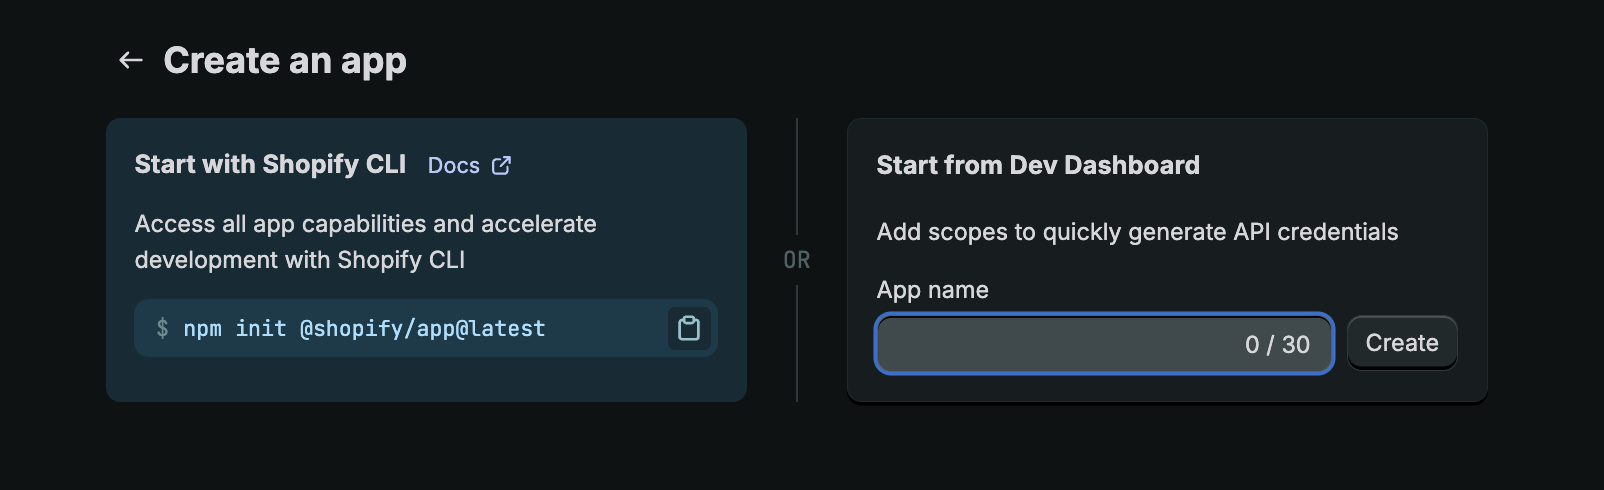
Give your app a name and hit Create.
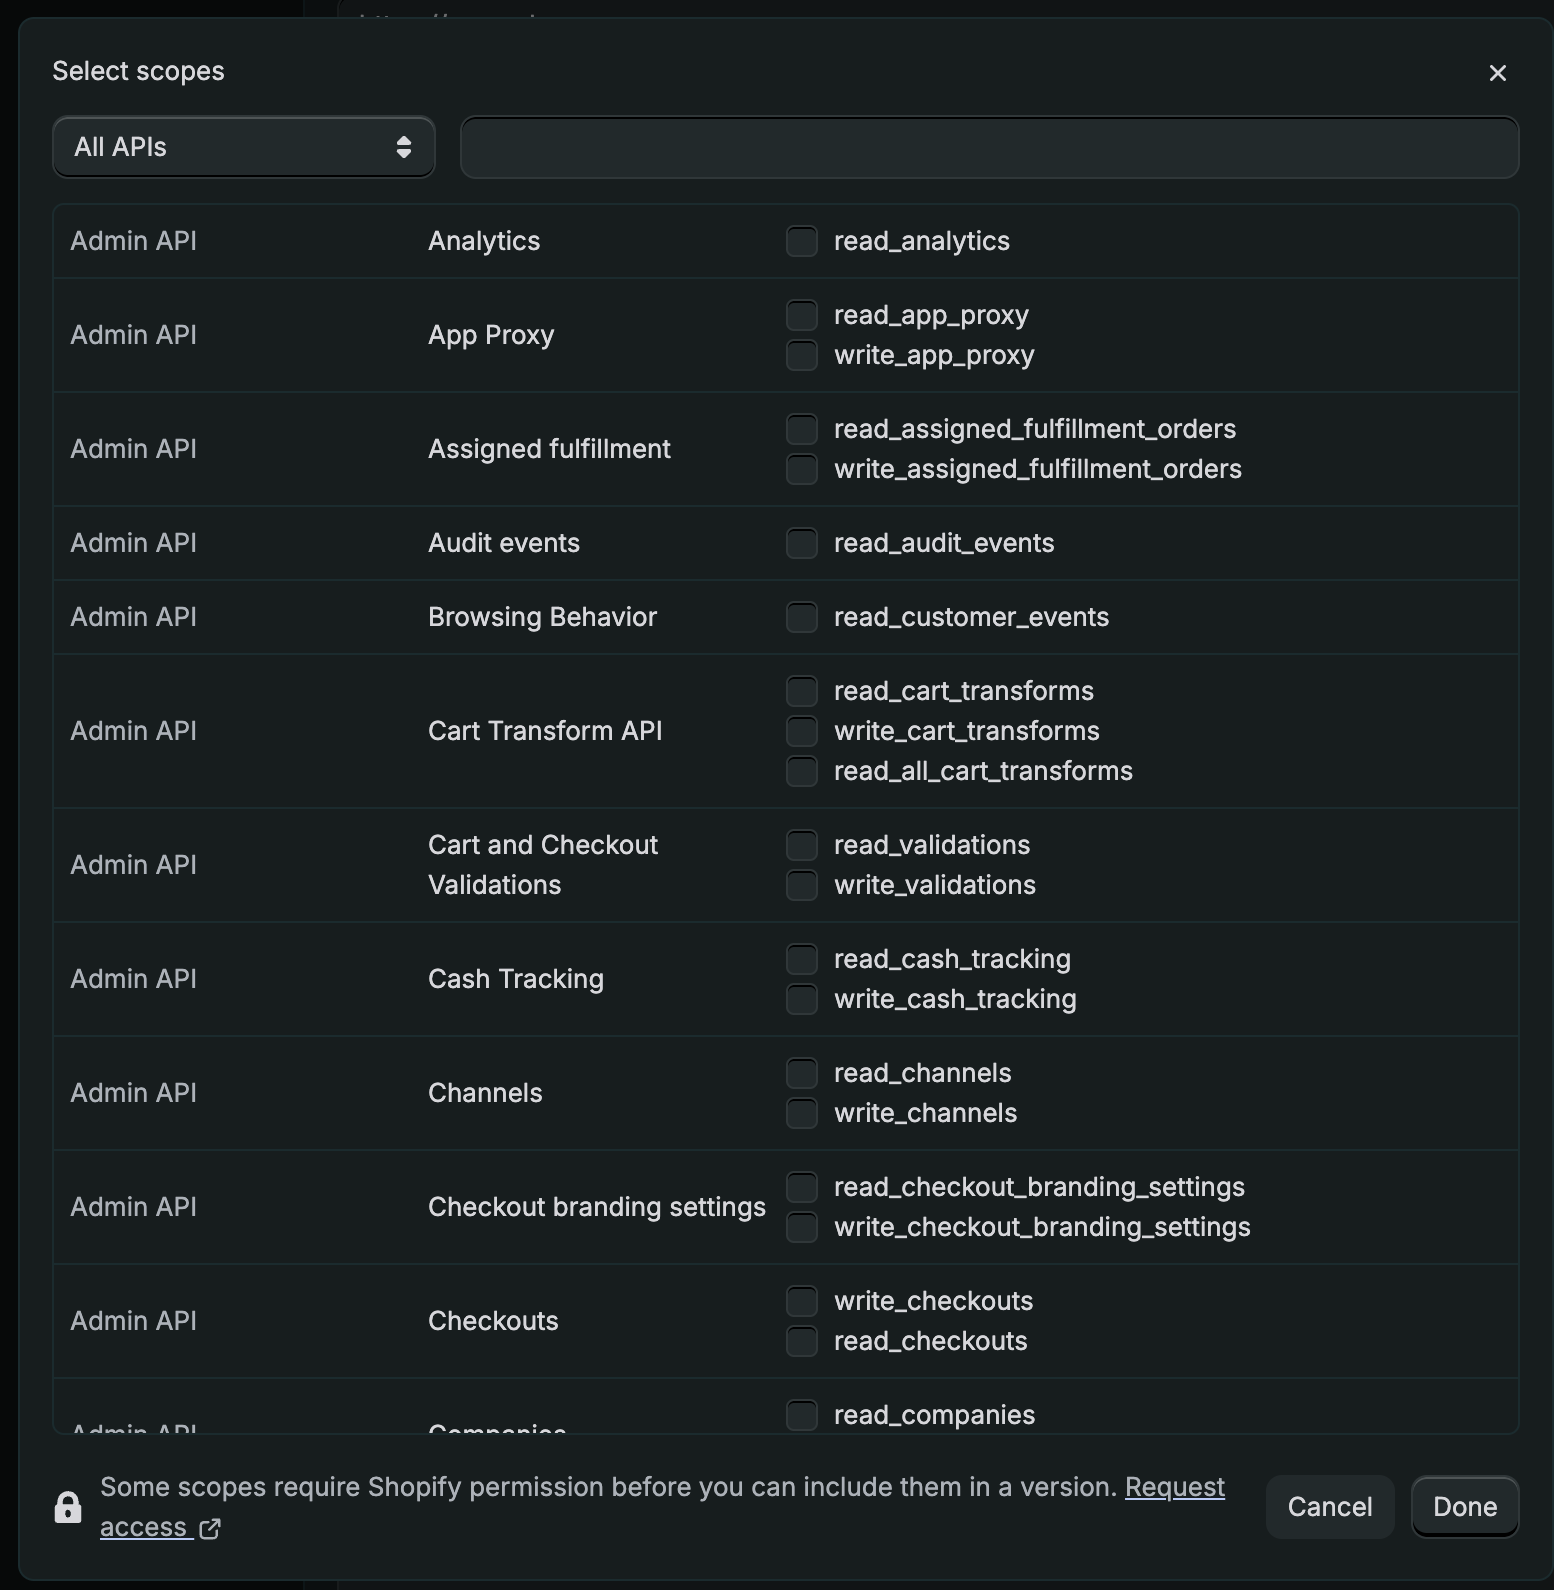
You will then be redirected to the configuration page for the initial version of your app. First, add the required scopes by scrolling down to the "Access" section and clicking Select scopes.
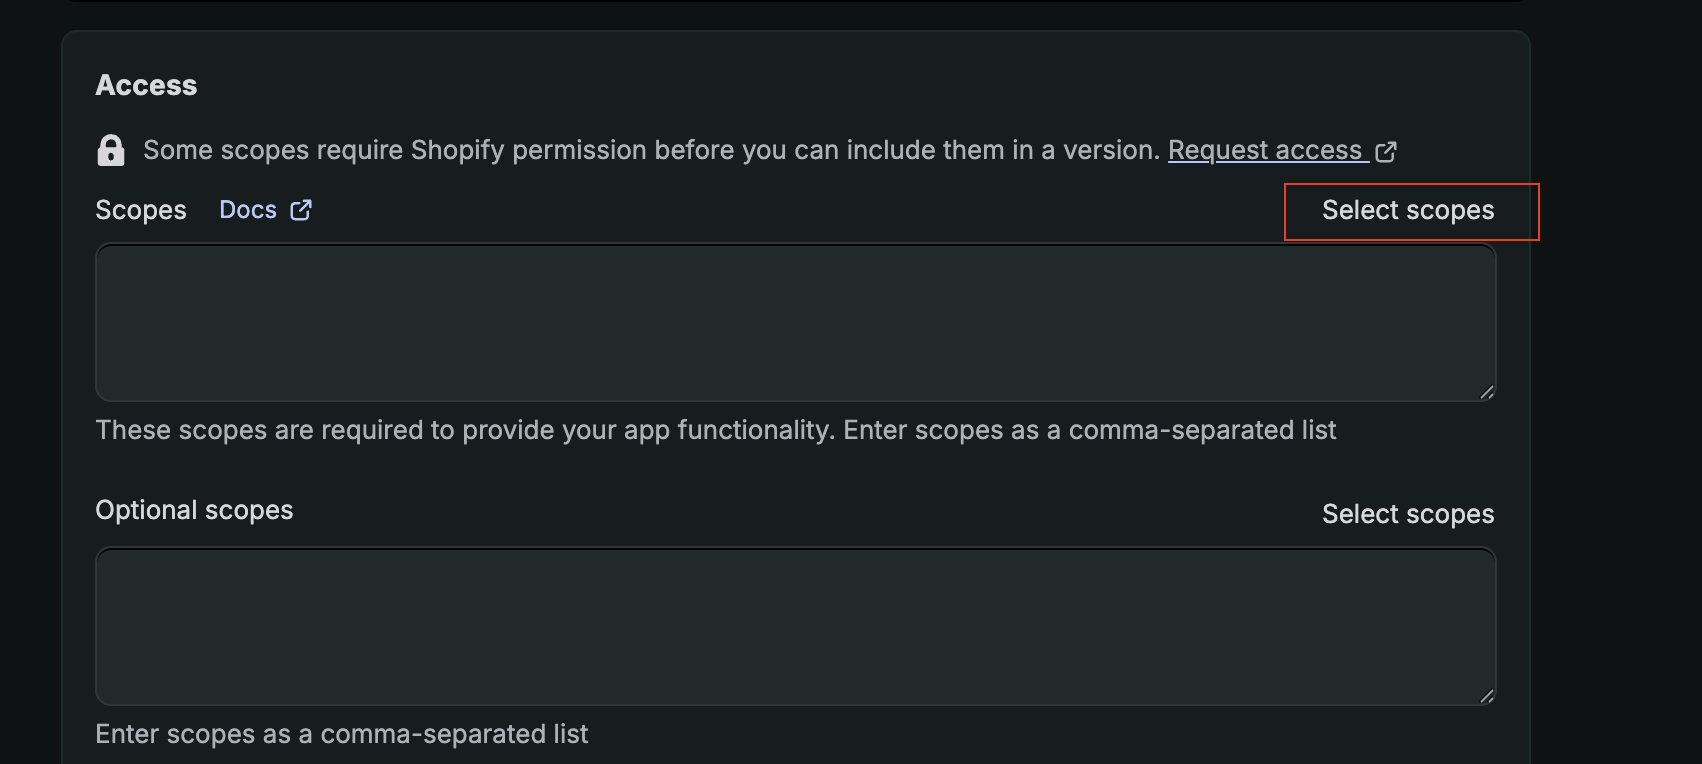
In the scopes dialog, select the desired scopes you want your app to have access to.
Still within the "Access" section, add the redirect URL for the OAuth2 flow in the "Redirect URLs" field. Add: https://auth.tray.io/oauth2/token
Then hit Release.
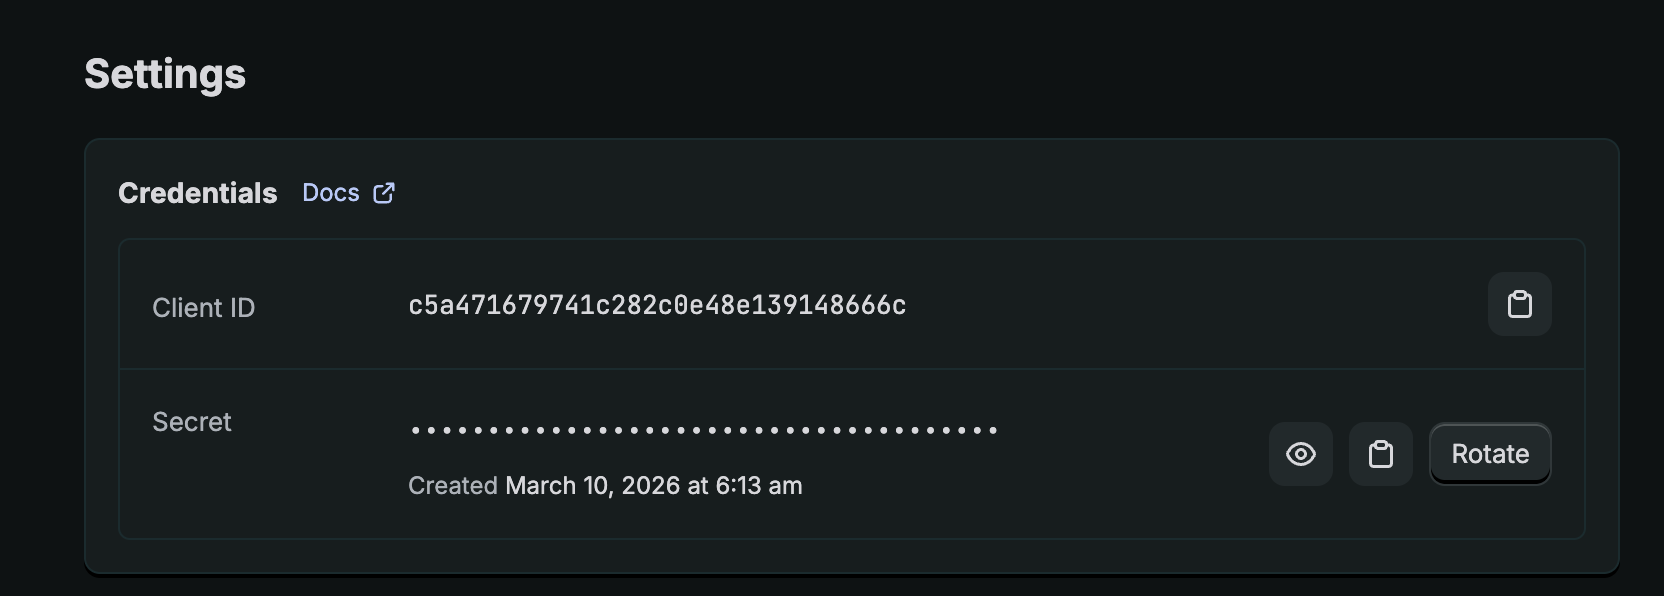
Now go to Settings on the left-hand side menu, where you can copy the Client ID and Client Secret.
Token Authentication (Outdated)
Admin access tokens are no longer available. Existing integrations using admin access tokens will continue to work, but Shopify no longer allows creation of new admin access tokens. You must use OAuth2 authentication for new integrations.
If you need a token-based approach, Shopify now offers access tokens that expire in 24 hours. See Shopify's documentation for more information.
Shop Subdomain
Regardless of which authentication method you use (OAuth2 or Token), you will need to provide your shop subdomain when setting up the authentication in Tray.
Your shop subdomain is displayed in the URL of your Shopify admin dashboard. For example, if your admin URL is "west.myshopify.com" or "east.myshopify.com", the subdomains would be "west" and "east" respectively.
Completing the Authentication
Once you have added all the required fields to your Tray.io authentication popup window, click on the Create authentication button. Go back to your settings authentication field (within the workflow builder properties panel), and select the recently added authentication from the dropdown options now available.
Your connector authentication setup should now be complete.
Shopify Trigger
If you wish your workflow to be kicked off by a particular action in Shopify, you can use the Shopify Trigger. The Shopify trigger allows you to receive notifications and trigger workflows when given events occur associated with the selected trigger operation.
Trigger operations available:
- Webhook
Webhook Setup
When creating a new workflow, click the 'Create new workflow' button in the top right hand corner of your main Tray dashboard. When the trigger popup window opens, search and select the Shopify trigger. Wait to be redirected to your new workflow and the workflow dashboard itself.

The Shopify Trigger uses the same authentication methods as the standard Shopify connector. Follow the authentication instructions above to set up your authentication.
Once authenticated, select 'Webhook' as the operation to specify which event you want your trigger to listen to.
WEBHOOKS: As this uses a webhook as its operation type, you will also need to integrate it with your Shopify account, in order to complete the authentication process.
Below is an example of a way in which you could potentially use the Shopify connector, to use the 'Search customers' operation and specify orders_count:0 into the 'Query' property. I.e: to search for customers that haven't ordered anything on your shop.
Additionally, you can specify only a set of fields that should be in the output by adding them in the 'Fields' property such as id, name.
The steps will be as follows:
- Set up Shopify trigger and boolean branch.
- Add a Slack connector notification step.
The final outcome should look like this:
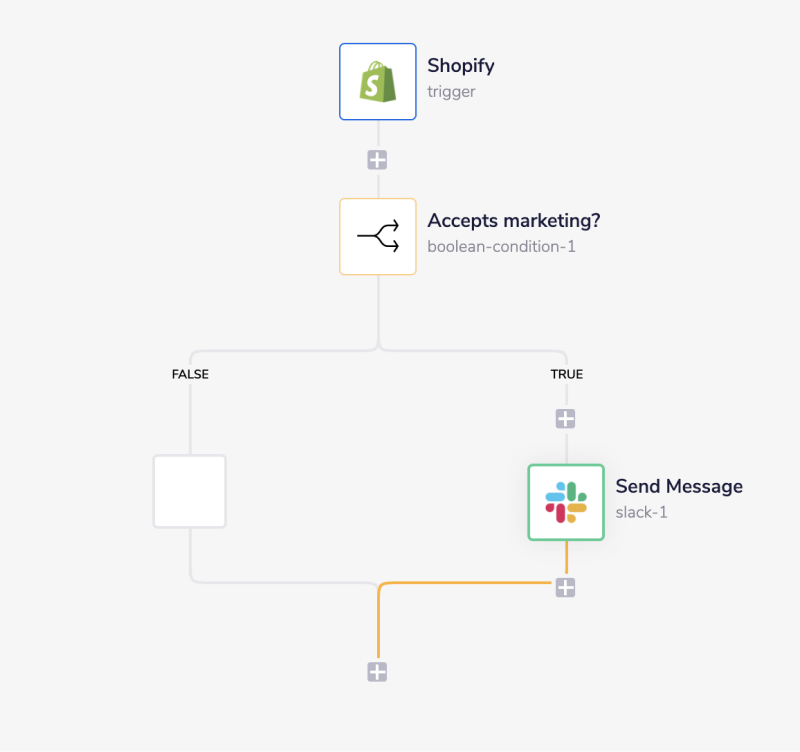
PLEASE NOTE: This is an oversimplified example - you would normally use the data to update a record in Salesforce, or something similar.
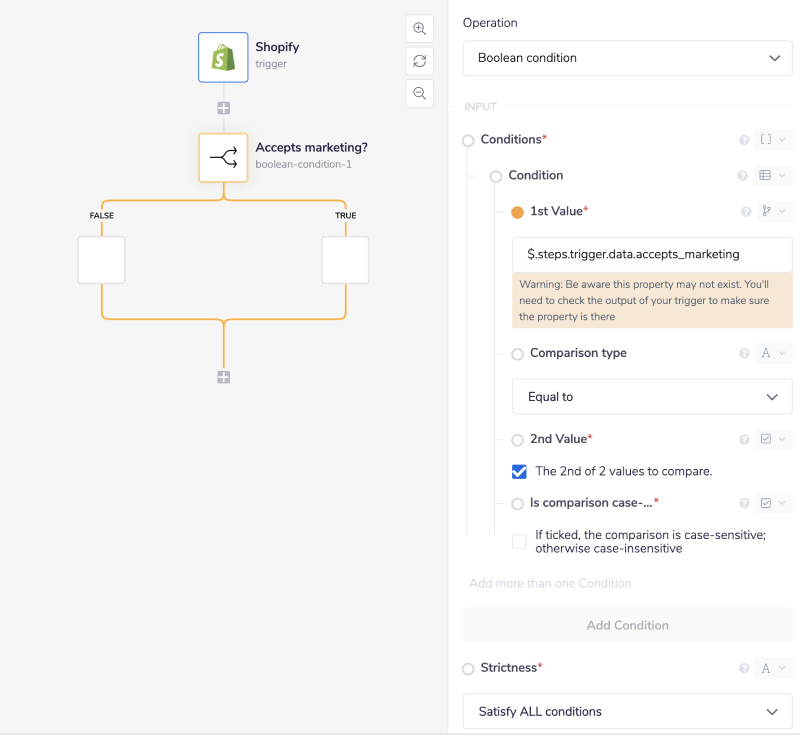
1 - Setup trigger & Boolean branch
Once you have clicked 'Create new workflow' on your main Tray dashboard (and named said new workflow), select the Shopify trigger from the trigger options available:
Make sure you have set up your trigger as explained depending on the version you are using, before going any further. Once you have been redirected to the Tray workflow dashboard, from the connectors panel on the left, add a Boolean connector to your second step. Set the operation to 'Boolean condition'. If you have used the 'Send test notification' option, from the admin section in your Shopify webhook dashboard (as detailed earlier in the trigger section above), you should have gotten an output similar to the below: This is viewable in the Debug panel under your step output.
The data sent by the Shopify webhook can be extracted and used with a jsonpath beginning with either
$.steps.trigger.topicor$.steps.trigger.data.[field].
JSONPATHS: For more information on what jsonpaths are and how to use jsonpaths with Tray, please see our pages on Basic data concepts and Mapping data between steps
You can achieve most of this path by using the connector-snake to save you time and effort.
CONNECTOR-SNAKE: The simplest and easiest way to generate your jsonpaths is to use our feature called the Connector-snake. Please see the main page for more details.
In our case we will create a boolean branch to check if the user accepts marketing, by setting the comparison type to 'Equal to' and the second value to 'The 2nd of 2 values to compare'.
Take special notice of the Input types! If they are not set correctly, your condition will fail.
2 - Add a Slack notification
Add a Slack connector step to your workflow on the TRUE branch. Set up your auth and set the operation to 'Send message'. Choose your channel, and then use Tray's interpolation method to have your result displayed in the message output. Note the use of { } to input the result of the jsonpath in to a string field
INTERPOLATION: When you wish to include JSON generated data within another input/output result, use our Interpolation method as described here.
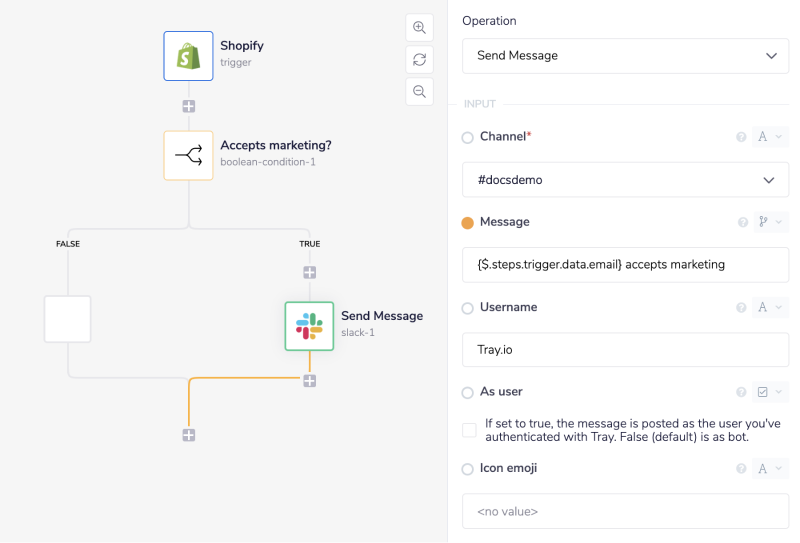 Now, whenever the boolean branch returns a TRUE result, a notification message will be sent to this particular Slack channel, to let people know that a user (as identified by their email address) has accepted the marketing material.
Whenever you create your own workflow, be sure to check out these key articles:
Notes for Embedded customers
Custom OAuth apps
You can create a custom OAuth app in order to White-label your authentications dialog during your integrations. Additionally, you can choose to advise your users to create their own Shopify Admin API access tokens and use them for their workflows instead of having to maintain your own custom OAuth Shopify app.
To create a custom OAuth app, follow the OAuth2 setup instructions outlined earlier in this document.
Scopes
Please be aware of the following points when dealing with scopes while using an Embedded account:
- The scopes you use for your source / master workflow are the scopes that your end users will have when creating the auth.
- You can also override scopes in the solution editor. This will allow you to specify that only a subset of the scopes set in the master workflow are available to your End Users. Please reach out to your Tray technical support if you wish to activate this feature.

- When creating an OAuth app in the Shopify UI, you shouldn't set granular scopes. This way, you would have to create a custom OAuth app for every integration that you create for this service to enforce scope limitation.
- A better way would be to use the standard method of setting the scopes when you are creating an authentication in your source / master workflow for each Solution. This way you can have multiple integrations that use the same custom OAuth app and control them within Tray.