The Config Wizard
The primary function of the Config Wizard is to allow End Users to configure your integration for their own use
What is the Config Wizard?
The primary function of the Config Wizard is to allow End Users to configure your integration for their own use, by:
- Creating authentications for the services involved (e.g. Slack, HubSpot, Salesforce) in the integration. They can also re-use auths if they had already created them in a different integration (it is also possible to import existing auths using our Auth API)
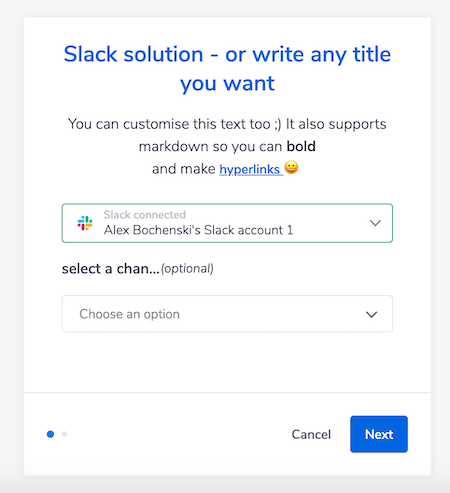
- Setting any required config data that is required by your integration to make the integration work specifically for them (e.g. what Slack channel do they subscribe to, what Salesforce contact type do they work with, or what Google Sheet do they want information sent to) The Auth-only dialog is also available.
Launching the Config Wizard in the Tray UI
It is possible to launch the Config Wizard from within the Tray UI.
When looking at the Project view of your integration, this is done by clicking on 'Create Solution Instance':
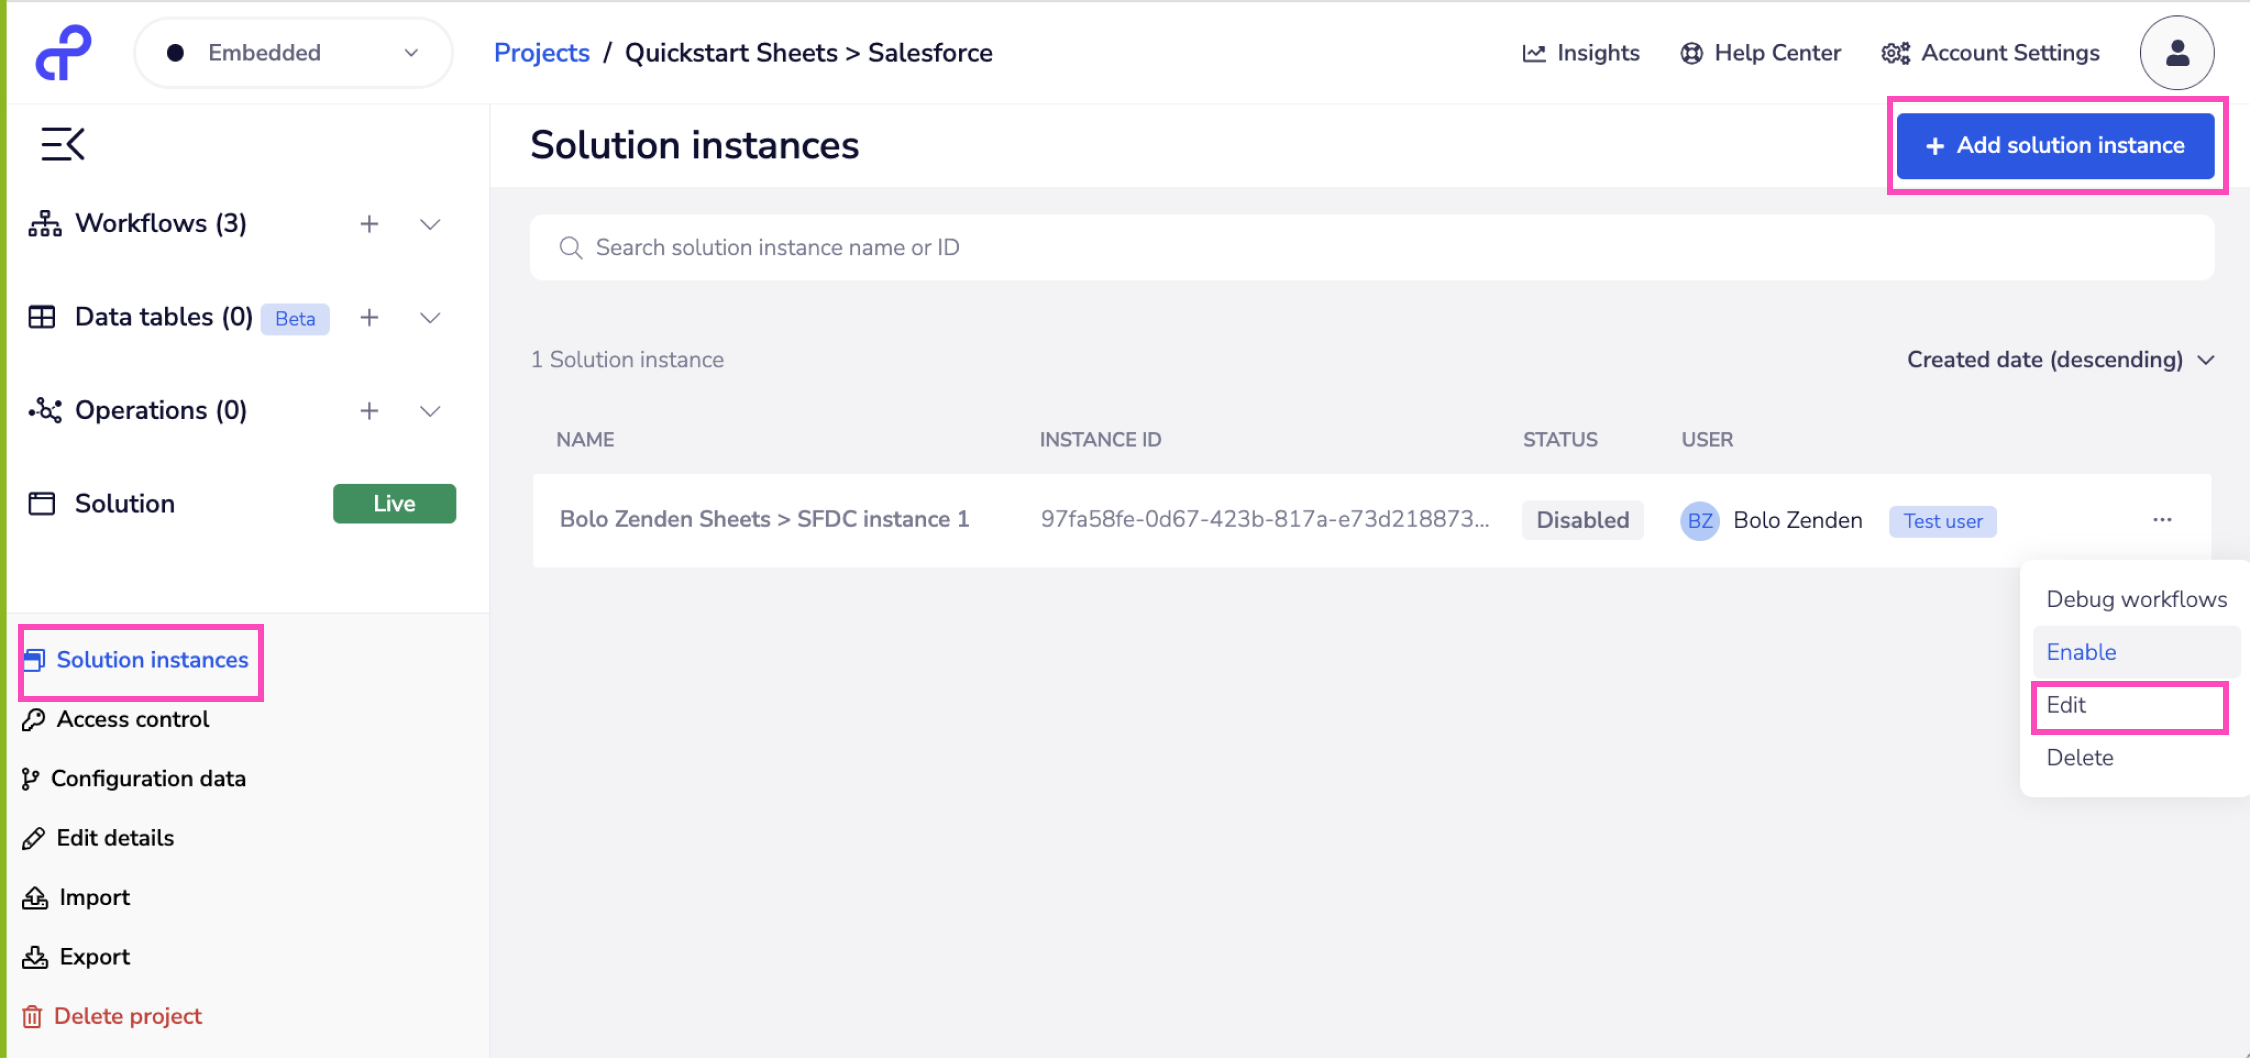 This allows you to act as an 'Integration Manager' and to activate and manage Solution Instances on behalf of End Users.
If you ever need to edit a Solution Instance - to update authentication details, add new auths or add / edit config values - you can rerun the Config Wizard by clicking on the 'Edit' option as shown in the above screenshot.
This allows you to act as an 'Integration Manager' and to activate and manage Solution Instances on behalf of End Users.
If you ever need to edit a Solution Instance - to update authentication details, add new auths or add / edit config values - you can rerun the Config Wizard by clicking on the 'Edit' option as shown in the above screenshot.
Launching the Config Wizard in your native code
The Tray Solution Configuration Wizard pop-up is activated at the following url:
https://embedded.tray.io/external/solutions/${embeddedId}/configure/${solutionInstanceId}?code=${authorizationCode}
This URL will vary depending on your Tray org region.
If you are in the EU region, the URL would be:
https://embedded.eu1.tray.io/external/solutions/${embeddedId}/configure/${solutionInstanceId}?code=${authorizationCode}
If you are in the APAC region, the URL would be:
https://embedded.ap1.tray.io/external/solutions/${embeddedId}/configure/${solutionInstanceId}?code=${authorizationCode}
In the above url remember that ${embeddedId} is the value that you set when configuring your Config Wizard CSS:
You can remove the Tray domain and white-label the Config Wizard url. If you have done so then embedded.tray.io will be replaced with e.g. acme.integration-configuration.com
Note on Browser Compatibility: The Tray Config Wizard supports the major desktop and mobile browsers Chrome, Firefox, Safari (9.1+ desktop and 9.3+ iOS), Opera, Android (and Android UC) and Edge (version 14 and above). It does not support Internet Explorer.
Popup vs iframe
When using a pop-up to display the Config Wizard, it is important to handle the possibility of the pop-up being blocked by the browser. Generally, browsers will not block pop-ups if they are triggered by direct user action (e.g., a button click). Some browsers can detect if a sequence of calls was initiated by a button click, so it is advisable to keep the button-click logic as minimal as possible. It is also good practice to test for pop-ups being blocked and take appropriate action, such as prompting the user with a message like "Please allow pop-ups for this site." This is especially important in the Config Wizard, where pop-ups are shown to users when authenticating with a service.
Response Headers That Can Affect Pop-Ups
Be aware that certain response headers can interfere with pop-up behavior, especially for authentication flows:
- Cross-Origin-Opener-Policy: same-origin: Prevents pop-ups from accessing the opener window, which can break authentication pop-ups. More info
- Cross-Origin-Embedder-Policy: require-corp: Often used with COOP, this can block cross-origin resources and disrupt pop-up behavior. More info
- Content-Security-Policy: If set with restrictive rules like
frame-ancestors 'none'or strictscript-src/form-actionpolicies, pop-ups and authentication windows may fail to open. More info
Iframe Attributes That Can Block Pop-Ups
If your Config Wizard is loaded inside an iframe, certain attributes can prevent pop-ups:
- sandbox attribute: If an iframe has this attribute without
allow-popupsorallow-modals, pop-ups will be blocked. More info- ✅ To allow pop-ups:
<iframe sandbox="allow-popups allow-modals"></iframe>
- ✅ To allow pop-ups:
- allow="popups" attribute: Some browsers require this to explicitly permit pop-ups. More info
- ✅ Example:
<iframe src="example.com" allow="popups"></iframe>
- ✅ Example:
If you're experiencing issues with pop-ups not opening, check your site's response headers and iframe attributes to ensure they are not too restrictive.
Iframe Requirements & Best Practices
If you wish to present the Config Wizard in an iframe, your domain will need to be added to our allowlist . Please contact us at support to arrange this. Your domain will then need to be passed in the Referrer Request Header.
Apps must be deployed with https in order to use an iframe as we block requests from http sites for security reasons
Wildcard domains are not supported. You need to specify / use specific subdomains.
Note that for local testing purposes, localhost:3000 and localhost:3001 are whitelisted for using iframes.
Our demo app shows an example of using an iframe to present the Config Wizard:
- The
src/components/ConfigWizard.jsfile sets up the post message event listeners for the iframe. - While
src/components/Instance.jssets up the openPopup method which handles opening an iframe.
Presenting a custom loading screen
During transition between stages in the Config Wizard you may find that the End User is presented with a combination of the Tray loading spinner and your own branded loading spinner.
When using an iFrame, you can control this more precisely and specify exactly what is presented, by making use of the tray.configPopup.ready PostMessage event.
You can program your app so that while that event has not occurred, your custom loading screen / spinner is displayed.
In our demo app (from src/components/configWizard.js) you can see this event being handled amongst the others described above for the standard pop-up:
Extra URL parameters
Setting the first screen in the Config Wizard
It is possible to specify which screen appears first in the Configuration Wizard by appending a query onto the url, such as:
https://embedded.tray.io/external/solutions/${embeddedId}/configure/${solutionInstanceId}?code=${authorizationCode}&show=[1,2,3,4]&start=2
Skipping Auth naming and settings
You can skip the title field of the authentication (it will be automatically named for you) by adding the skipTitleField=true query parameter to the above url.
For OAuth services (i.e. non-token-based) you can also skip the auth settings (i.e. login details) and go straight to the scopes page by using the skipAuthSettings=true query parameter.
For example:
https://embedded.tray.io/external/solutions/${embeddedId}/configure/${solutionInstanceId}?code=${authorizationCode}&skipTitleField=true&skipAuthSettings=true
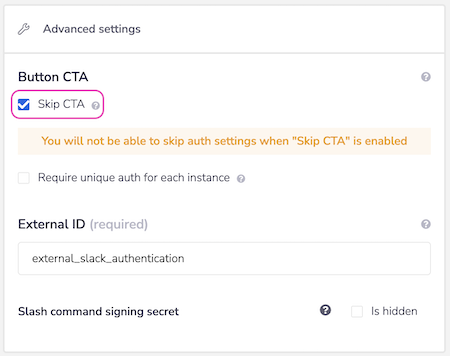
Hiding the Authentication Button
If you wish to reduce the number of clicks an End User has to make it is possible to hide the 'New Authentication' button in the Config Wizard so that they go straight to the service authentication dialog.
This is done in the UI. When you are setting up the Configuration Wizard screens, it is possible to use the 'Skip CTA' option for any authentications:
Events
The Configuration Wizard will publish some events by PostMessage for your application to potentially handle. tray.configPopup.finish - Will be sent with no payload if there has been a successful configuration of the Solution Instance and the user has reached the finish page. tray.configPopup.error - Will be sent with an err property in the case an error occurs during configuration. tray.configPopup.cancel - Will be sent with no payload if the user cancels the configuration. tray.configPopup.validate - Used to indicate that you should start the validation process You can subscribe to these events from your application with a window.addEventListener The src/lib/configWindow.js file from our demo app shows a way of handling these events.
Validation
To enable basic validation for the Config Wizard the customValidation queryString can be appended to the Config Wizard url:
https://embedded.tray.io/external/solutions/${embeddedId}/configure/${solutionInstanceId}?code=${authorizationCode}&customValidation=true
The process for validating data being entered by an End User is as follows:
- The data input on each screen is validated when the End User clicks 'Next' - i.e. not in one payload after the final screen
- When the End User clicks 'Next' on a screen, the Configuration Wizard will send a tray.configPopup.validate post message event to your application which indicates that you should start the validation process
- When this event is received you should respond immediately that in progress is true. At this point all inputs will be disabled and the Config Wizard will display a 'loading' message. This will allow for any longer data checks on your Back End
- As soon as you have finished your validation, you should respond with a tray.configPopup.client.validation post message event which states that in progress is false. This message should include an array of the error messages resulting from your validation, which can be empty To manage the above, the following data types are available:
type CustomValidationErrors = {
  [externalId: string]: string
};
export type CustomValidation = \{
  inProgress: boolean;
  errors?: CustomValidationErrors
\};
export type CustomValidationAuthValues = \{
  [externalId: string]: string | undefined;
\};
export type CustomValidationConfigValues = \{
  [externalId: string]: any;
\};
export type CustomValidationFormData = \{
  visibleValues: string[]; // soon to be deprecated
  visibleAuths: string[];
  visibleConfigs: string[];
  authValues: CustomValidationAuthValues;
  configValues: CustomValidationConfigValues;
\};
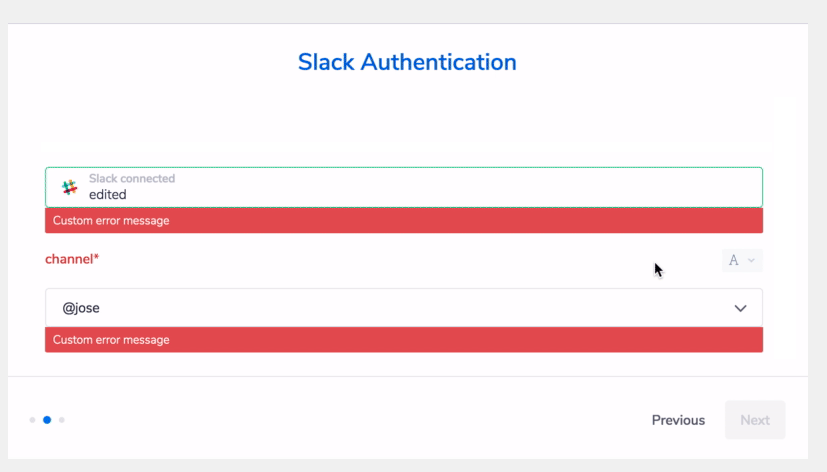
Your custom error messages can then be displayed in the app thus:
CSS and whitelabelling
You can also whitelabel the Config Wizard by:
- Editing the CSS
- Whitelabelling the Config Wizard URL
- Using a Custom OAuth app to display your own logo