Authenticating connectors
Just as when you log into your Gmail, Facebook, Salesforce, LinkedIn account etc., any service connectors you wish to use also require an authentication to verify the user.
Just as when you log into your Gmail, Facebook, Salesforce, LinkedIn account etc., any service connectors you wish to use also require an authentication to verify the user. Authentications can be built and used within these three areas:
- Personal - Used only by you.
- Organization - For example a company login used by anyone within your organisation.
- Workspace - Sub-divisions of your organisation.
USER TIP: Please see the Managing Authentications page for guidance on how best to handle authentications within your organization and instructions on creating authentications from the dashboard.
Read on for an overview of the different types of authentications you will come across. Then you can go to the Service Connectors own page to find the specific instructions needed in order to authenticate.
Naming your Authentications
Please take care when naming your authentications. You will often need to create more than one over time (even for the same services) and it can become incredibly easy to get them confused with one another if you don't take your naming conventions seriously. You should try to name your authentications in a way that will quickly identify it within a potentially large list. Consider who/ how many people will need access to this authentication when choosing where to create this authentication For example whether it is a Sandbox or Production auth. Maybe including the name of the service API version you are using would be useful. Perhaps you could specify the Workspace group or Organisation associated with this particular type of authentication so you know if its one you and your team have access to. If you take the above into account upon creation when looking in your group of available authentications later on finding the right one will be simple!
Creating Auths
There are two places you can create service authentications:
- In a workflow
- From the dashboard
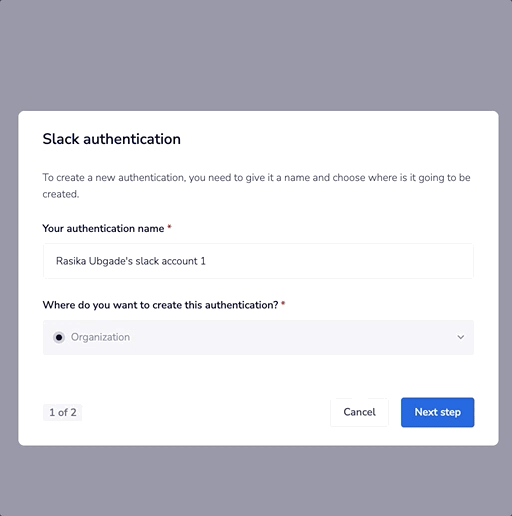
Creating auths in a workflow
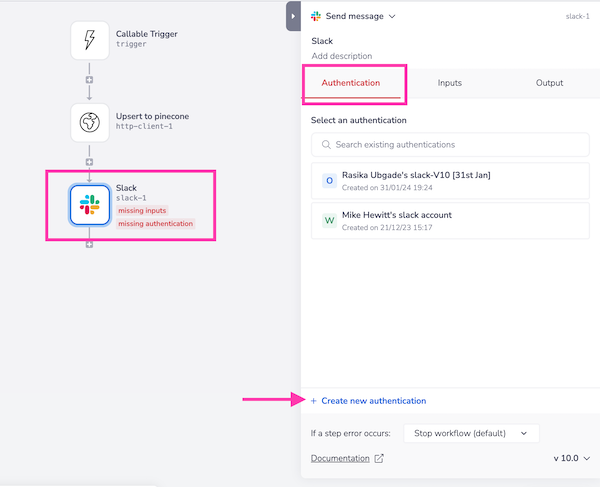
Once you are within the builder highlight the connector you want to create a new authentication for.
In the connector properties panel select the Auth tab and Create New authentication:
Managing Scopes
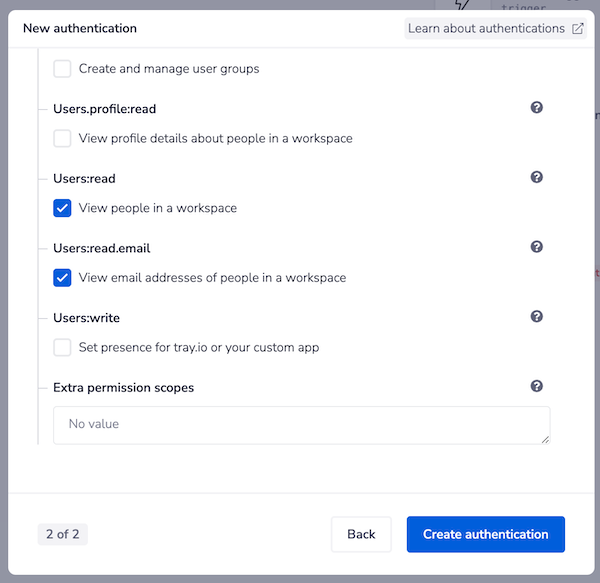
When creating auths, a lot of OAuth2 services will present a list of scopes as checkboxes, and include and 'Extra permissions' box to allow you to enter any extra scopes required:
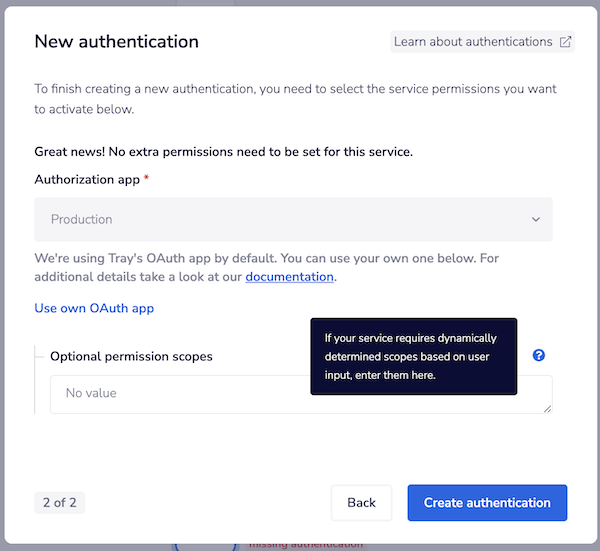
 Others will simply present you with a permission scopes box to allow you to enter any necessary scopes:
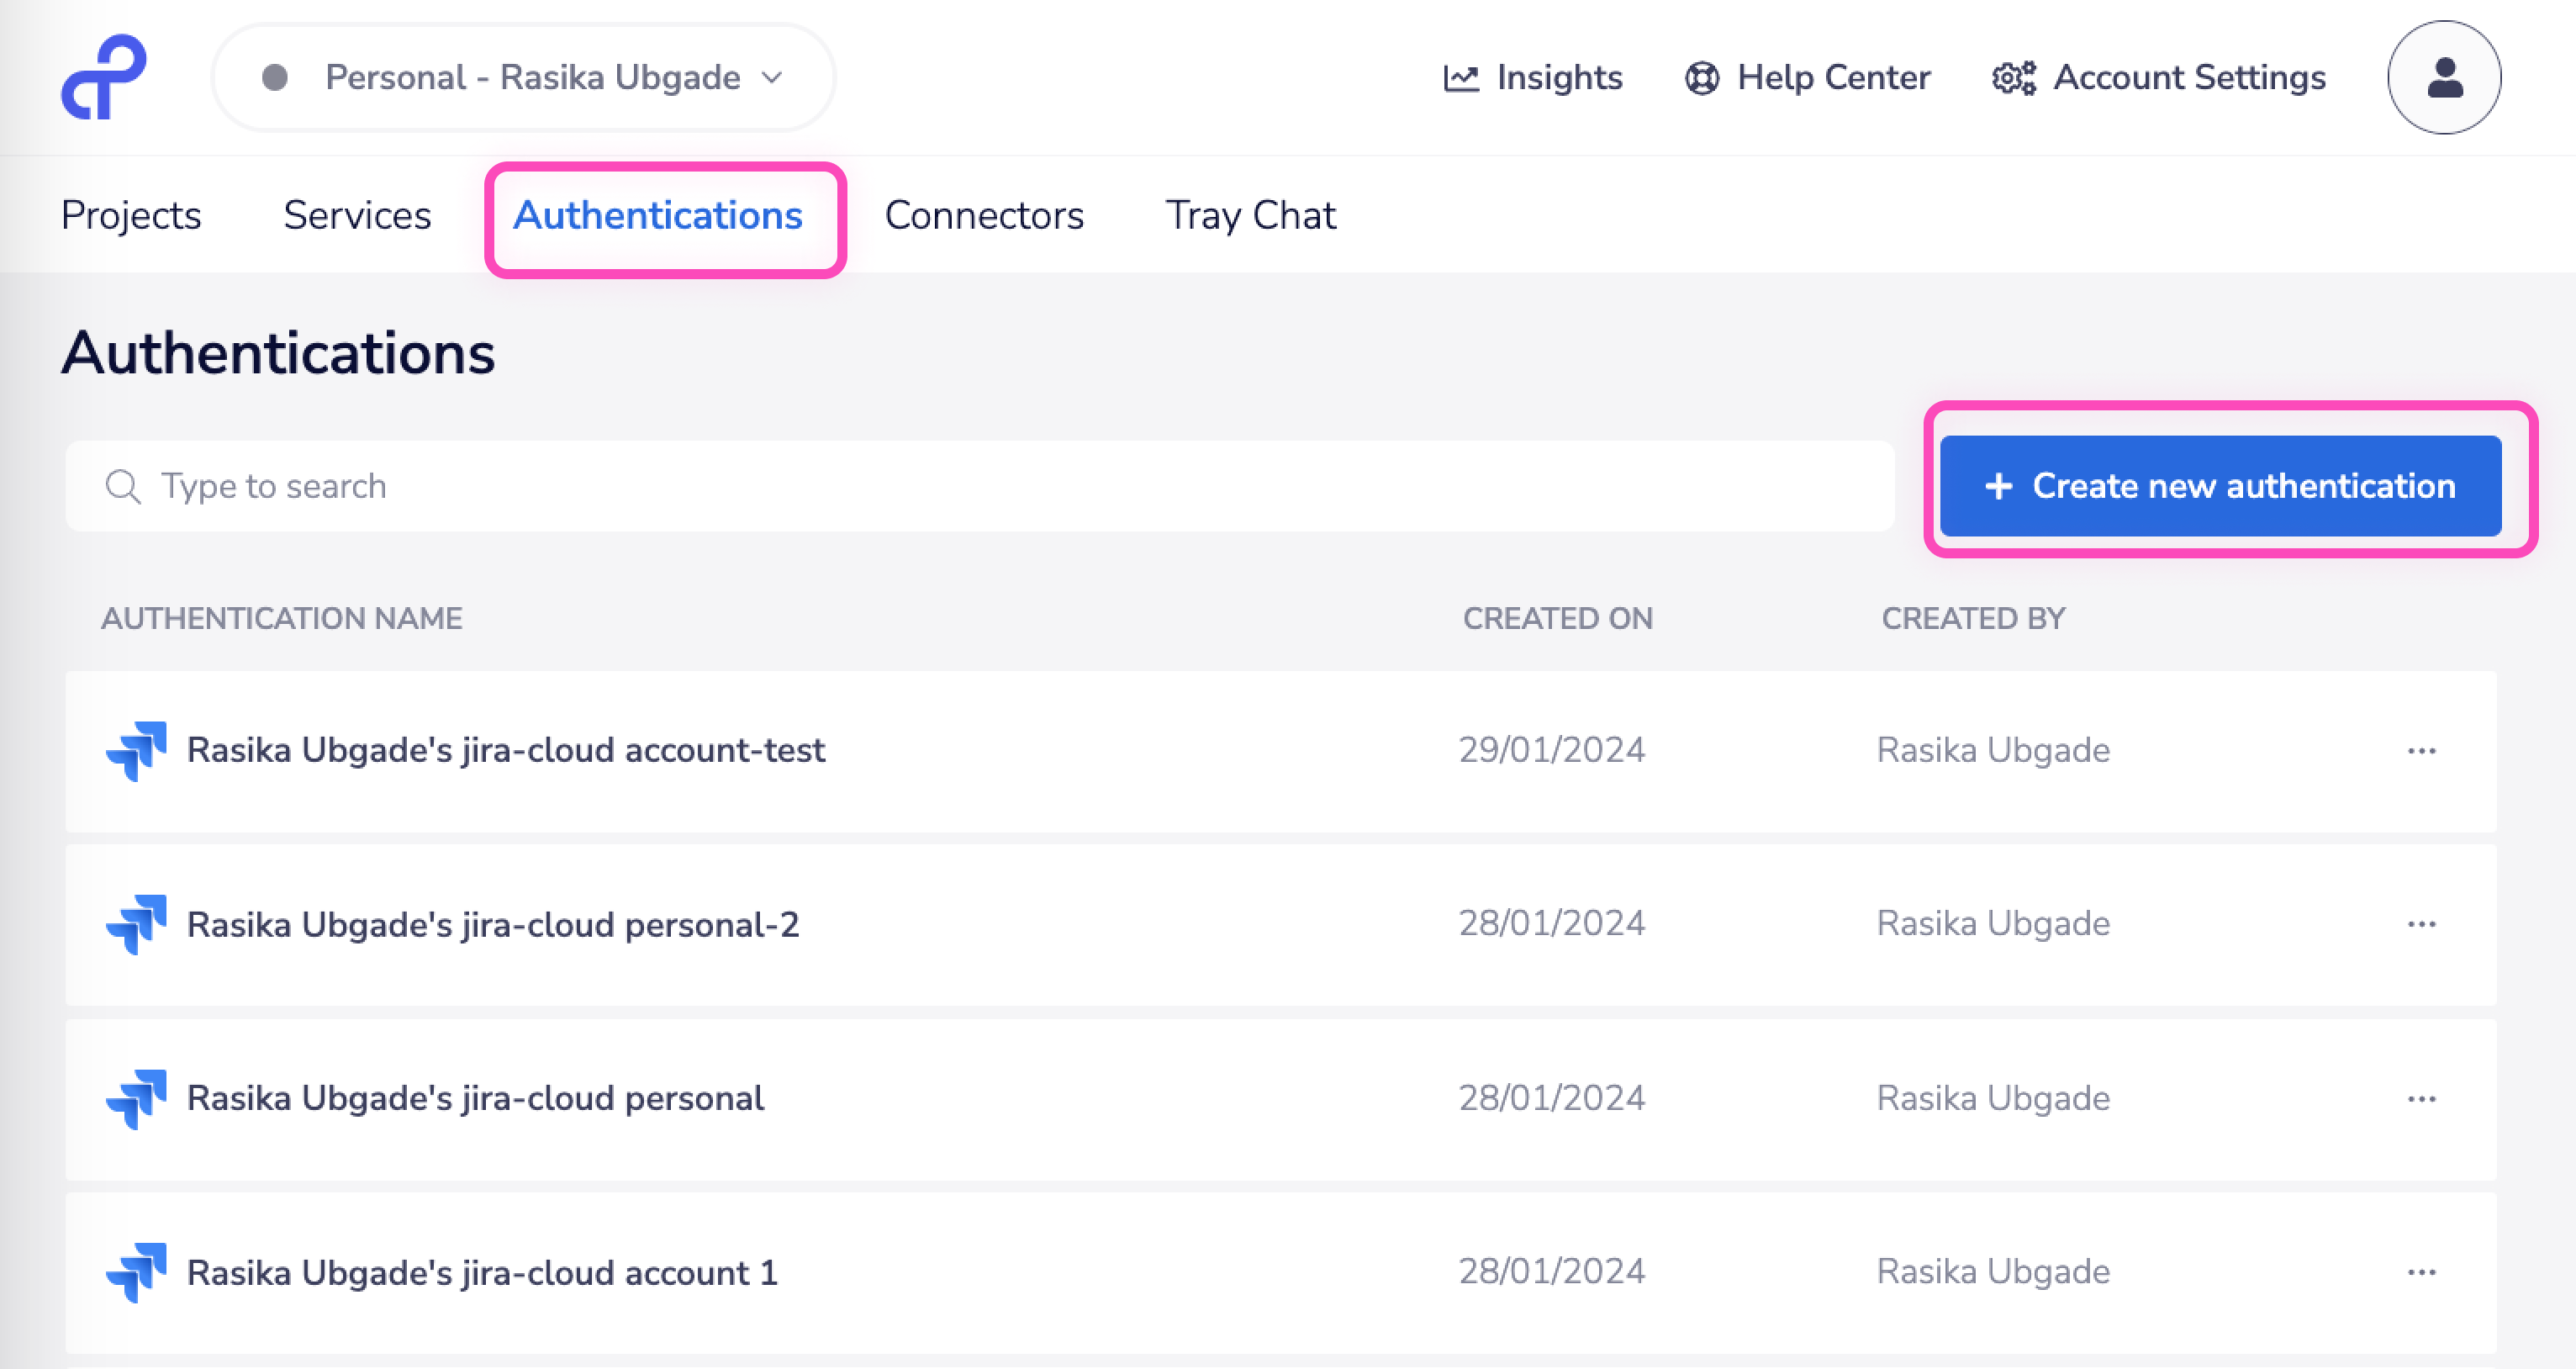
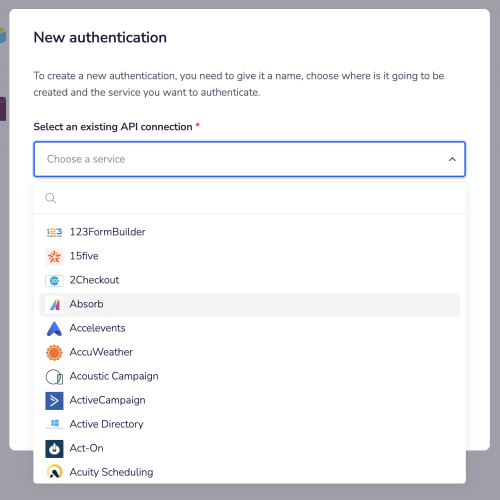
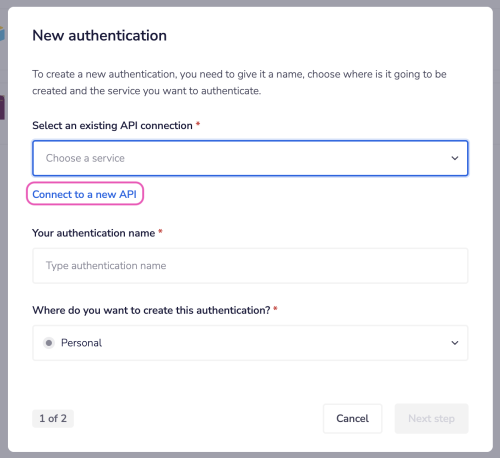
Creating auths from the Dashboard
Within the main Tray dashboard click on the Authentications section. Click Create new authentication.
 Here you will have two options. Do you want to** authenticate with a prebuilt service** or connect to a custom API:
Auth types
Token based
Some API's prefer to use Bearer Tokens as a means for validation. Such as Airtable.
All you need do is add your token to the form when the property is presented:
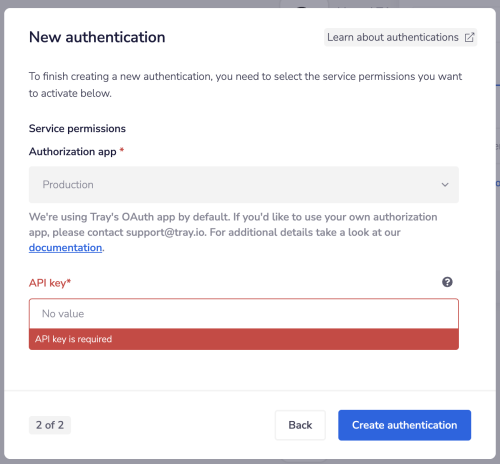
OAuth2
APIs that use OAuth or OAuth2 display a more complex box. From here you can reduce the permission 'scopes'.
Be careful - reducing the scopes might prevent the connector from functioning properly (required scopes are described in individual connector docs).
Please take note that every connector authentication window is unique! There are many variables involved that are dependant on the service's own requirements and API calls.
Individual service connector documentation gives more specific details on how to set up a connector's authentication.
PLEASE NOTE: Tray does support OAuth (or OAuth 1) authentications, we simply don't recommend them due to the security risk they might impose.
Certificate-based Authentication
Tray can also support certificate-based authentications. Please contact us if you need a custom certificate-based authentication built for your service.
Viewing auth details
From the three-dot menu next to an authentication, select Info to open an information page for that auth, showing:
- Its name, ID, and the service it authenticates against.
- The scopes granted to it.
- A searchable list of workflows using this authentication.
From this page you can also update the authentication's settings or delete it.
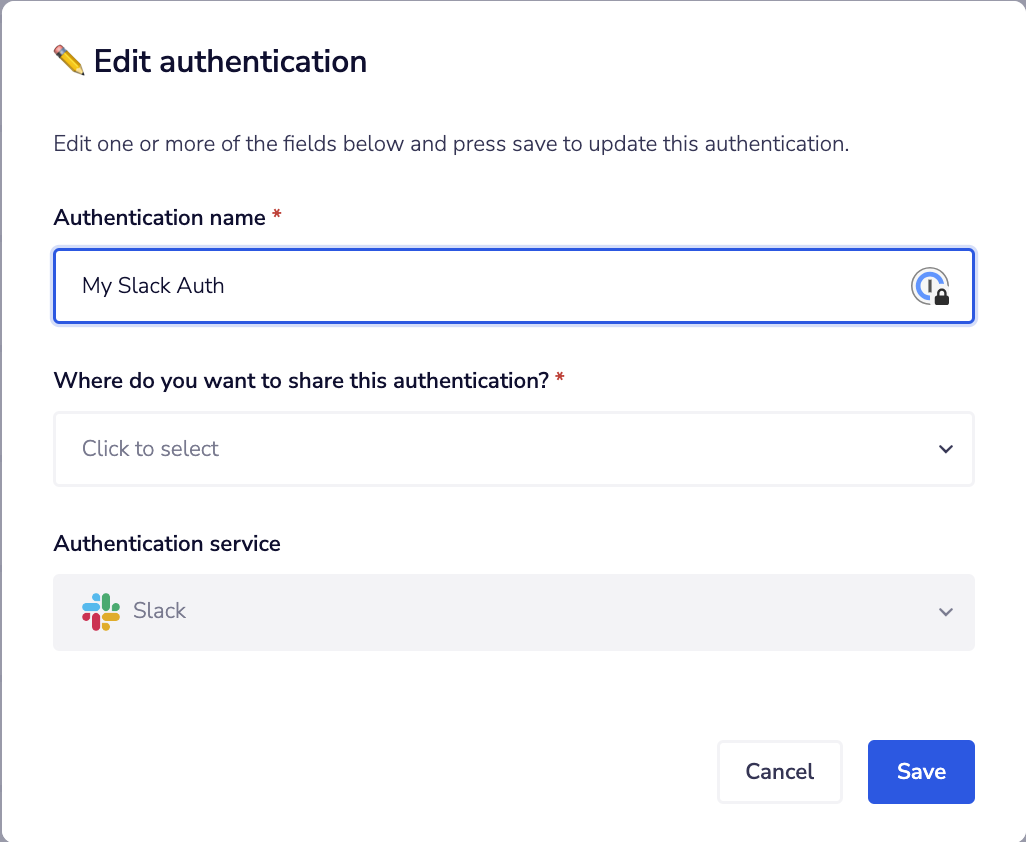
Editing basic auth details
Once created, you can edit the basic details of the authentications you have provided you have the right access levels.
This includes the name of the authentication and the workspace it is part of.
Updating auth settings
You can change the settings and access of authentications created previously - i.e. the parameters you gave said authentication earlier or when it was originally created.
From the 'Authentications' section of the main dashboard next to the authentication in question, select the 'Settings' option from the 'Options' icon.
This step will ask you to re-authenticate as all changes and access to your tools will have to be verified.
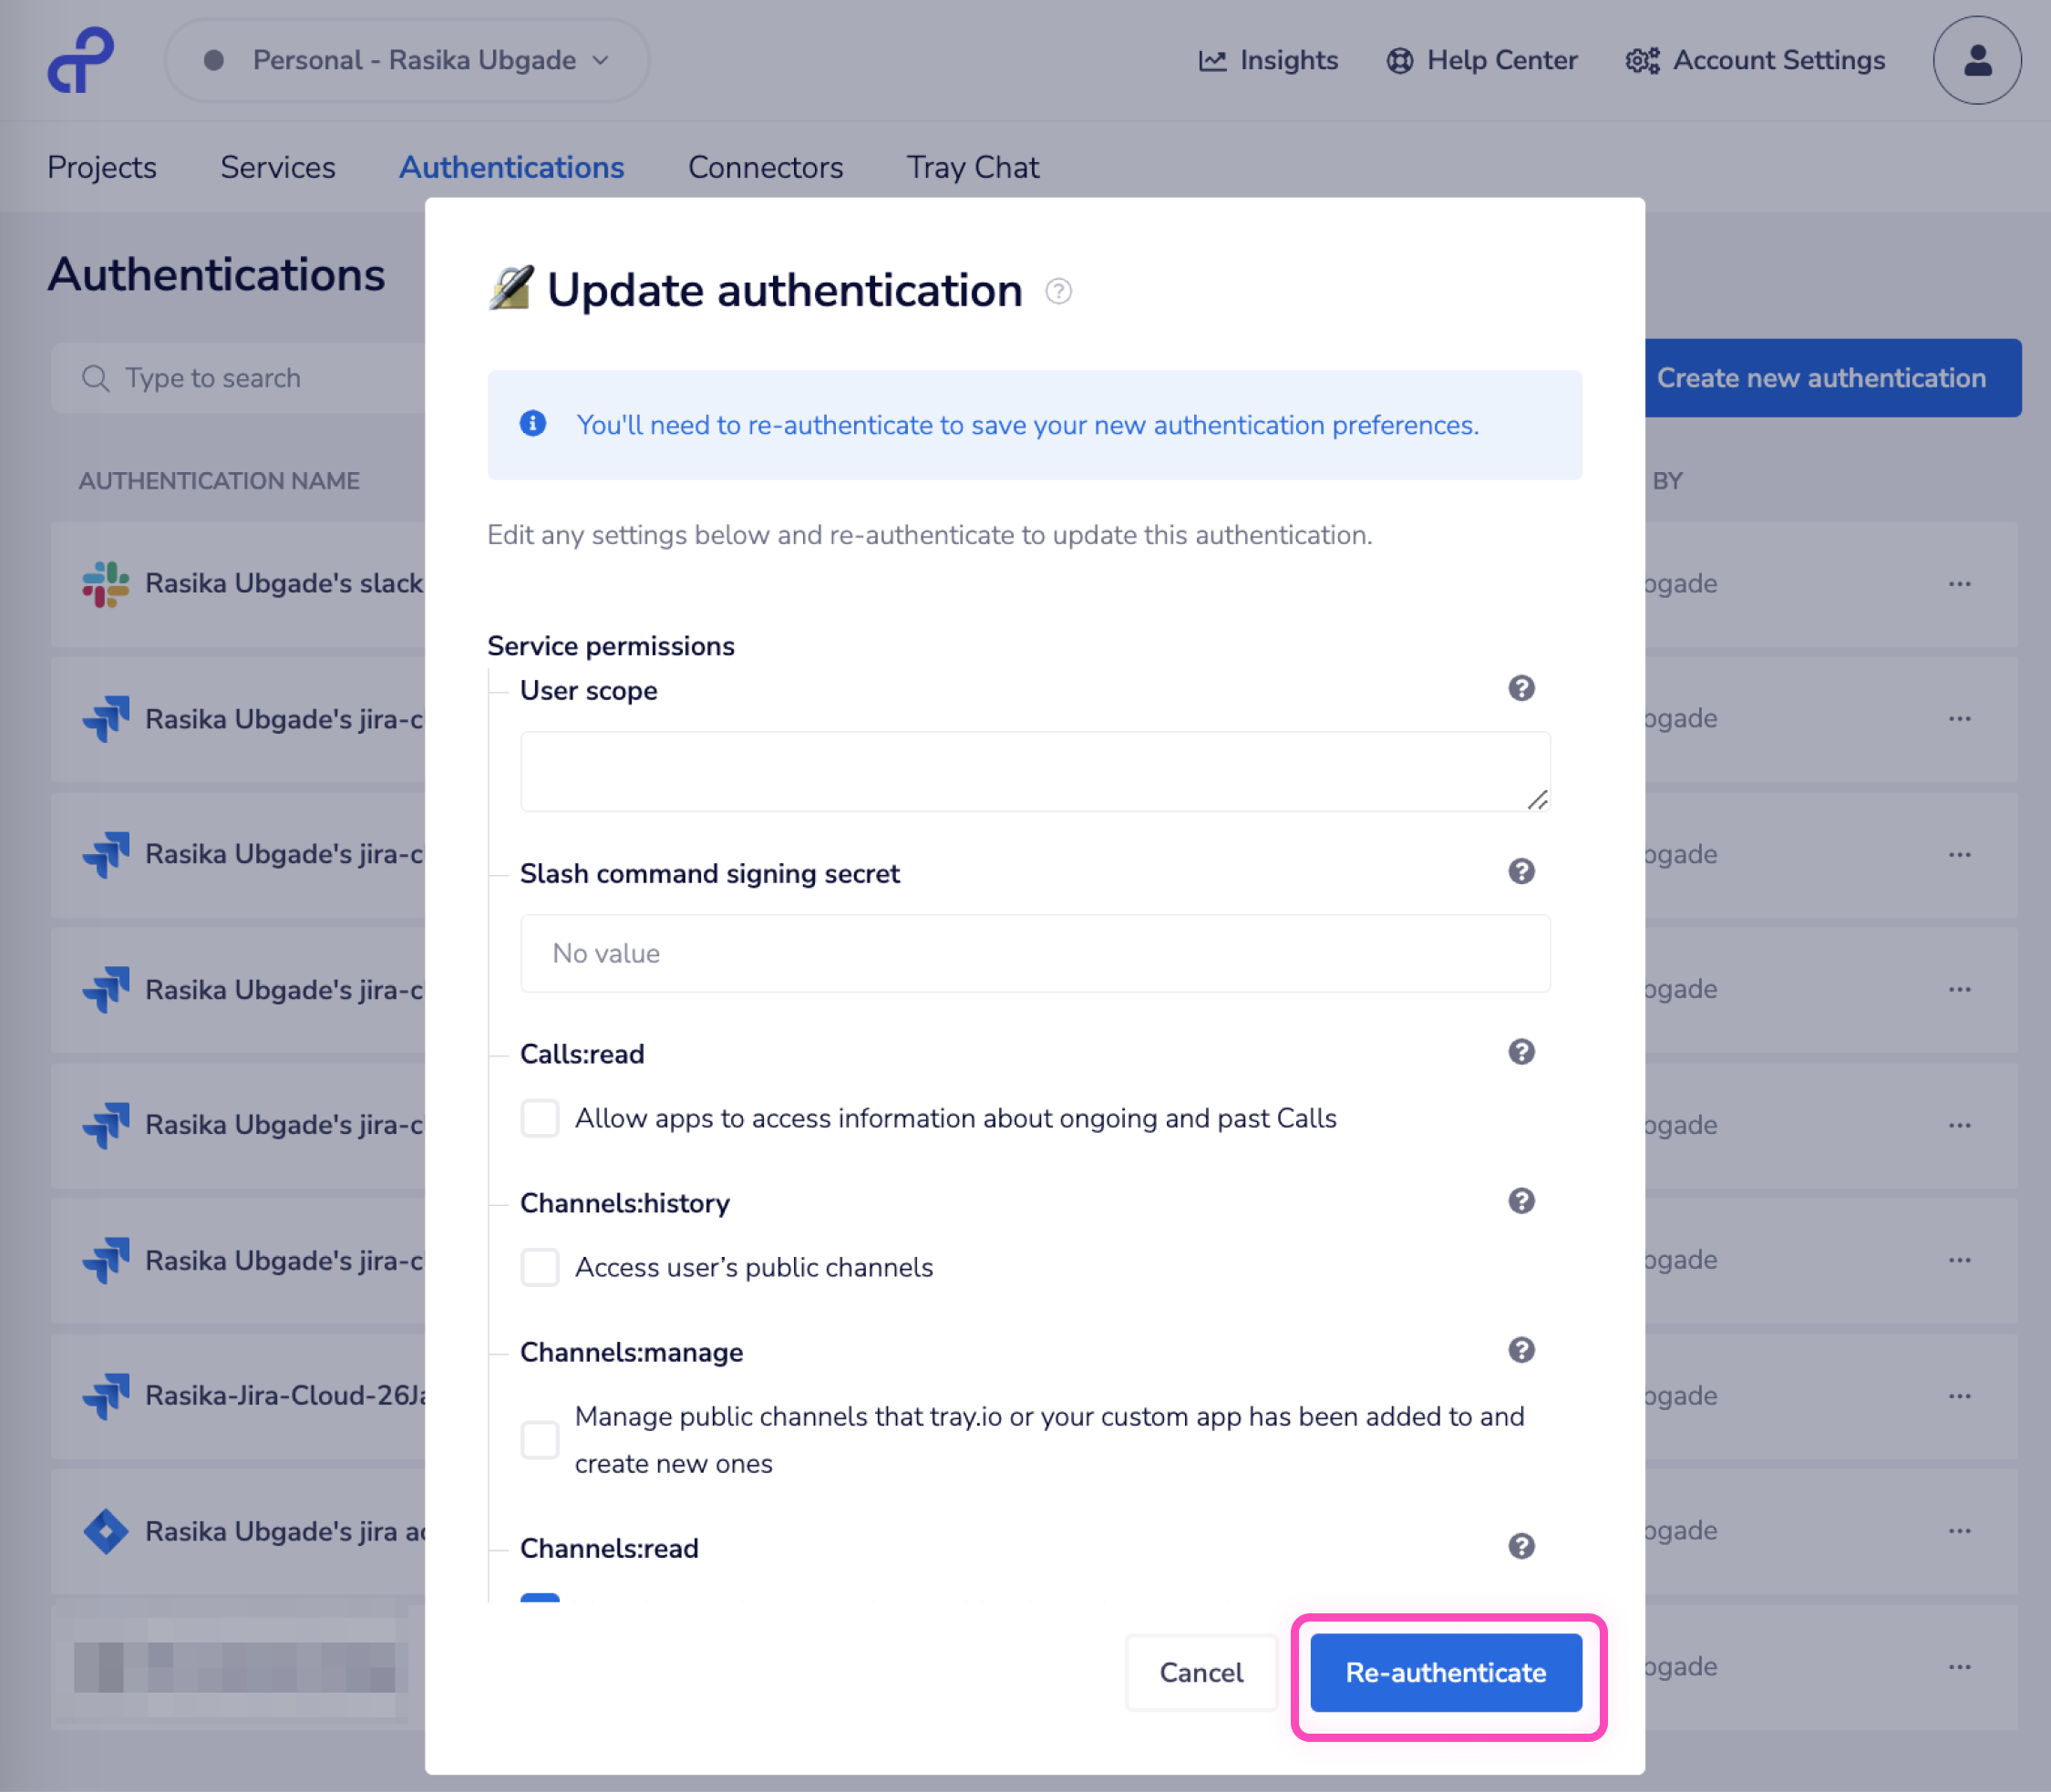 You can also edit the actual authentication credentials itself, such as:
- The custom domain of the app.
- The API key associated with the app.
- The OAuth scopes (i.e. specific 'read/write' permissions to different parts of the service). Note that when doing this:
- Changes you make will override existing values.
- Previously-saved sensitive authentication information will not be displayed.
Creating new Services
If you need to connect to a third party service (for when there is no pre-existing Tray connector) there are three ways in which you can do this:
- Generic Service Authentication - (token based authentications)
- Create a new service and auth (via the HTTP client or authentications dashboard)
- Create a new service only (for which authentications can later be made)
You cannot use Generic Service Authentication with complex token-based and Oauth-based authentications. In such cases, we recommend creating a new service.
Consider a scenario where you want to launch a modal in slack when a /test-referral command is fired in Slack. To launch the modal you need to use an HTTP Client connector.
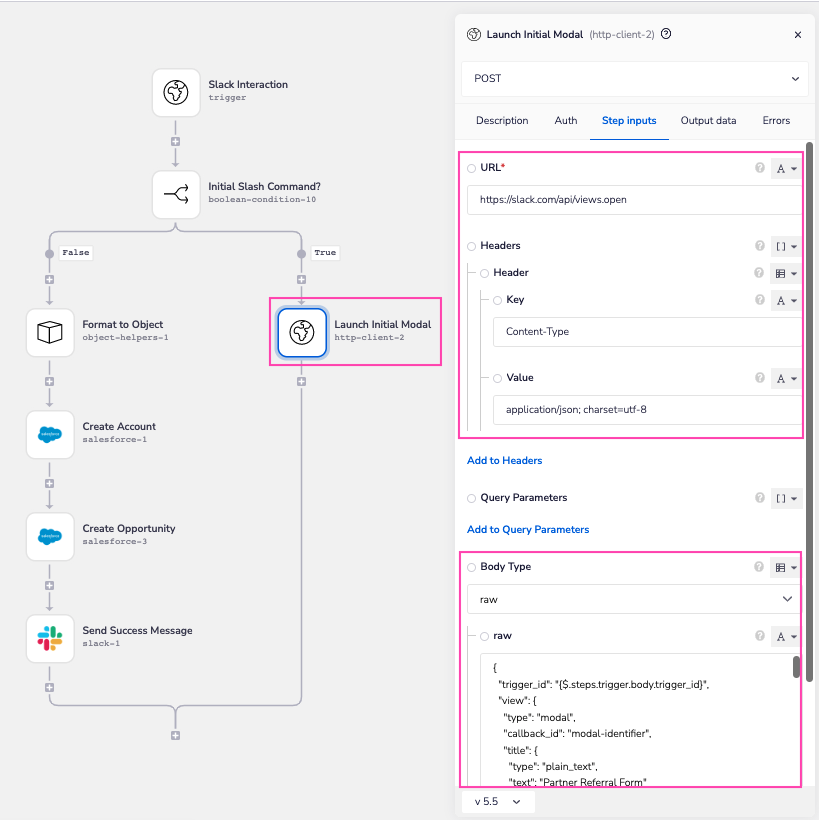 To authenticate the HTTP Client with the required Slack app you can use the Generic Service authentication method.
For security purposes, be careful when you create a Generic service auth in an organization workspace as it will be accessible to everyone in your organisation.
Generic Service Authentication
This method is useful for any third party service that uses token auths (example: Basic auth). Apart from this, you can also use generics service auth for:
- Webhook trigger - to securely store a CSRF token
- File helpers - to secure any credentials that maybe used in a file http request header. and any connector that may want to have sensitive data passed externally. Follow the step by step guide below to add Generic service auth in HTTP Client connector:
Create a Service & Auth
There are essentially two routes for doing this.
- Go to your Personal workspace and select the main Tray Authentications tab. Click 'Create new authentication'.
- Note that you will not be able to create an authentication AND a service at the same time within any other workspace.
- The other route is via the HTTP connector within the builder itself.
- See the Custom Services page for more details on what can be done with the HTTP connector.
Create a Service only
To reference a service when creating an authentication with the HTTP Client you can for example, choose a name for your auth token and then enter the actual token value.
This auth token can then be used in your API call (for example, as a parameter) by including the path $.auth.token_name.
Please see the Custom Services guide for an illustration of how this generic approach works.