API Operations
How to create endpoints for your packaged APIs
The API Operation trigger
In order to create endpoints for your API you will need to create an operation that is associated with a workflow which uses the dedicated API operation trigger:
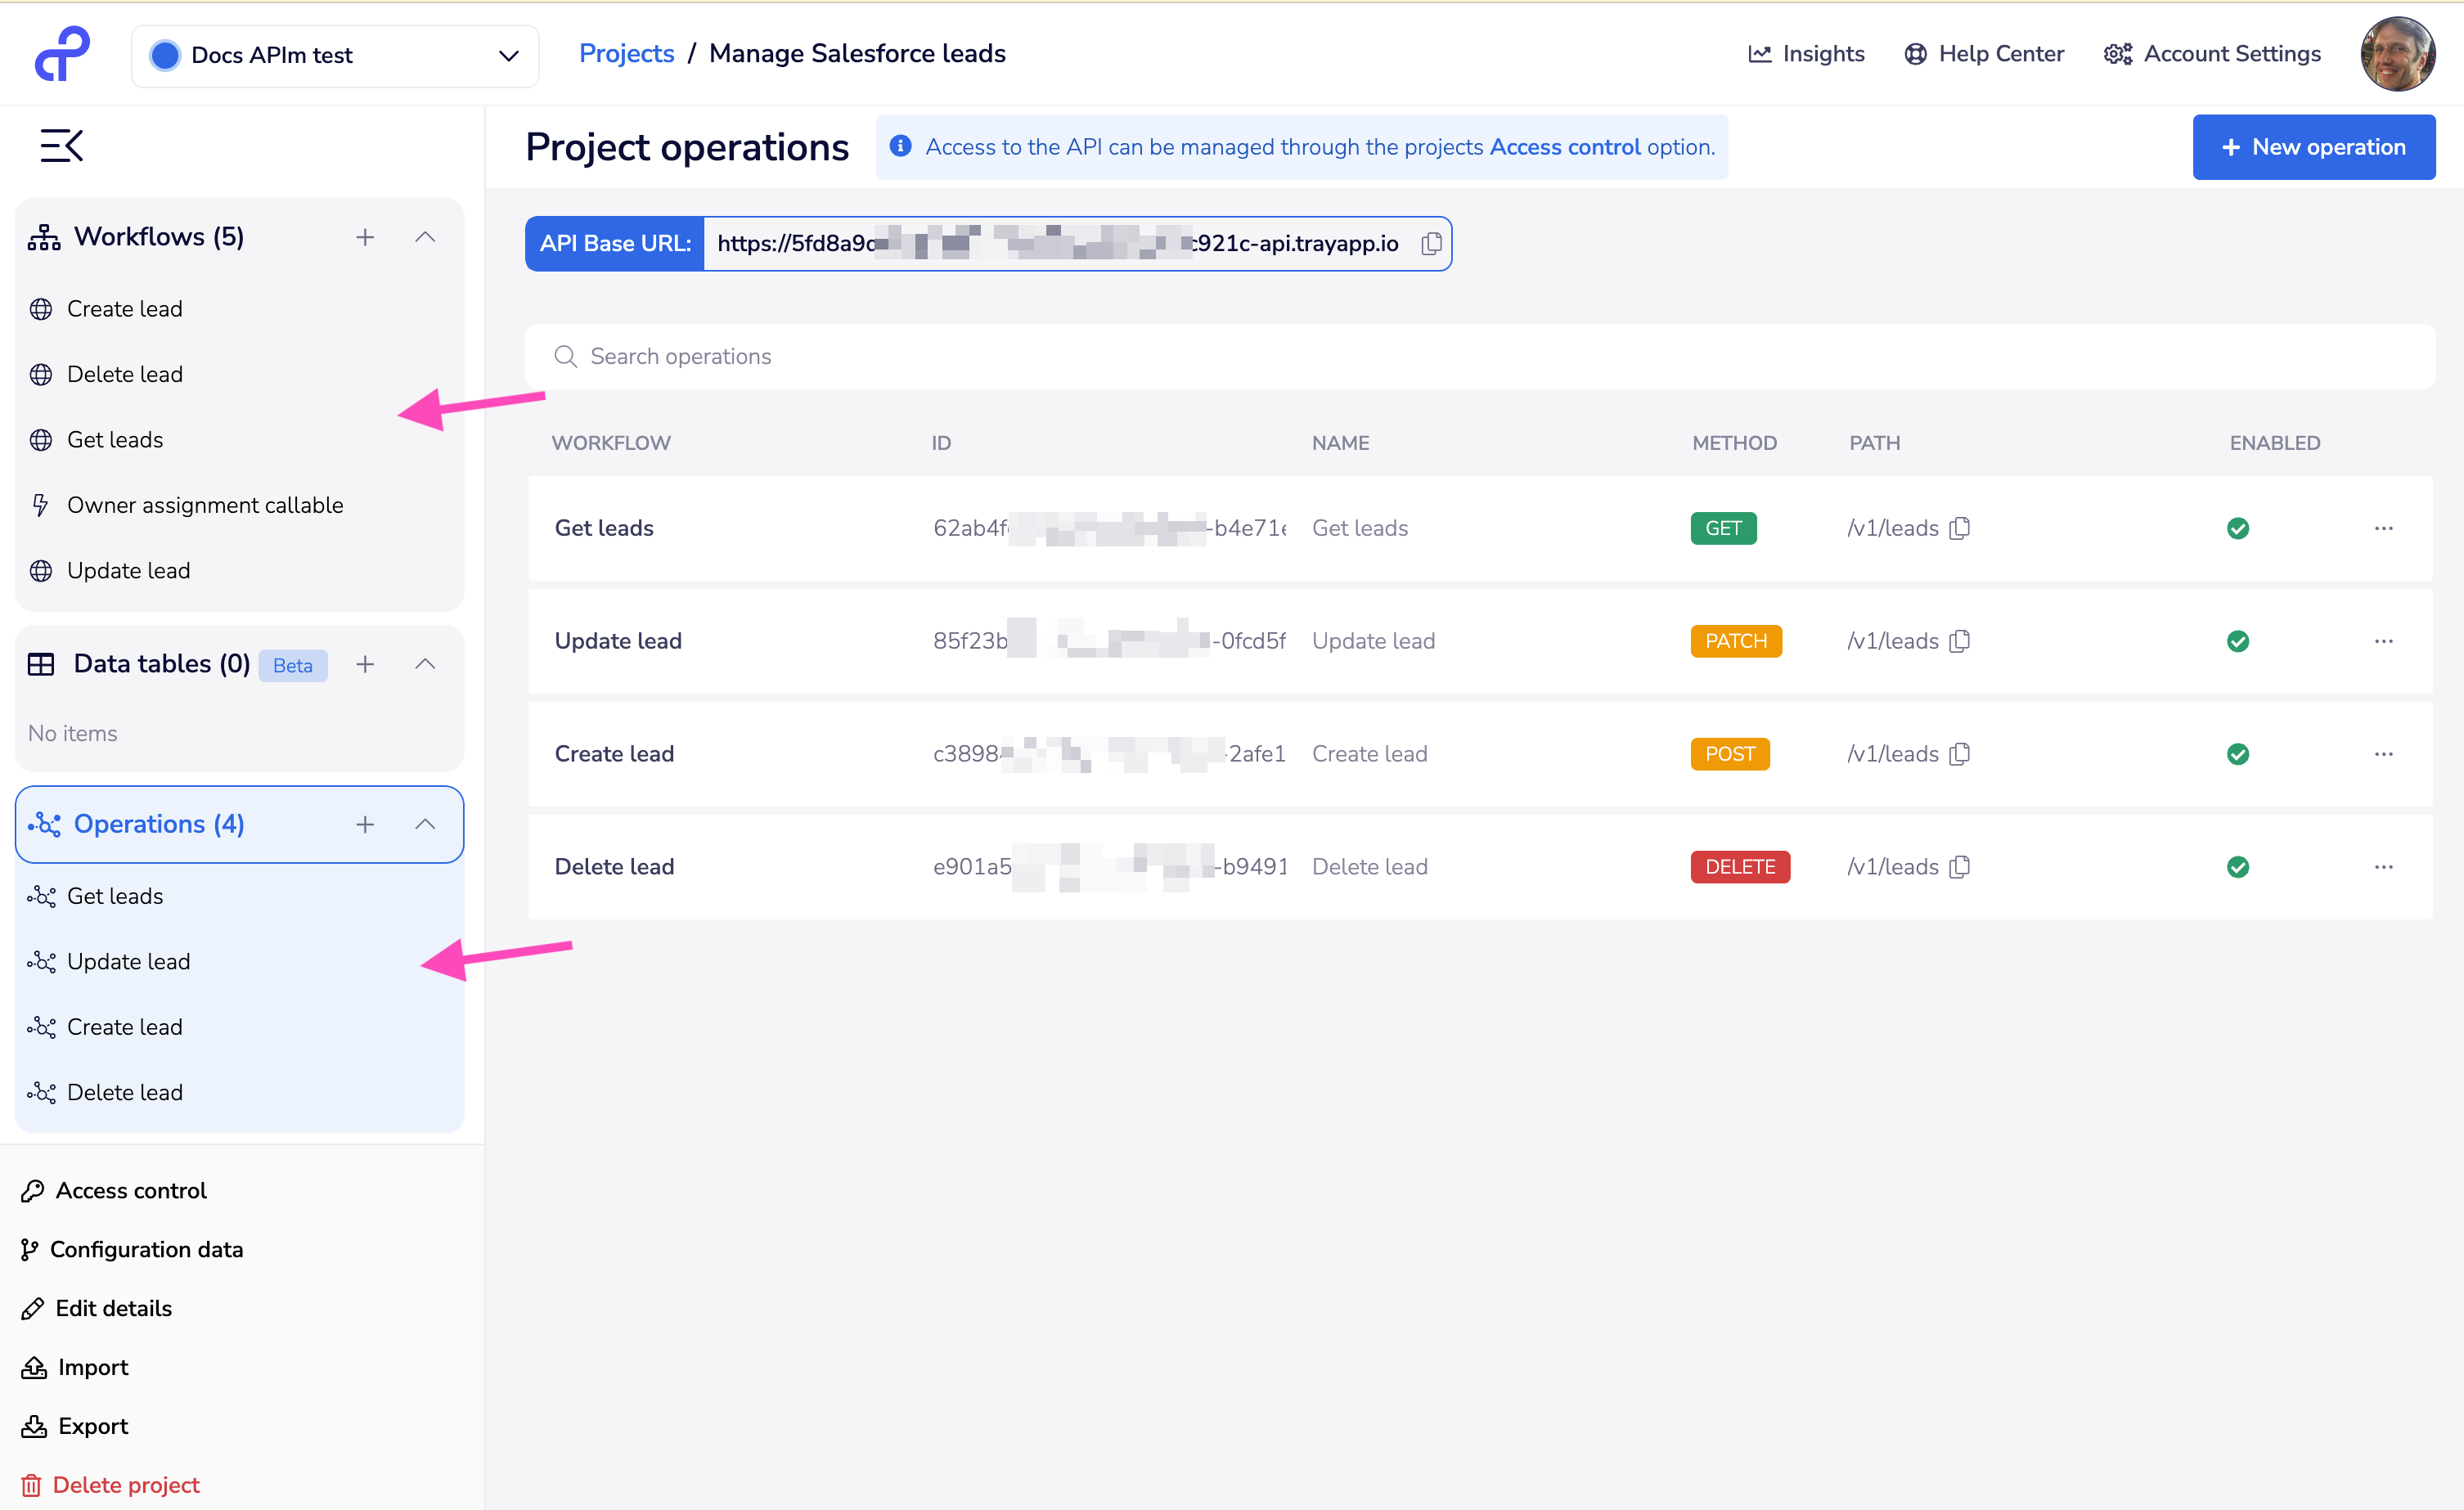
The following screenshot shows an example project which has built a full set of CRUD endpoints making use of API operation-triggered workflows:
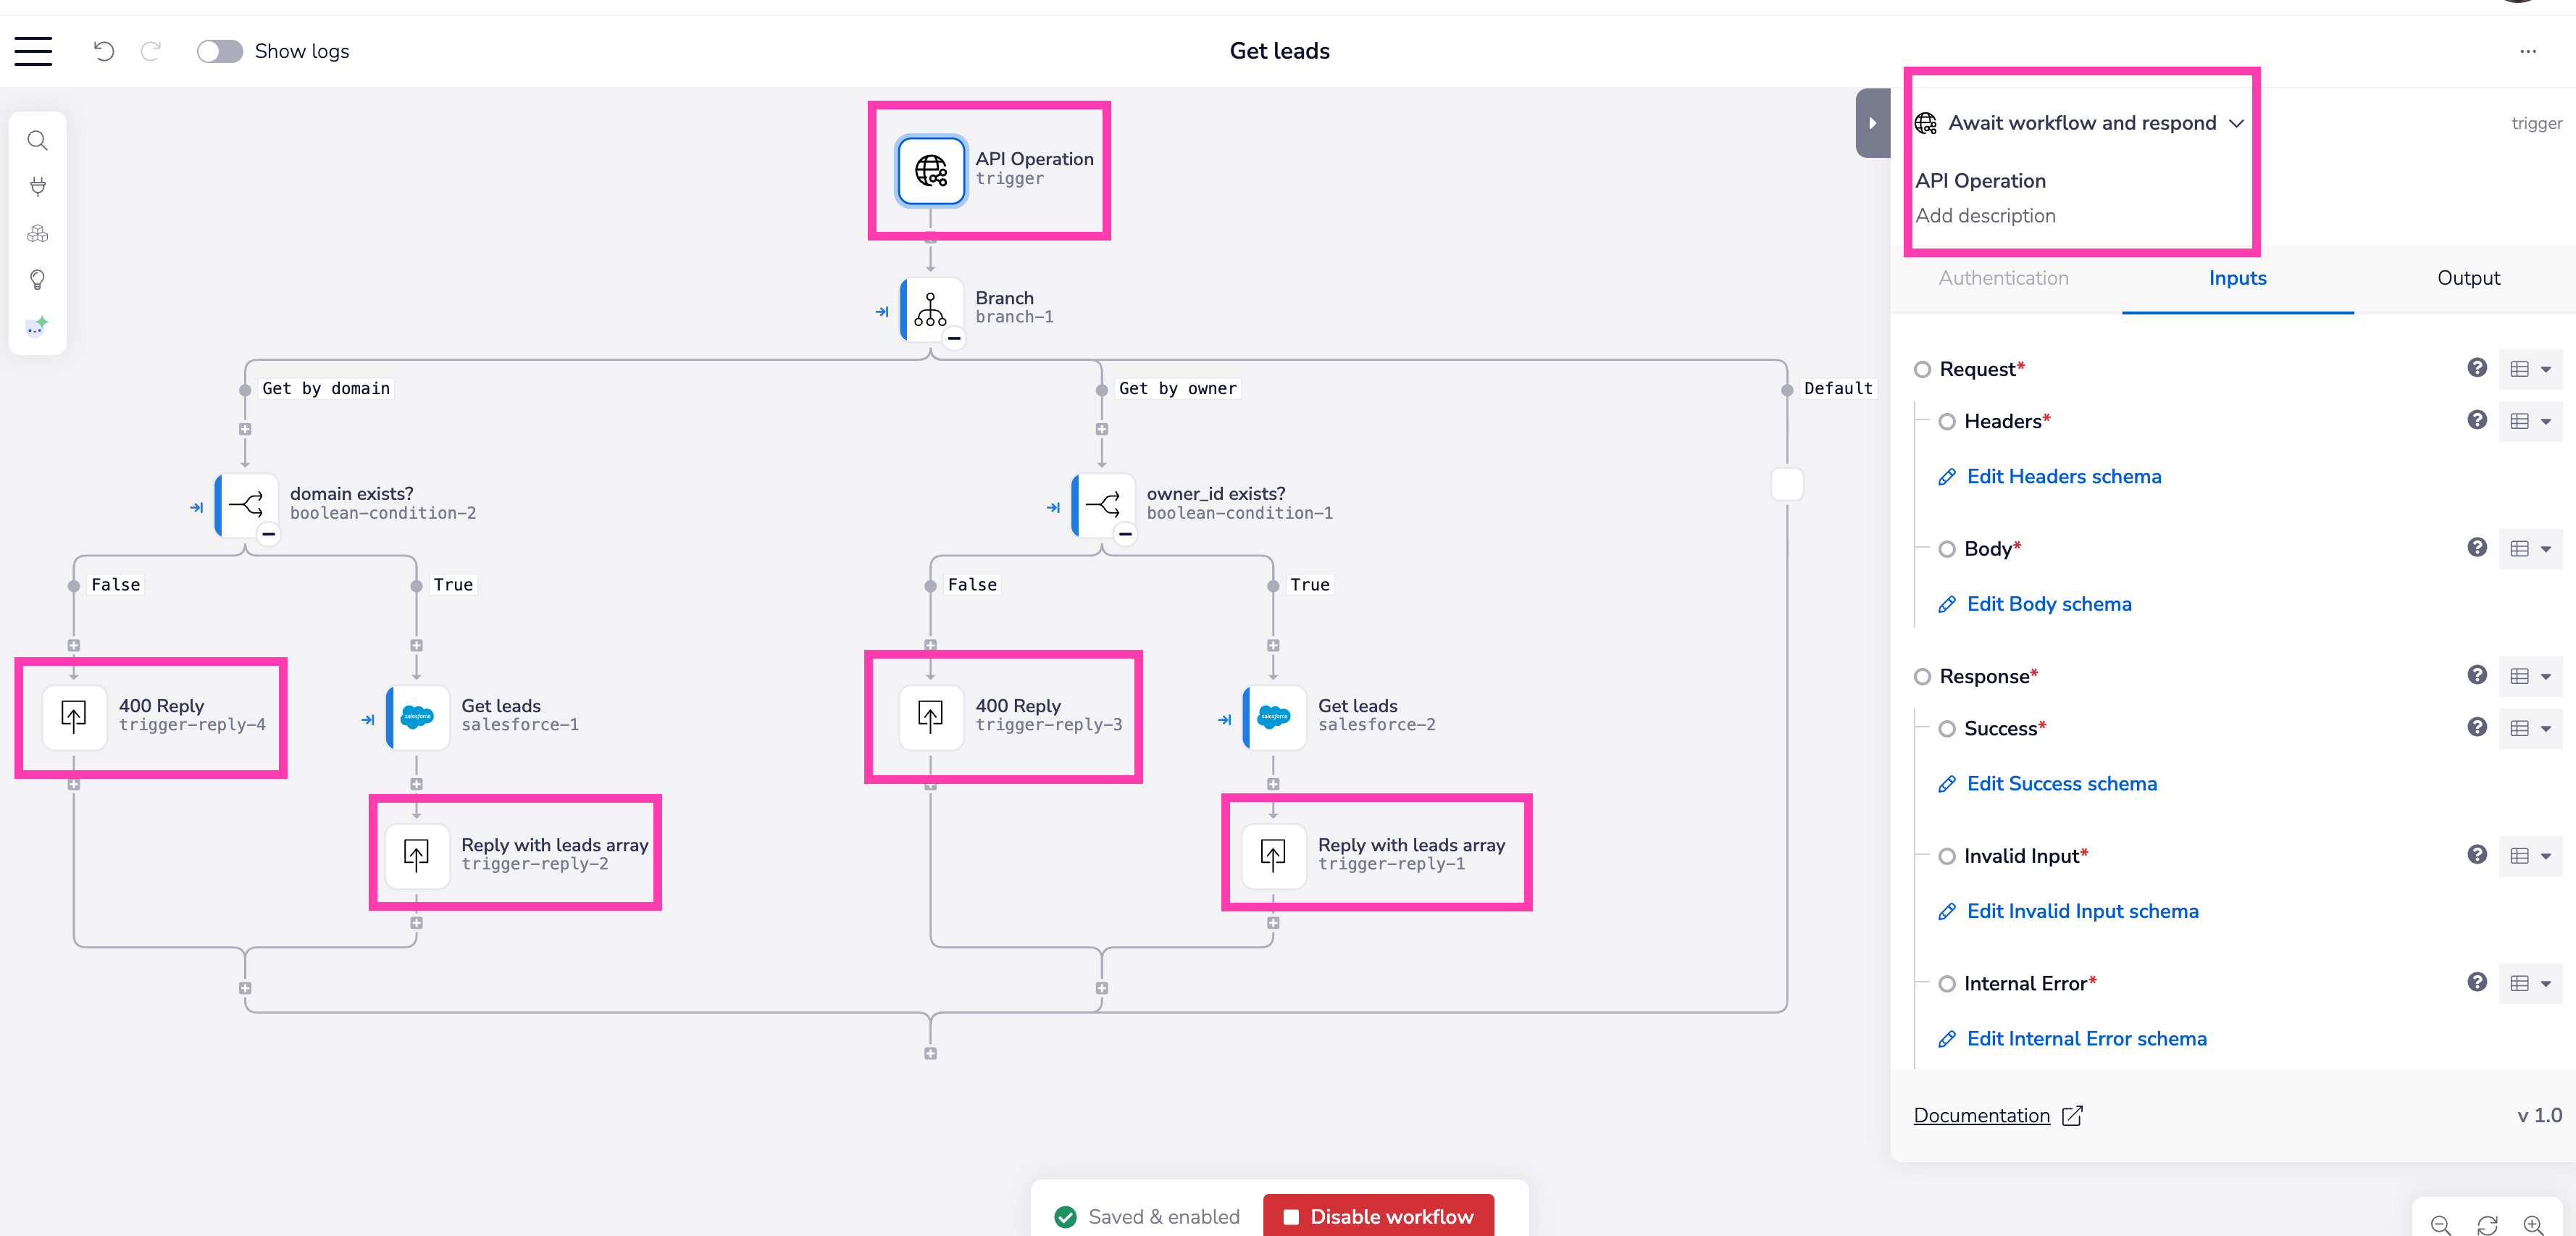
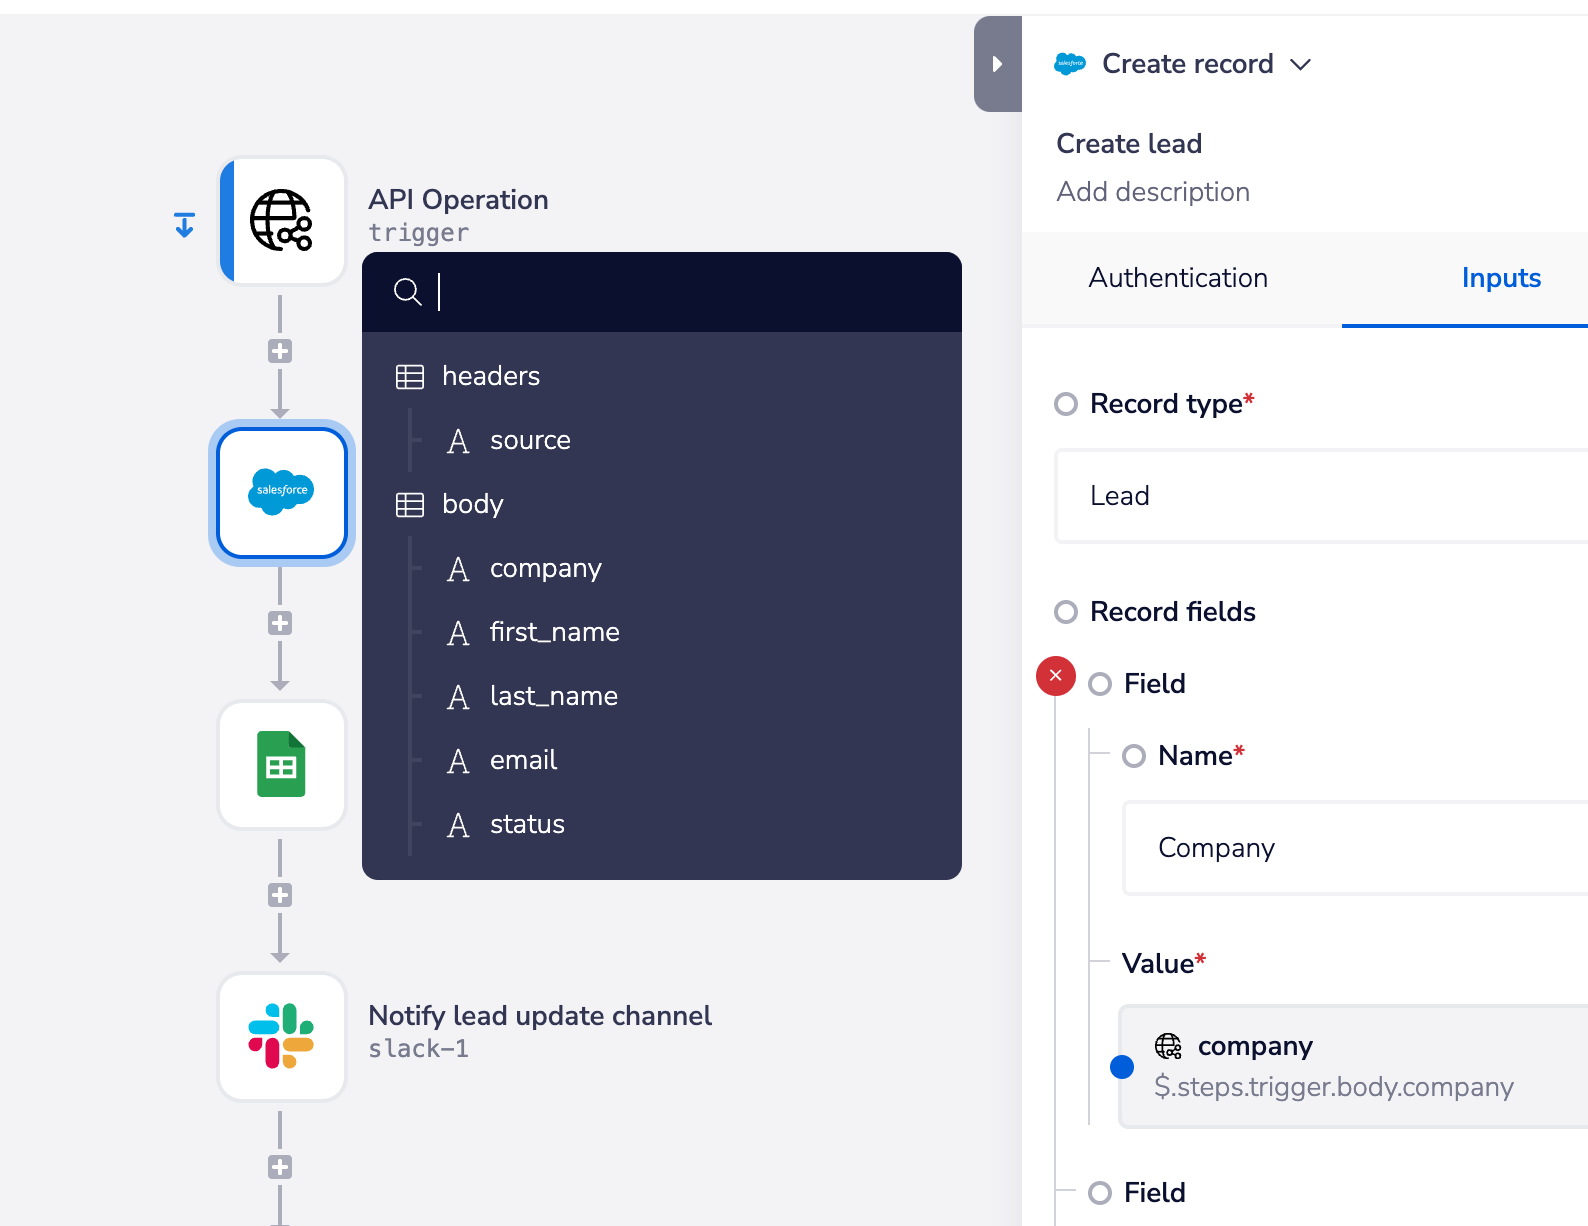
And the following example 'Create lead' workflow shows how you can build whatever intelligence and processes you need into your endpoint workflows - in this case we receive leads, input them to Salesforce, add to a Google Sheets leads tracker, notify a Slack channel and call a lead owner assignment workflow:

An endpoint is linked to a single workflow, but this workflow can deploy multiple callable workflows to carry out the operations involved.
The 'Await workflow and respond' operation
This is the primary operation for the trigger which allows you to fully customize your success and failure responses within the workflow, and respond with relevant data payloads for the sender of the request to consume.
Naturally, this is the 'heaviest' operation in terms of load and processing time.
You should make use of the 'Trigger event reply' connector to send success and failure messages and payloads at appropriate stages of your workflow:
Please see details below on setting success and failure response schemas for correct usage of Trigger event reply.
The 'Validate and respond' operation
This operation will wait until validation is completed, but based only on the fields that have been marked as 'required' in the request header and body schemas.
This would be useful in cases where a job is kicked off and the requester needs confirmation that the job has been successfully started, but does not need confirmation of completion, or any data in return.
The 'Auto respond with HTTP 200' operation
This operation will not perform any validation and will simply confirm that the request has been received.
This would be useful in cases where a job is kicked off and all the requester needs is confirmation that their request has been received.
Setting API endpoint schema
Configuring request body and reply payload
When creating an endpoint you will need to set the endpoint schema.
Primarily this is for:
- The body of the incoming requests
- The payload that is included in the success response
Failure responses (500, 403 etc.) are generally dealt with automatically, but you can customize them as needed by editing their schema and using the Trigger event reply connector.
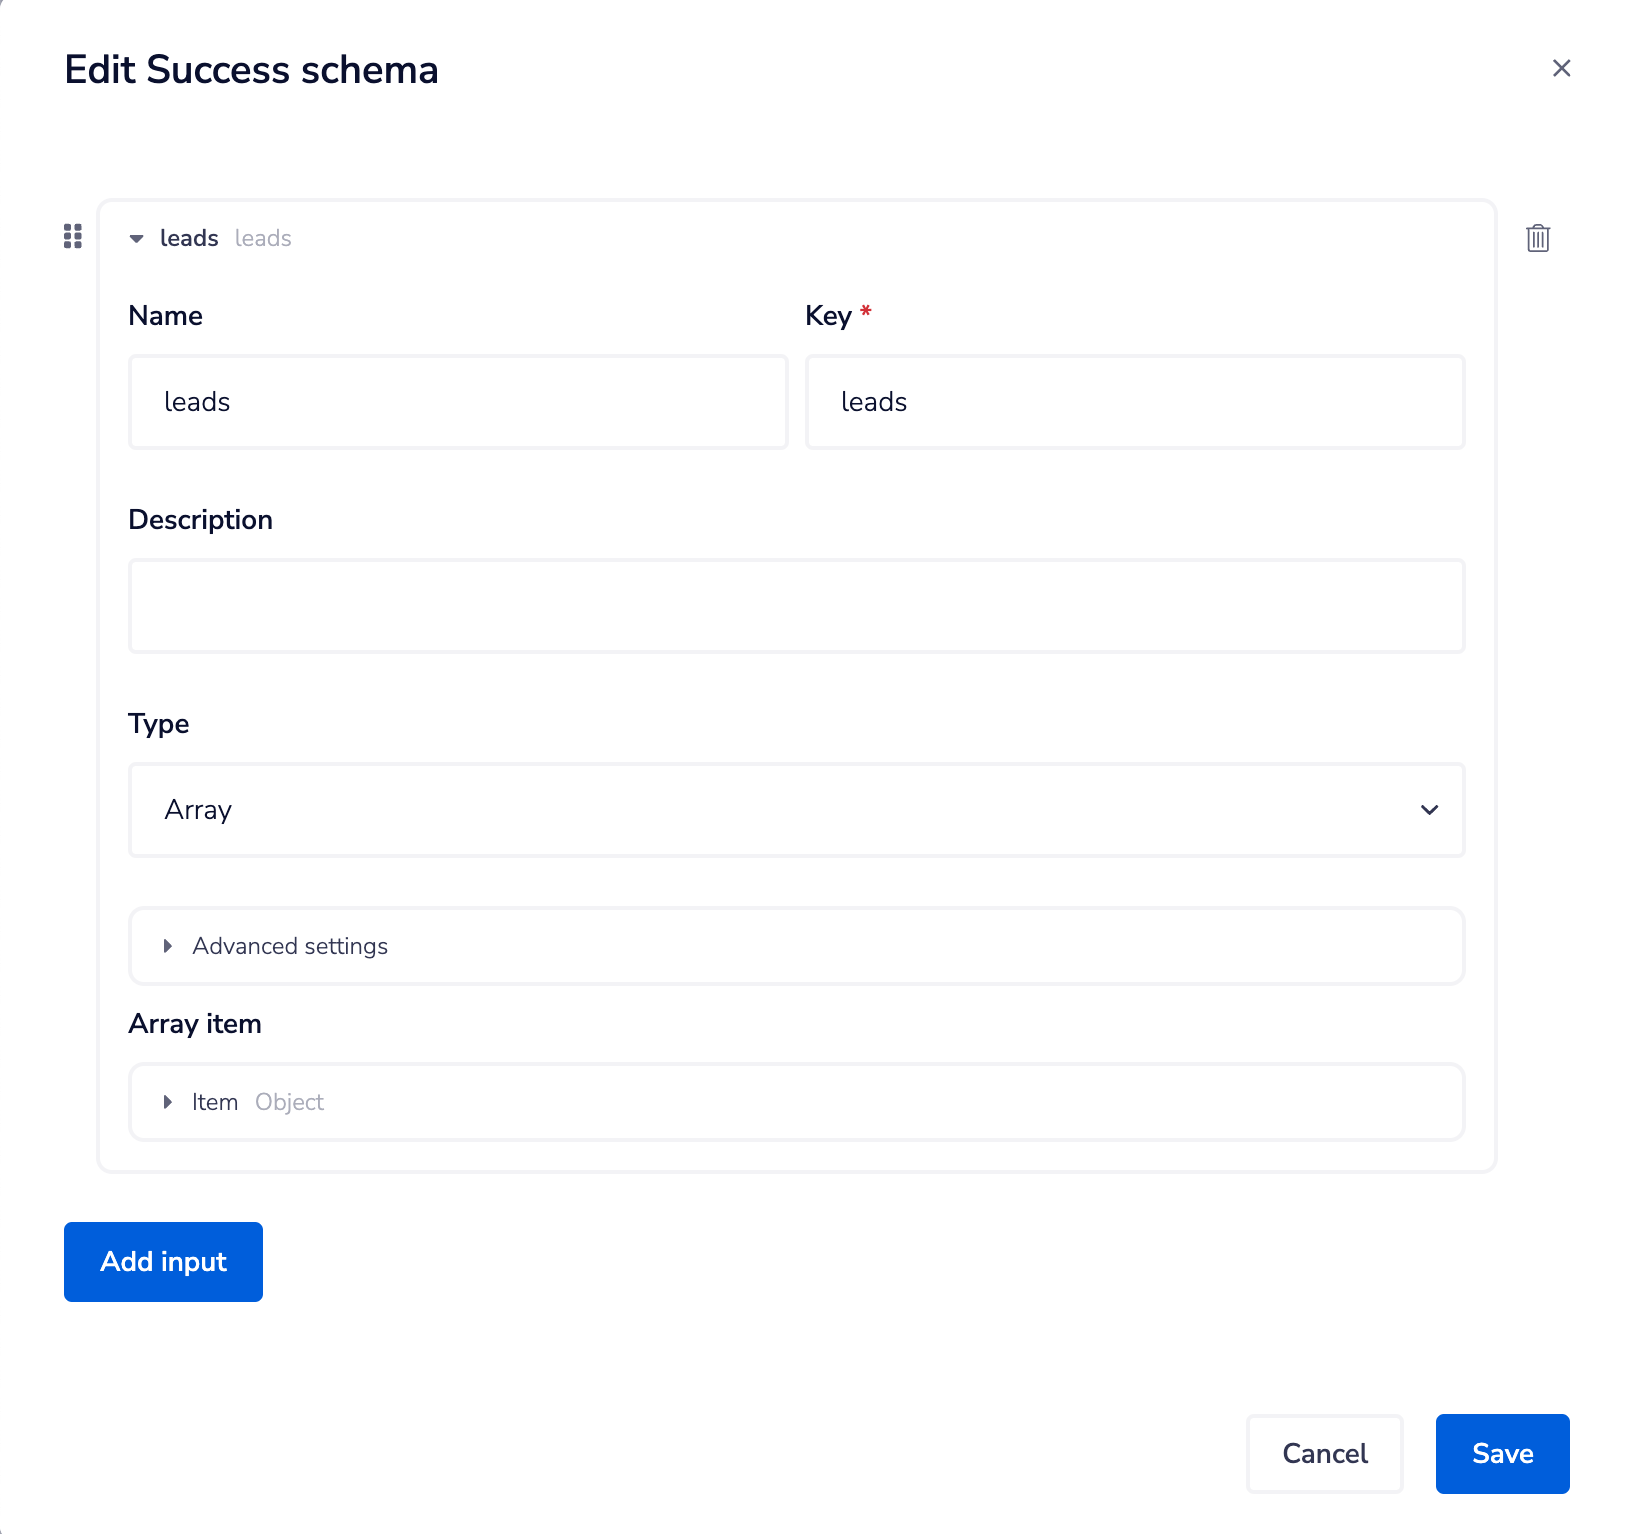
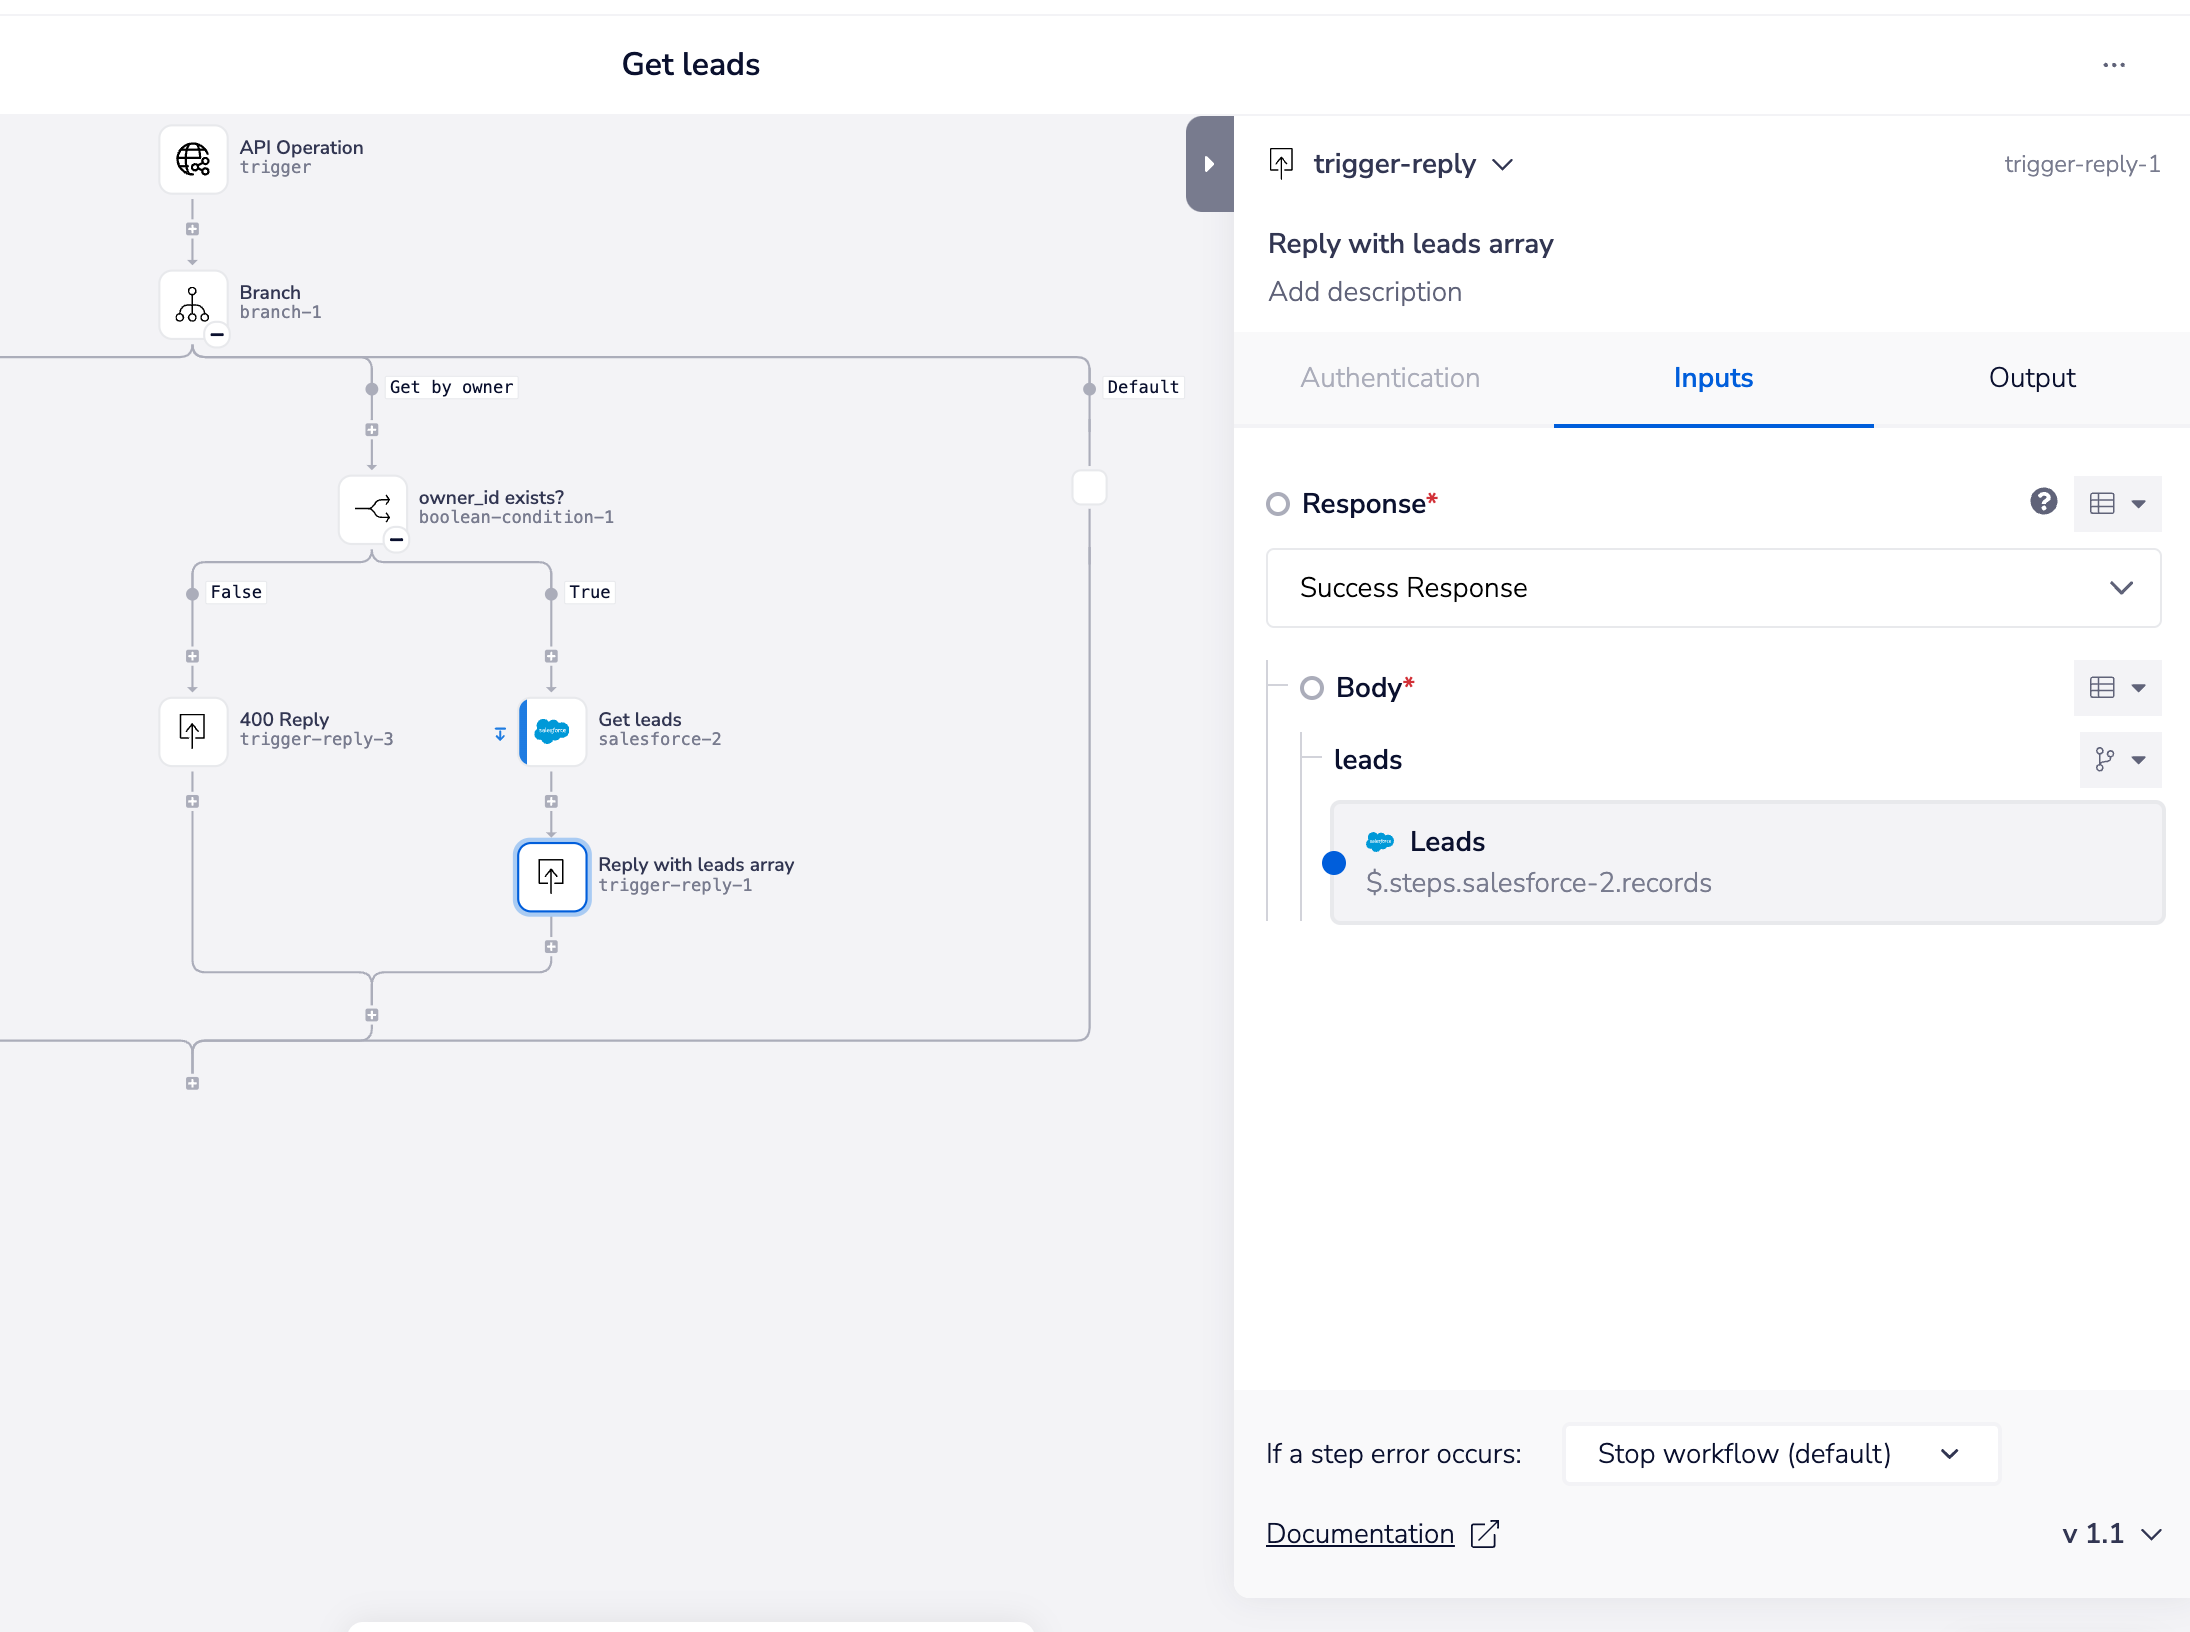
To configure responses to requests, you will need to set the success schema to include e.g. an array of objects that is returned by the key service being called.
Then at appropriate points in your workflow use the Trigger event reply connector to pull in the results from the appropriate connectors and send the reply to the user.

Each item in the schema can be:
- Given a data type
- Marked as required
Note that the presence of a pencil icon indicates that fields have already been set for a particular schema, while a + indicates that no fields have yet been set:
![]()
Request schema - headers
Note that this is only for setting custom headers.
For example you may wish to specify a 'source' header which can be passed with any queries made to an endpoint and then consumed for reporting purposes in your workflow:
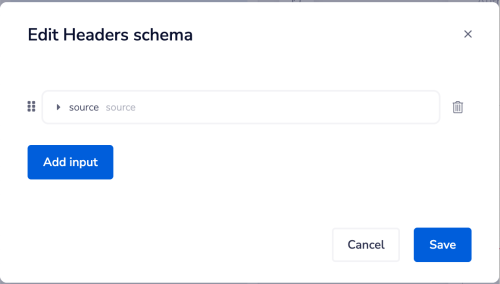
You do not need to add standard headers such as 'Authorization' or 'Content-type'.
Authorization is turned on by default for all endpoints.
Tokens will need to be passed as a bearer using the 'Authorization' header, but you do not need to set that here.
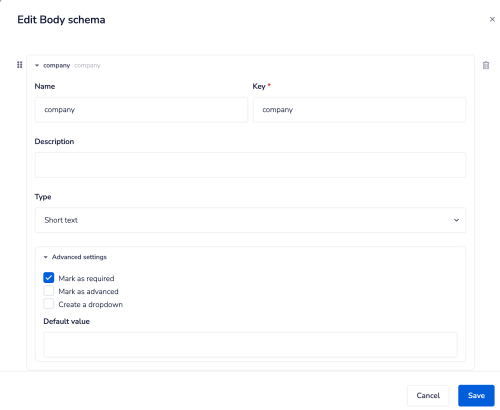
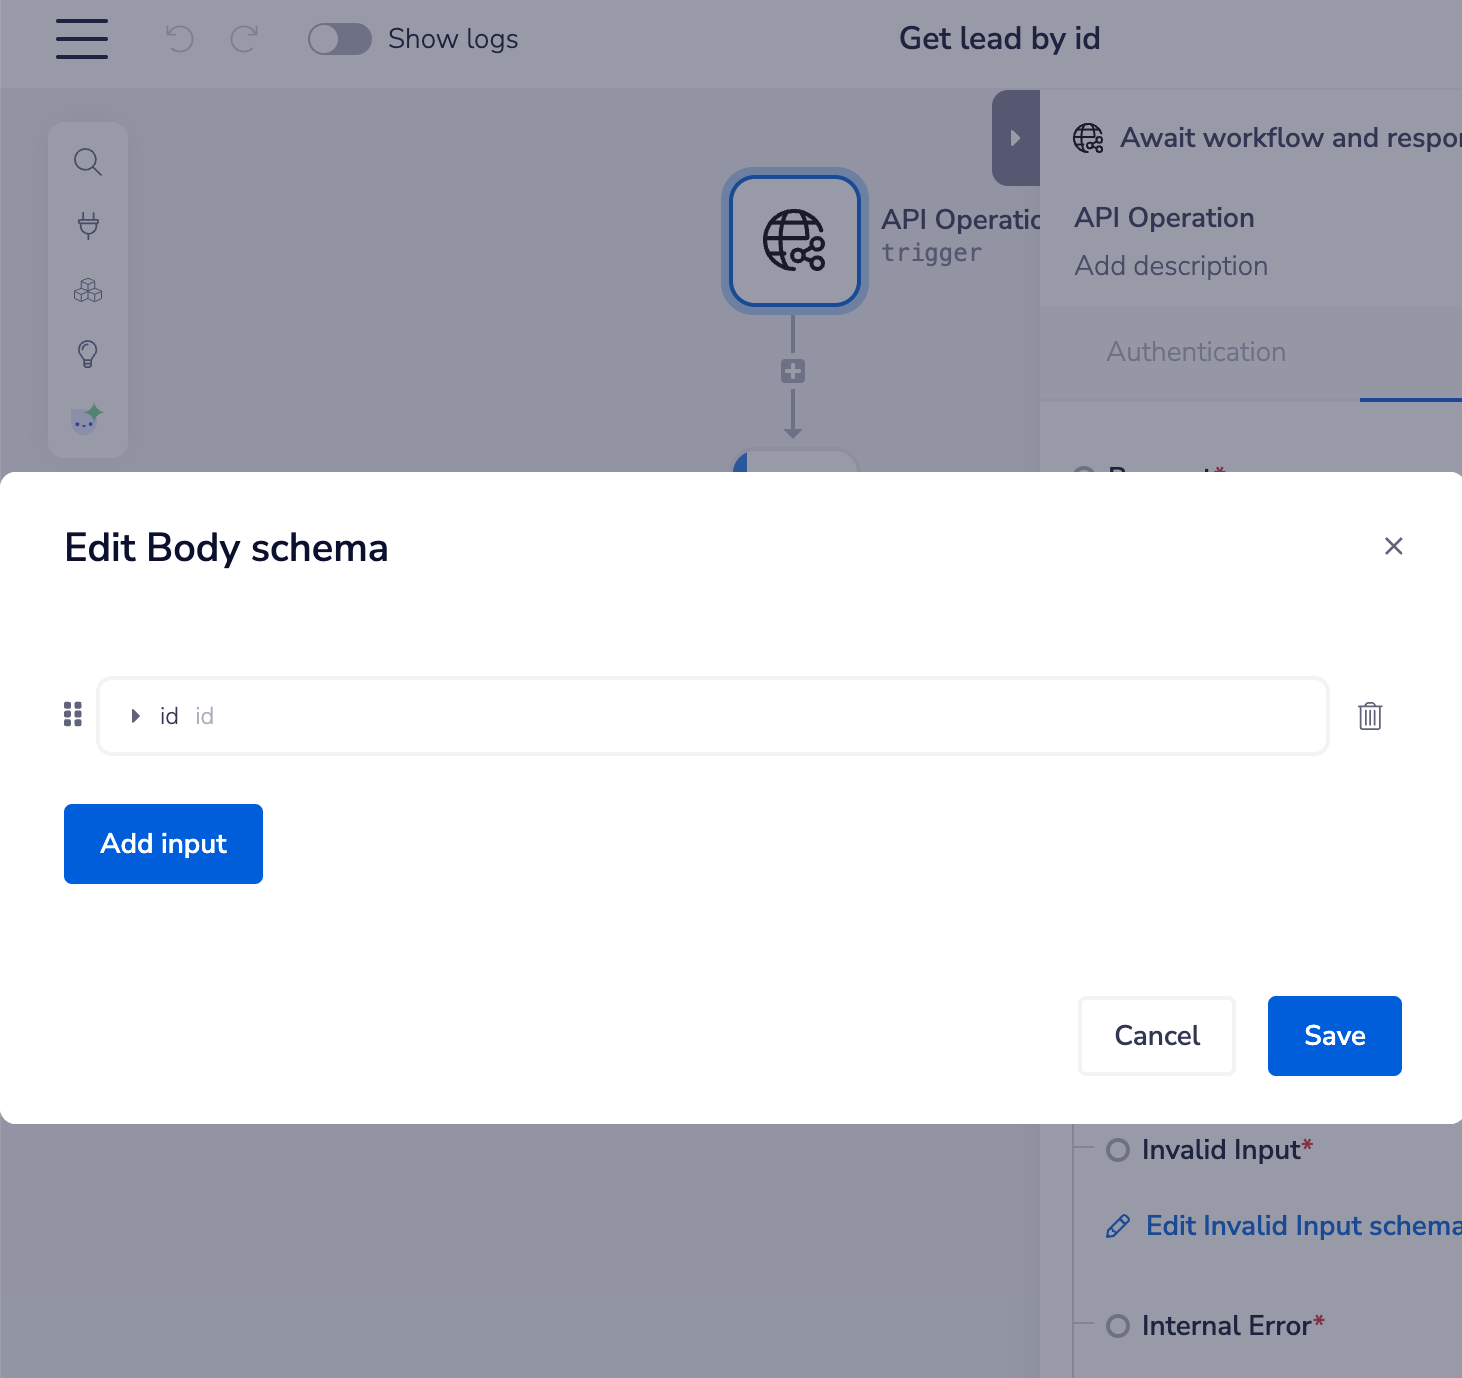
Request schema - body
Setting the body schema for an endpoint determines what values can be passed when calling the endpoint.
It also determines what is available downstream when using jsonpaths in your workflows:
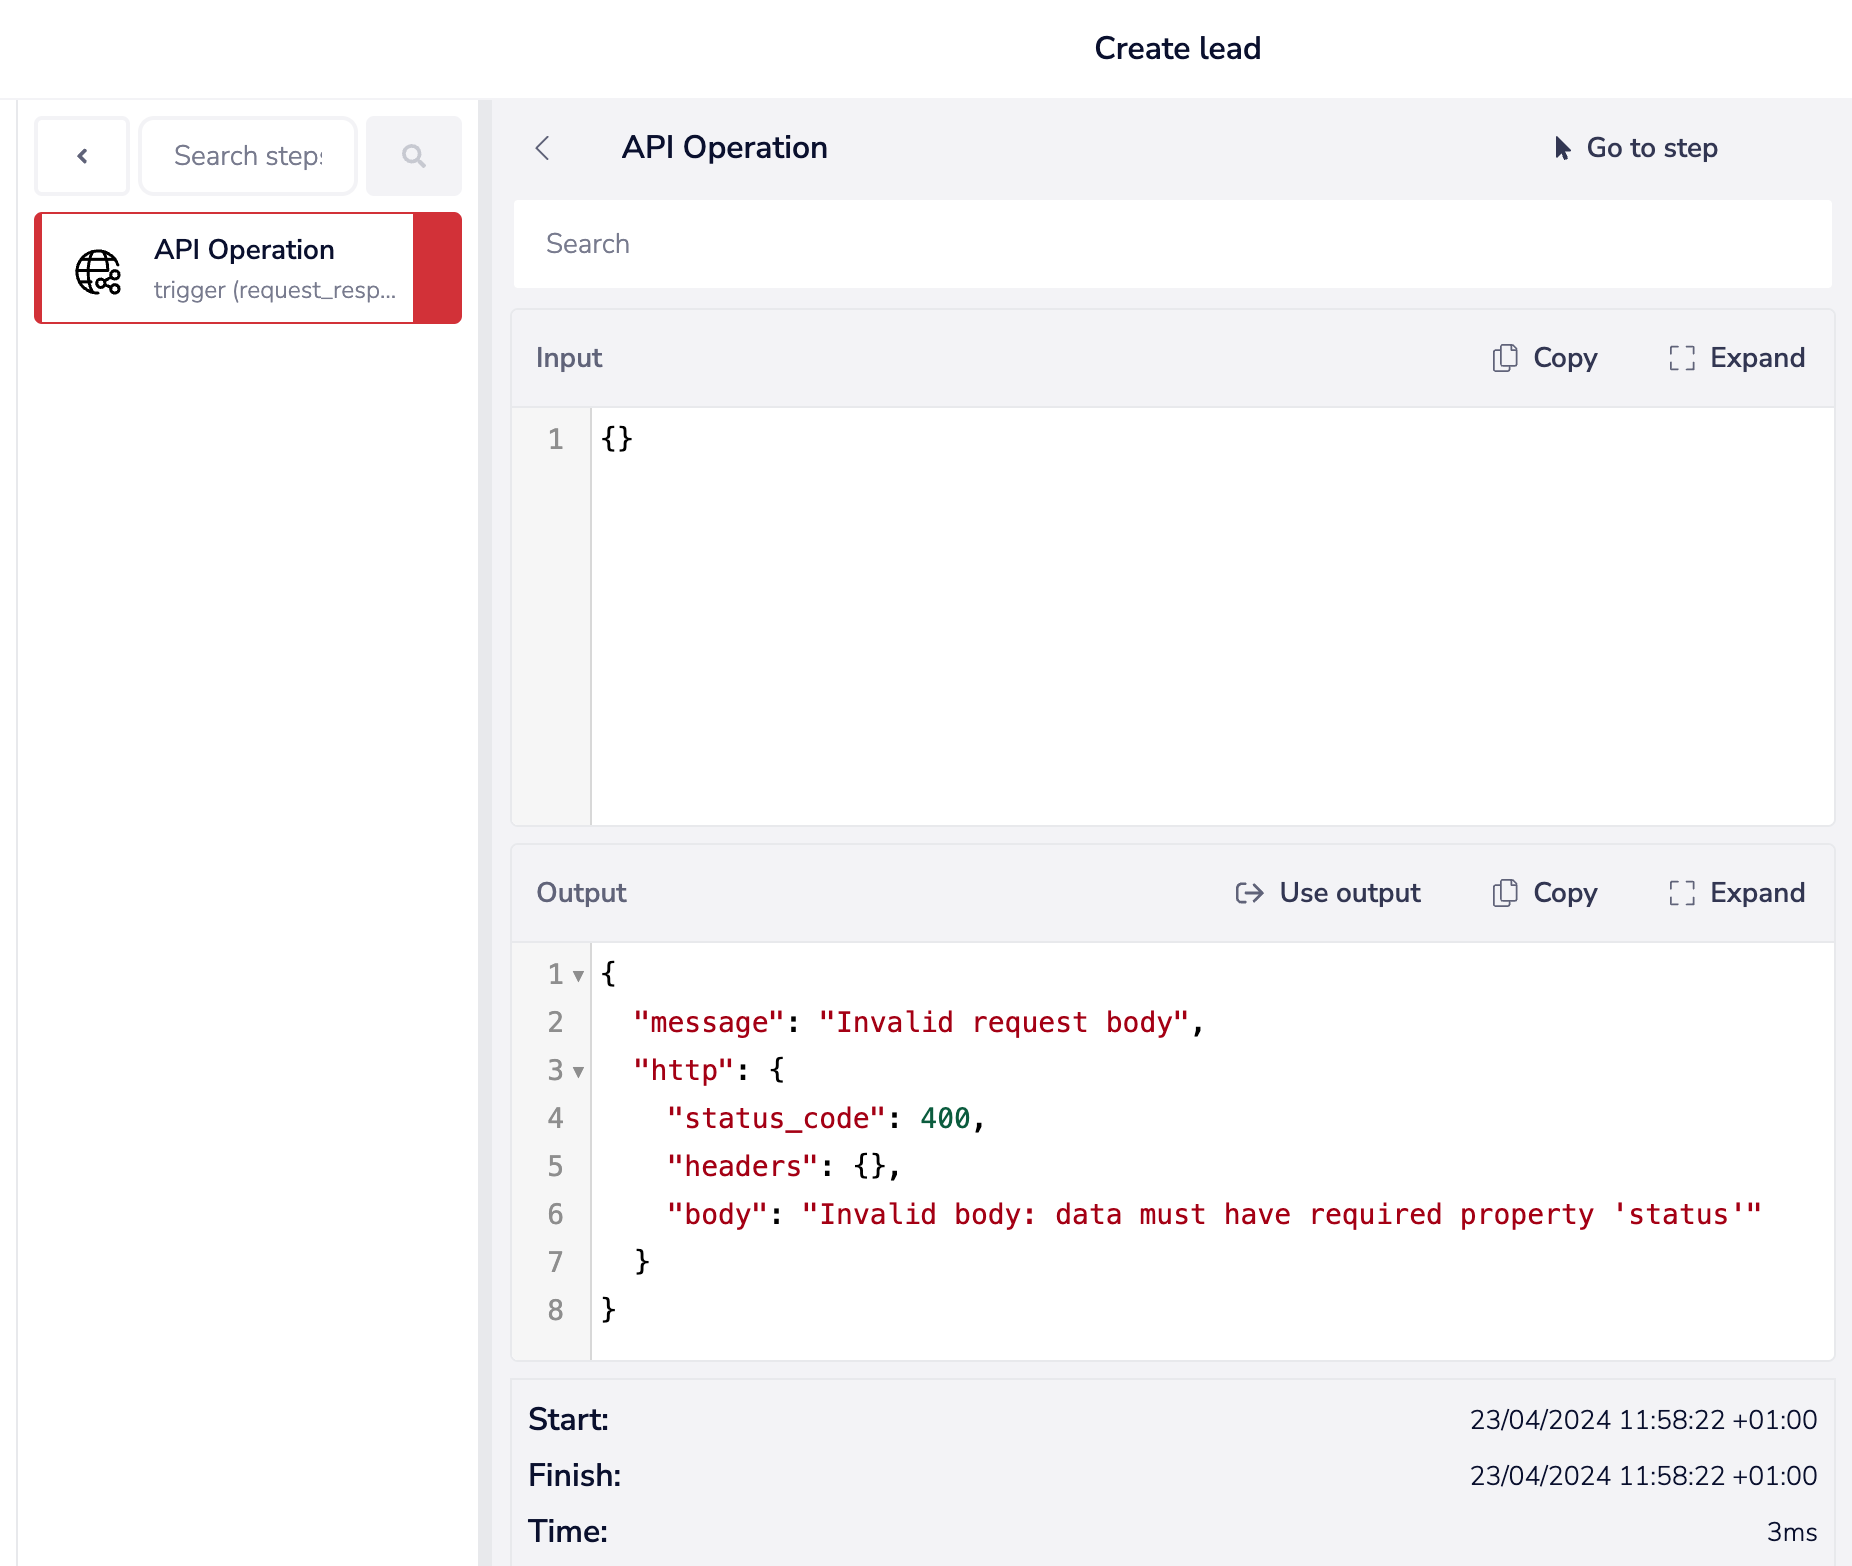
If a request is made which** does not include any of the fields marked as required** by the schema then an** automatic '400 - Invalid body' status will be returned.**
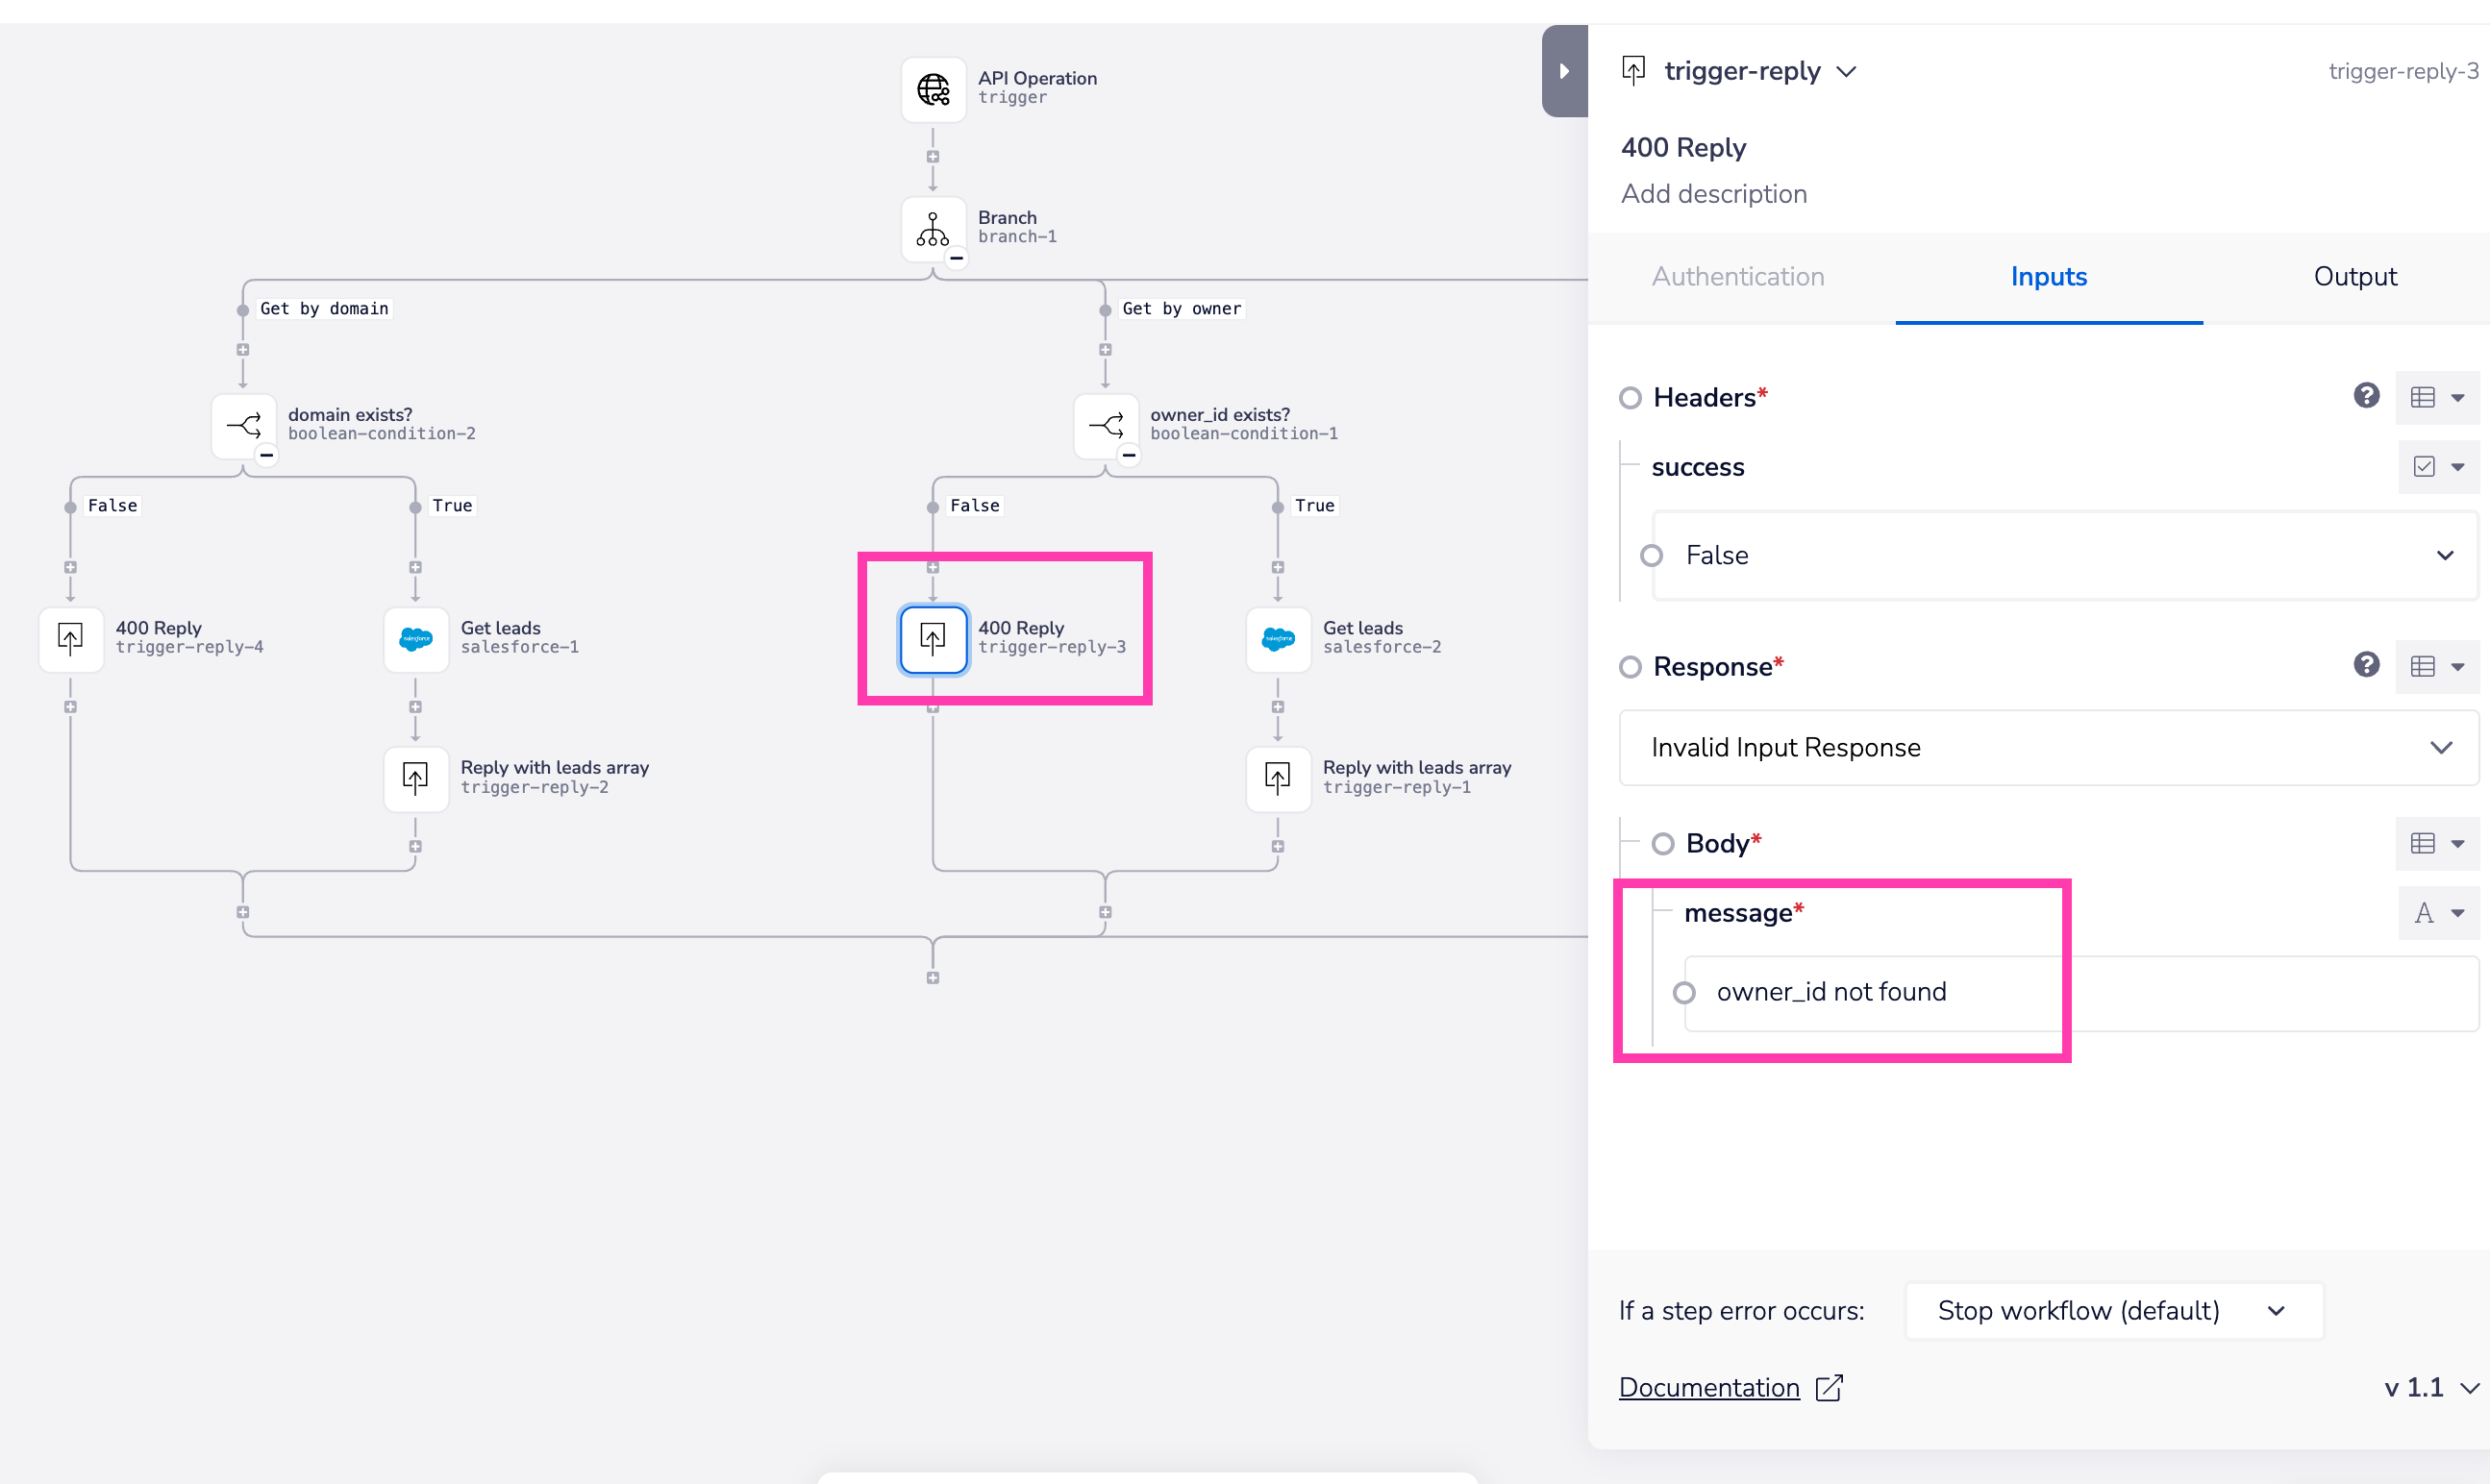
For more** complex schema** with optional variables you will need to build custom logic into your workflow and ensure that you have manually set invalid input responses to be returned (see below for an example):
Query parameters vs path parameters
Query parameters
When you are configuring a GET operation, simply setting the request body schema will set the query parameters - enabling requests to be made in the usual format such as:
https://<base_url>/v1/leads?get_by=owner&owner_id=0058d0
Path parameters
In order to set up path parameters, you will need to specify this in the path when creating the operation, by using a : to indicate the parameter that can be passed directly in the path, as per this 'Get lead by id' operation:
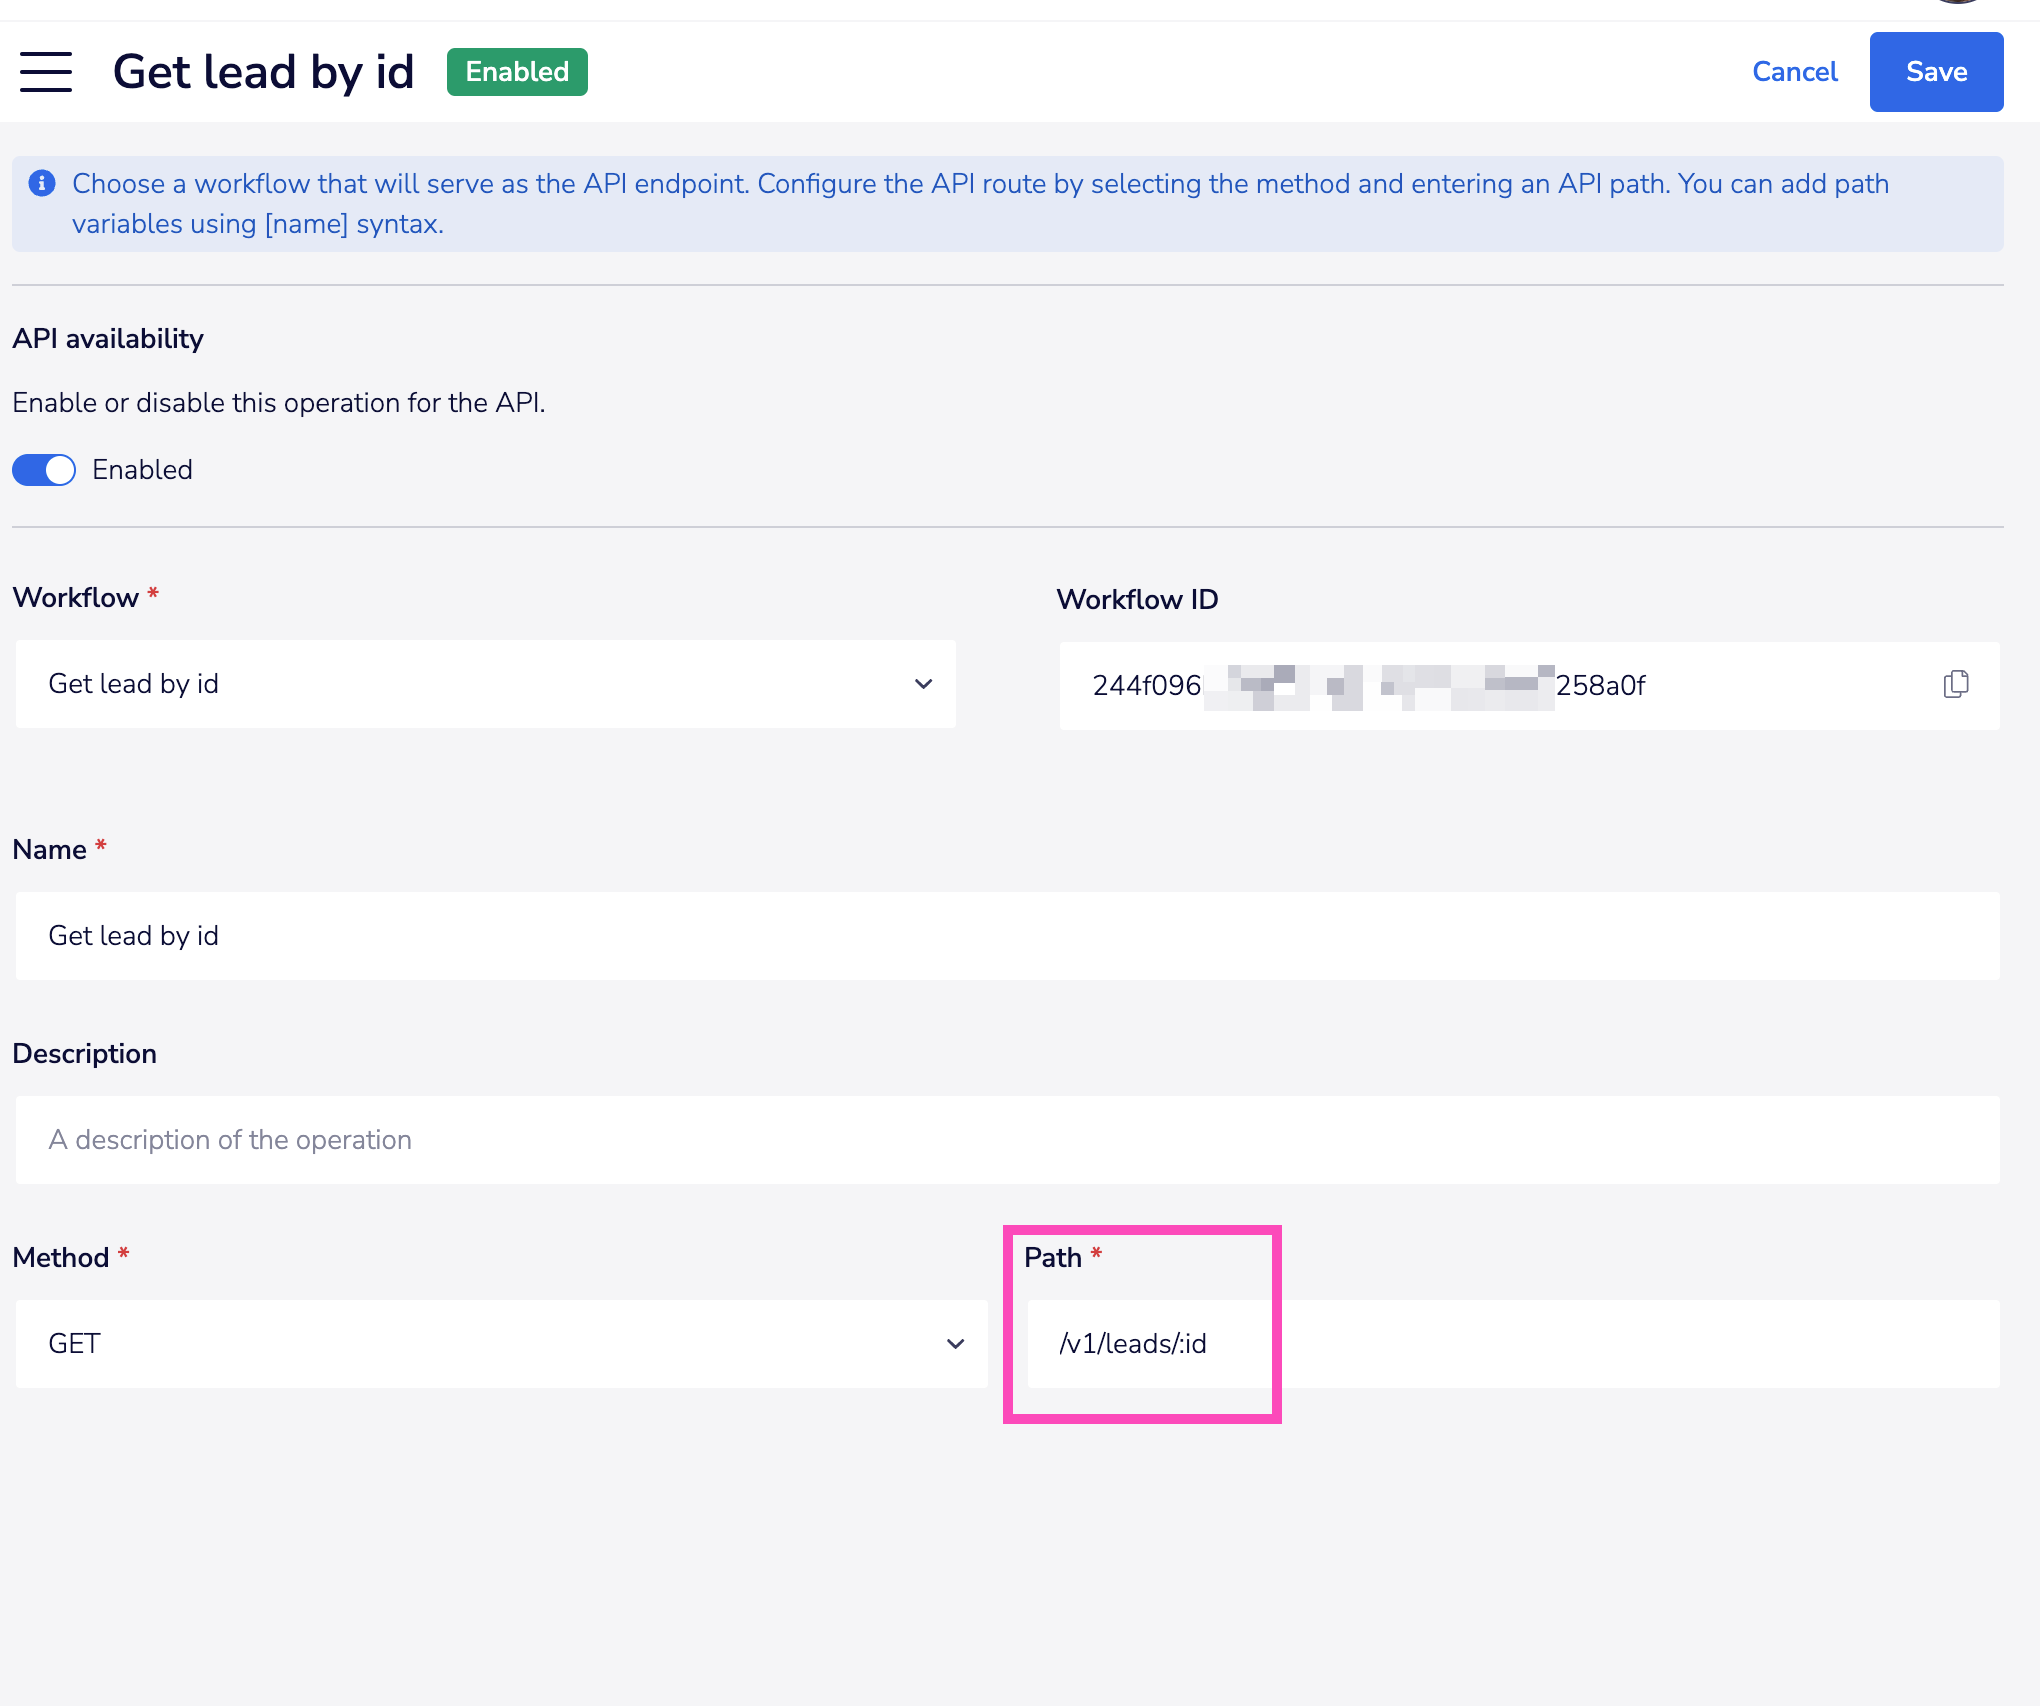
Then in the workflow itself just edit the body schema to include that path parameter:
This will then enable GET requests to be made in the usual path parameter format, such as:
https://<base_url>/v1/leads/29834b0
Response schema - headers
It is not currently possible to customize response header schema.
The 'content-type' is set to application/json
Response schema - success
For success responses you can set a simple message of task completion.
Or you can return e.g. an object or array of results for the user application to consume:
This can then be used with the Trigger event reply connector to send an appropriate response to the user:
Response schema - invalid input
For endpoints which contain optional parameters you can customize how you respond to different forms of invalid input.
By default the schema for invalid input contains a simple 'message' field:
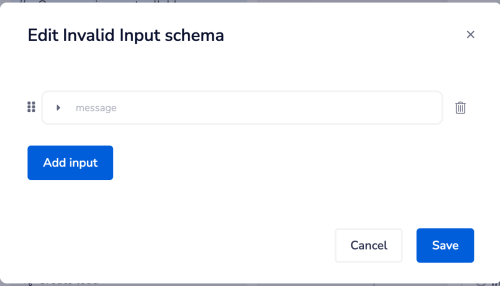
This can then be customized using the Trigger Event Reply connector at various points in your workflow:
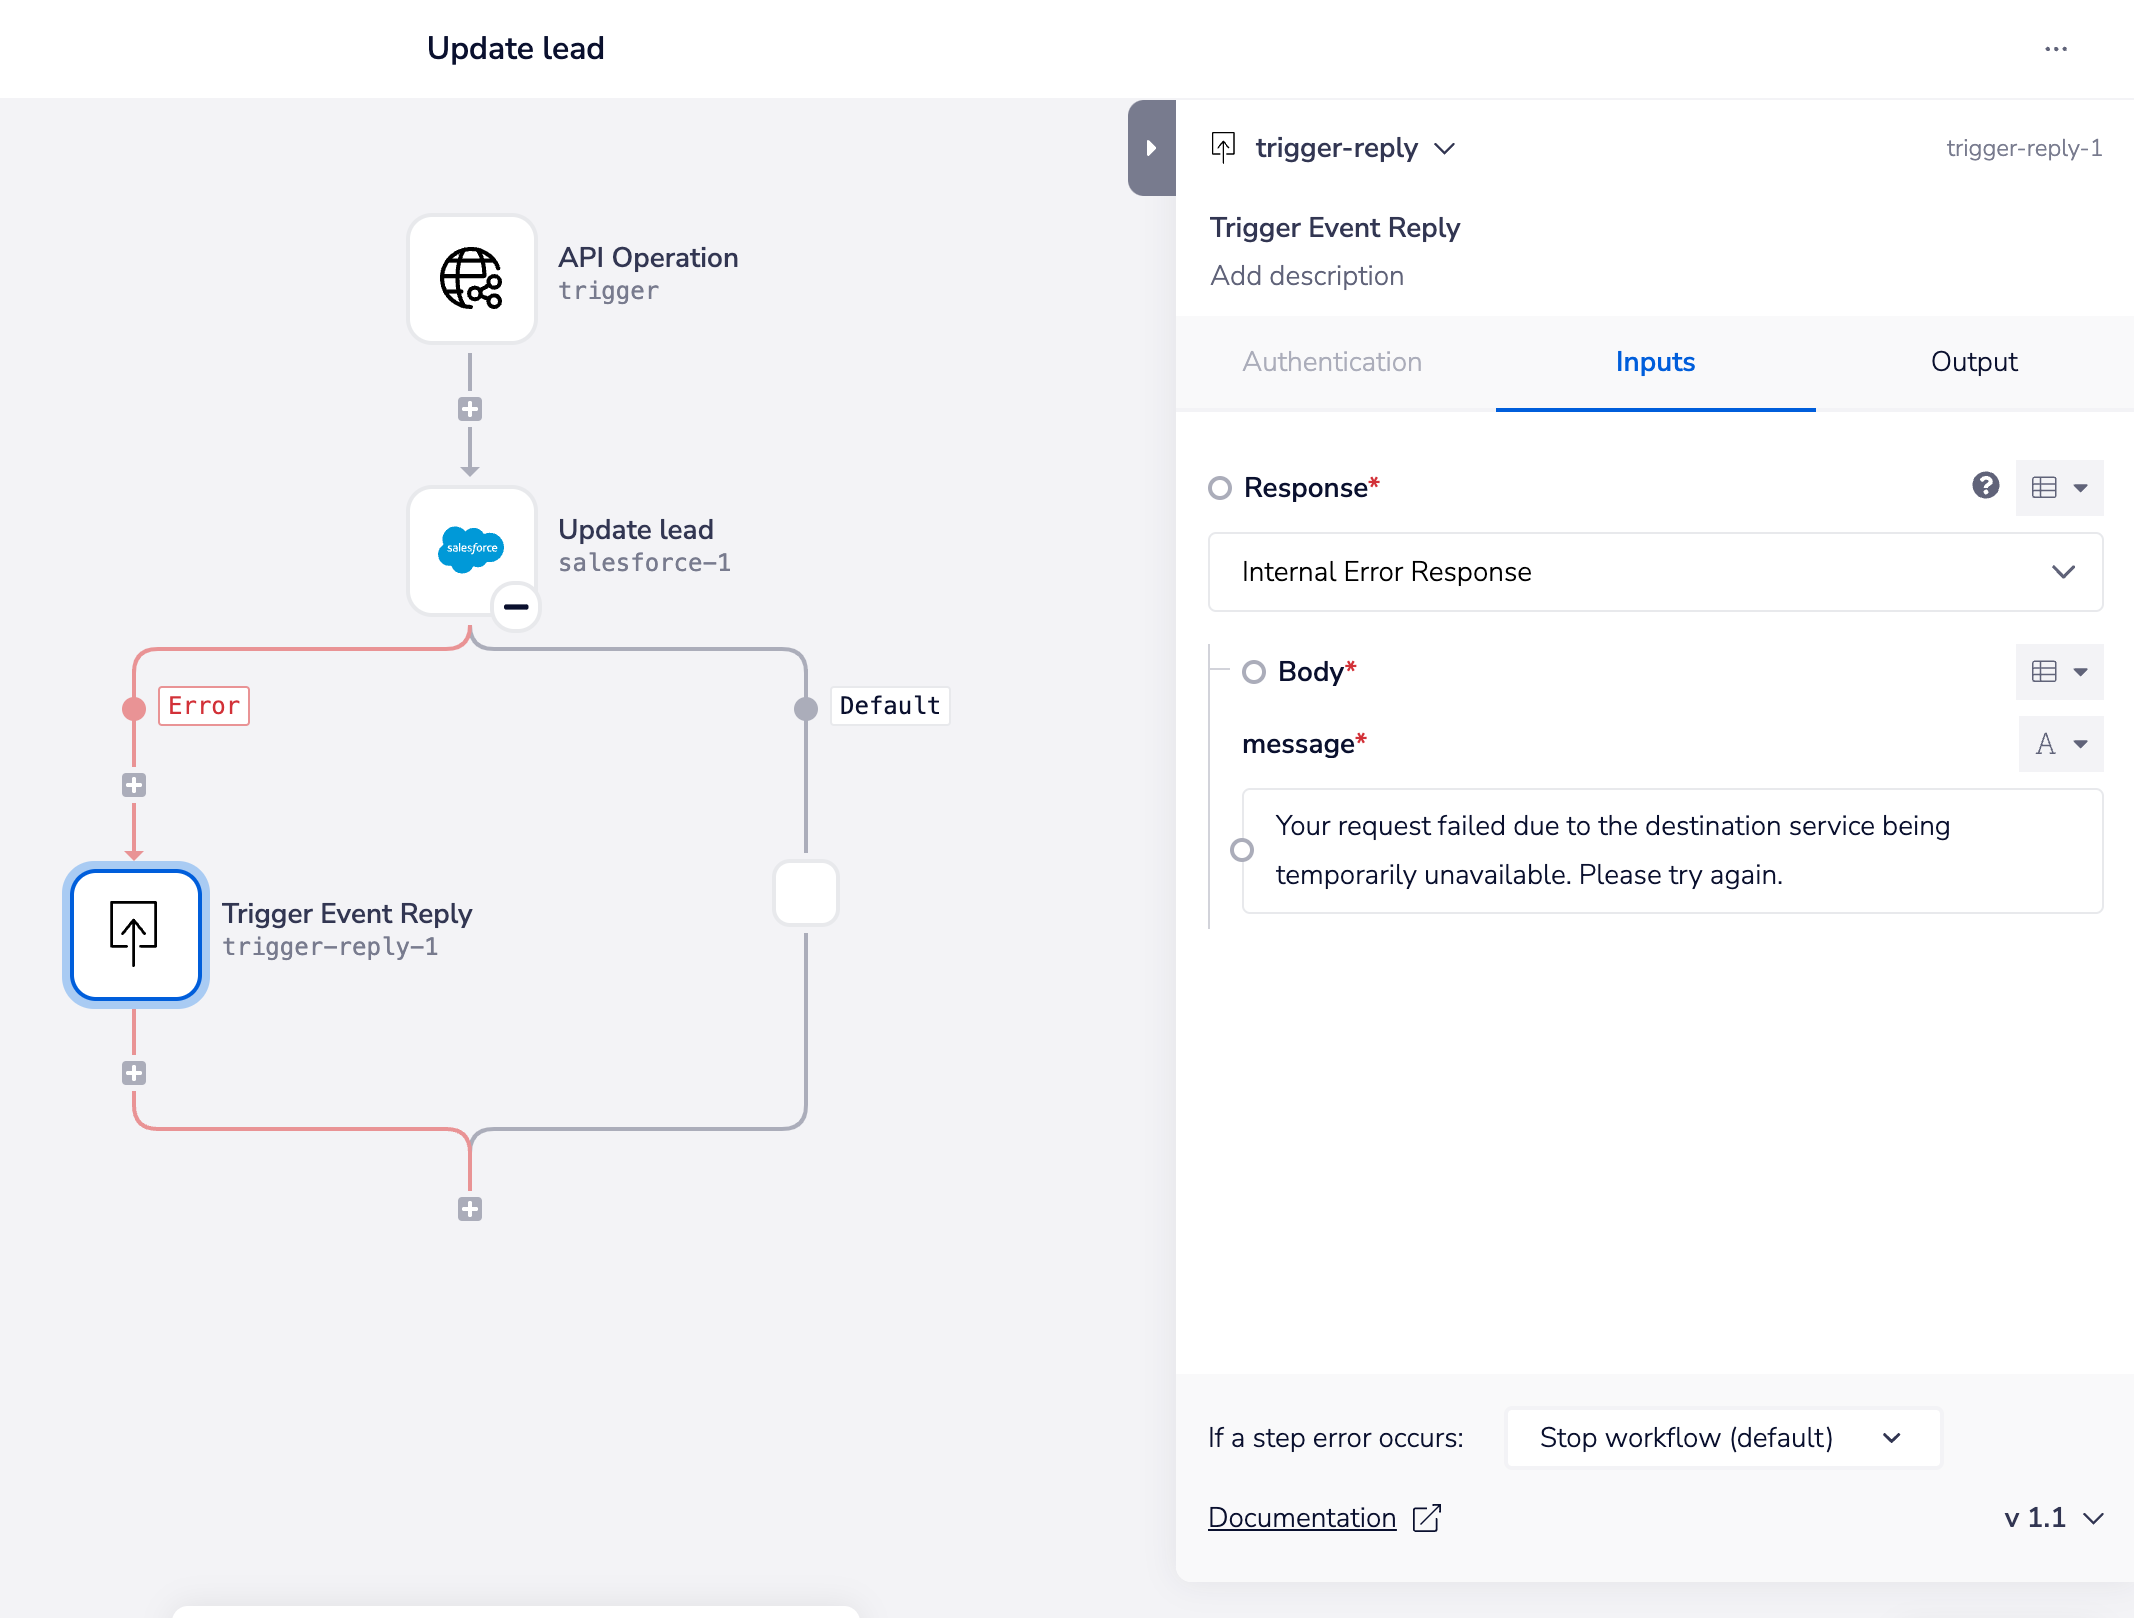
Response schema - internal error
It is not a requirement to set custom 500 messages
Generally the workflow will automatically respond with 500 messages when appropriate
However you can use custom messages to give you more granular control over exactly what is communicated to the user and when
By default the schema for 500 internal error is set with one 'message' field.
After testing, anywhere in your workflow where you have identified a potential point of failure you can then add a Trigger event reply with a custom message:
Response schema - forbidden
By default the schema for 403 internal error is set with one 'message' field.
At any point in your workflow you can then use Trigger event reply to send a custom forbidden message.
Note that you can also use security policies to set endpoint access rules which can send custom 403 messages.
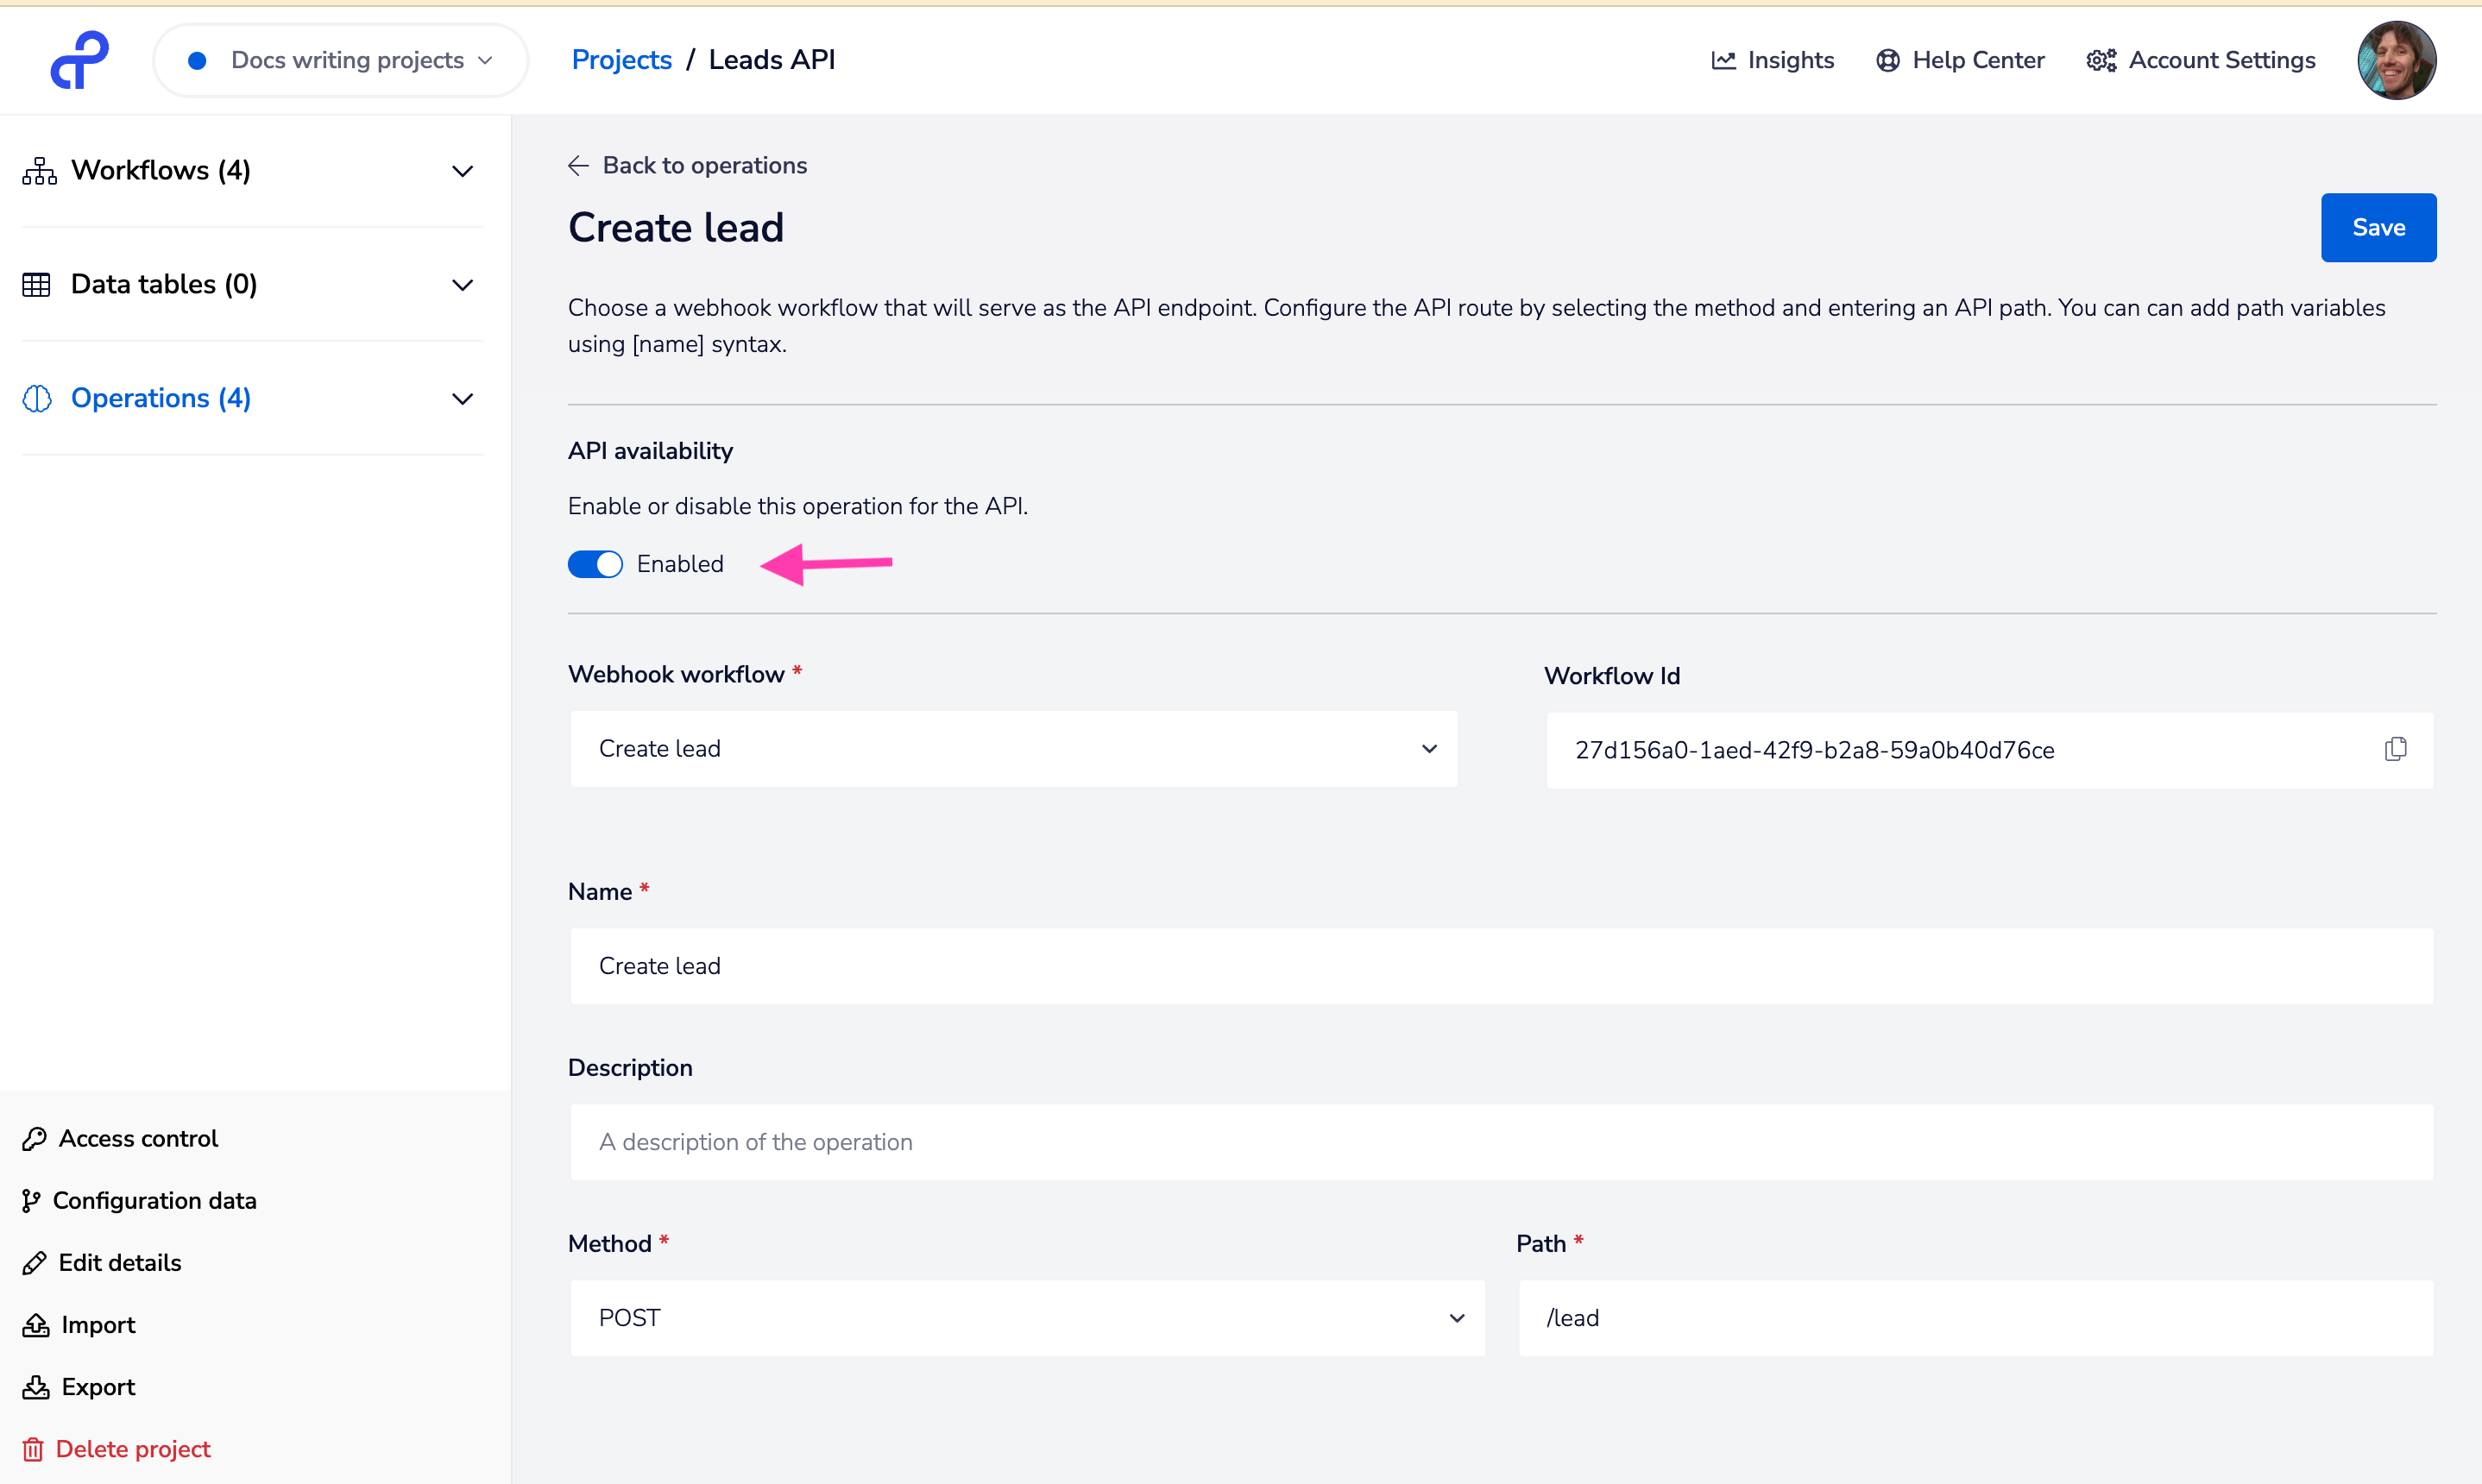
Creating an endpoint
When creating an endpoint you need to make sure it is enabled.
Then specify the method and path:
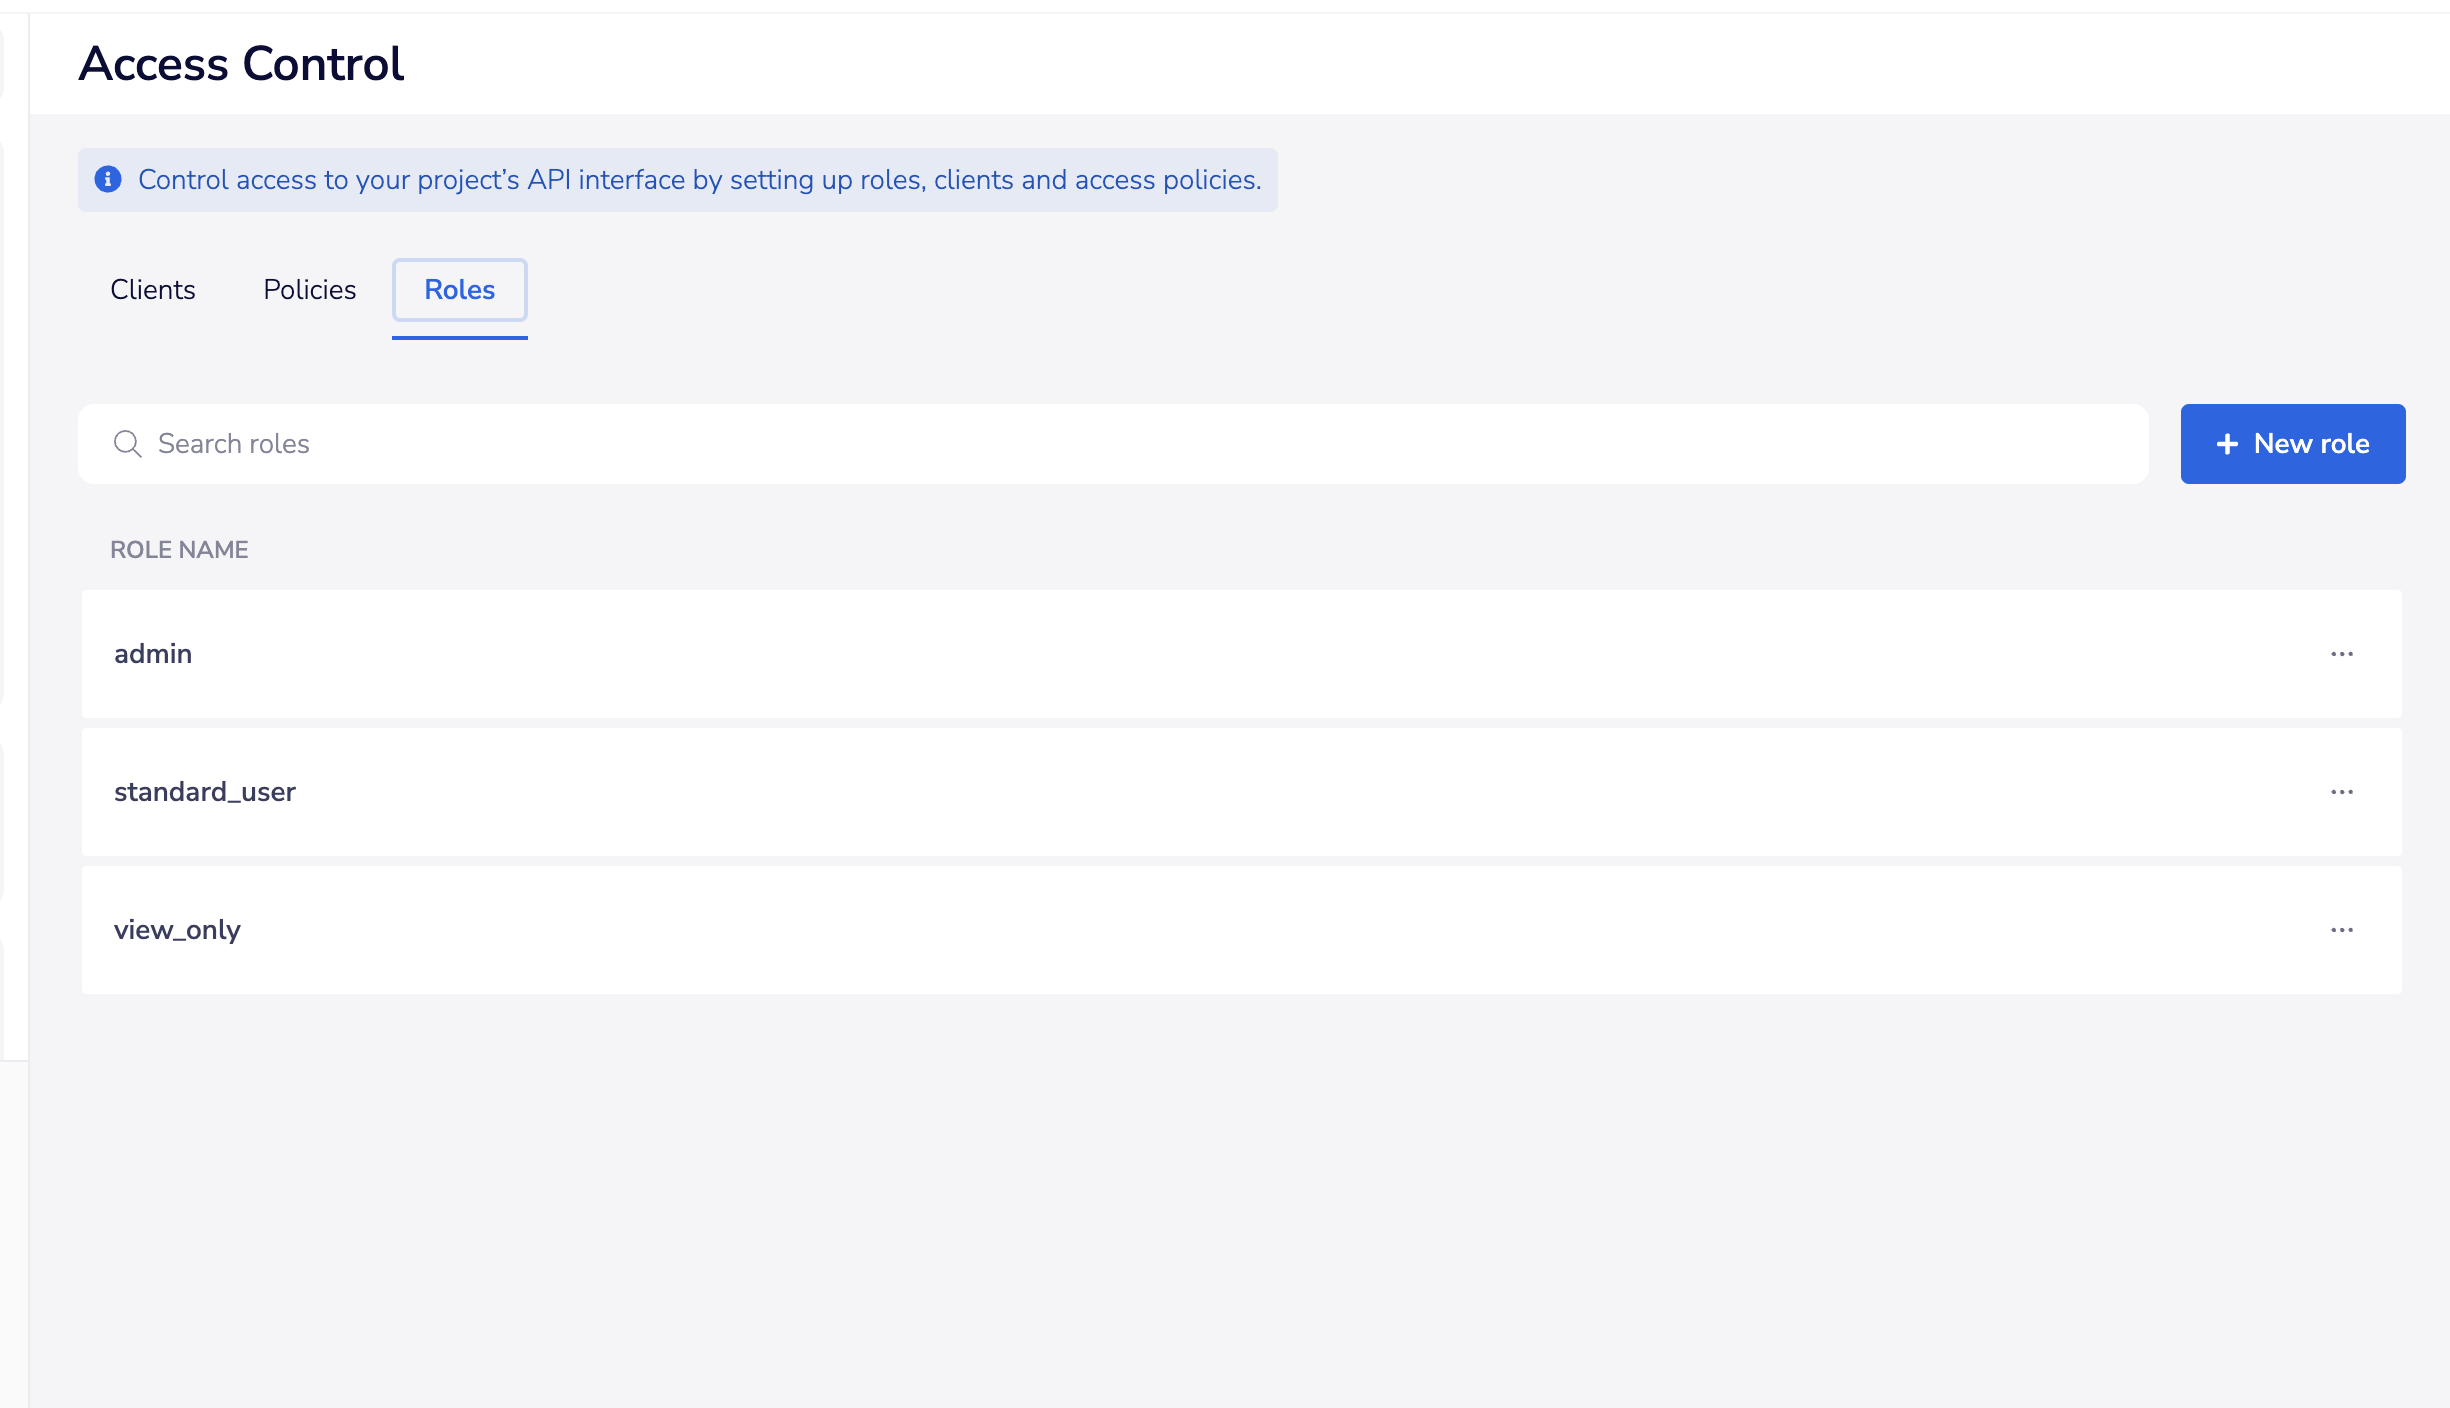
Securing an endpoint
In order to secure access to individual endpoints you must create role-based policies.
Specifically this means that you do not set the policy directly in the operation settings screen.
Role-based policies allow you to build clear and consistent access control - for example you can ensure that all developers have a certain level of access, while all general staff have read-only access to certain operations:
Versioning your API
It is recommended to use path versioning (e.g. /v1/leads /v2/leads etc.) to version your endpoints.
In this case you will build a separate workflow / operation for each version of a particular endpoint.
Versioning in this way has the following benefits:
- You can build separate schemas and success / error responses in the subsequent versions of your endpoints
- Patching is simple if needed - just duplicate the original workflow, make the necessary changes and publish as a new operation when you are ready to deploy the patch