Access Control
Setting roles and access policies for your published APIs
Introduction to API Access Control
When managing APIs you will generally want to take full control of how your endpoints are accessed.
To do this you can go to the 'Access control' section to create roles and policies that will allow users to access your endpoints in a controlled and secure manner.
Role-based policies allow you to build clear and consistent access control - for example you can ensure that all developers have a certain level of access, while all general staff have read-only access to certain operations.
By default a client token will have bearer-authenticated access to all endpoints - unless it is attached to a role which explicitly blocks its access to one or more of the endpoints
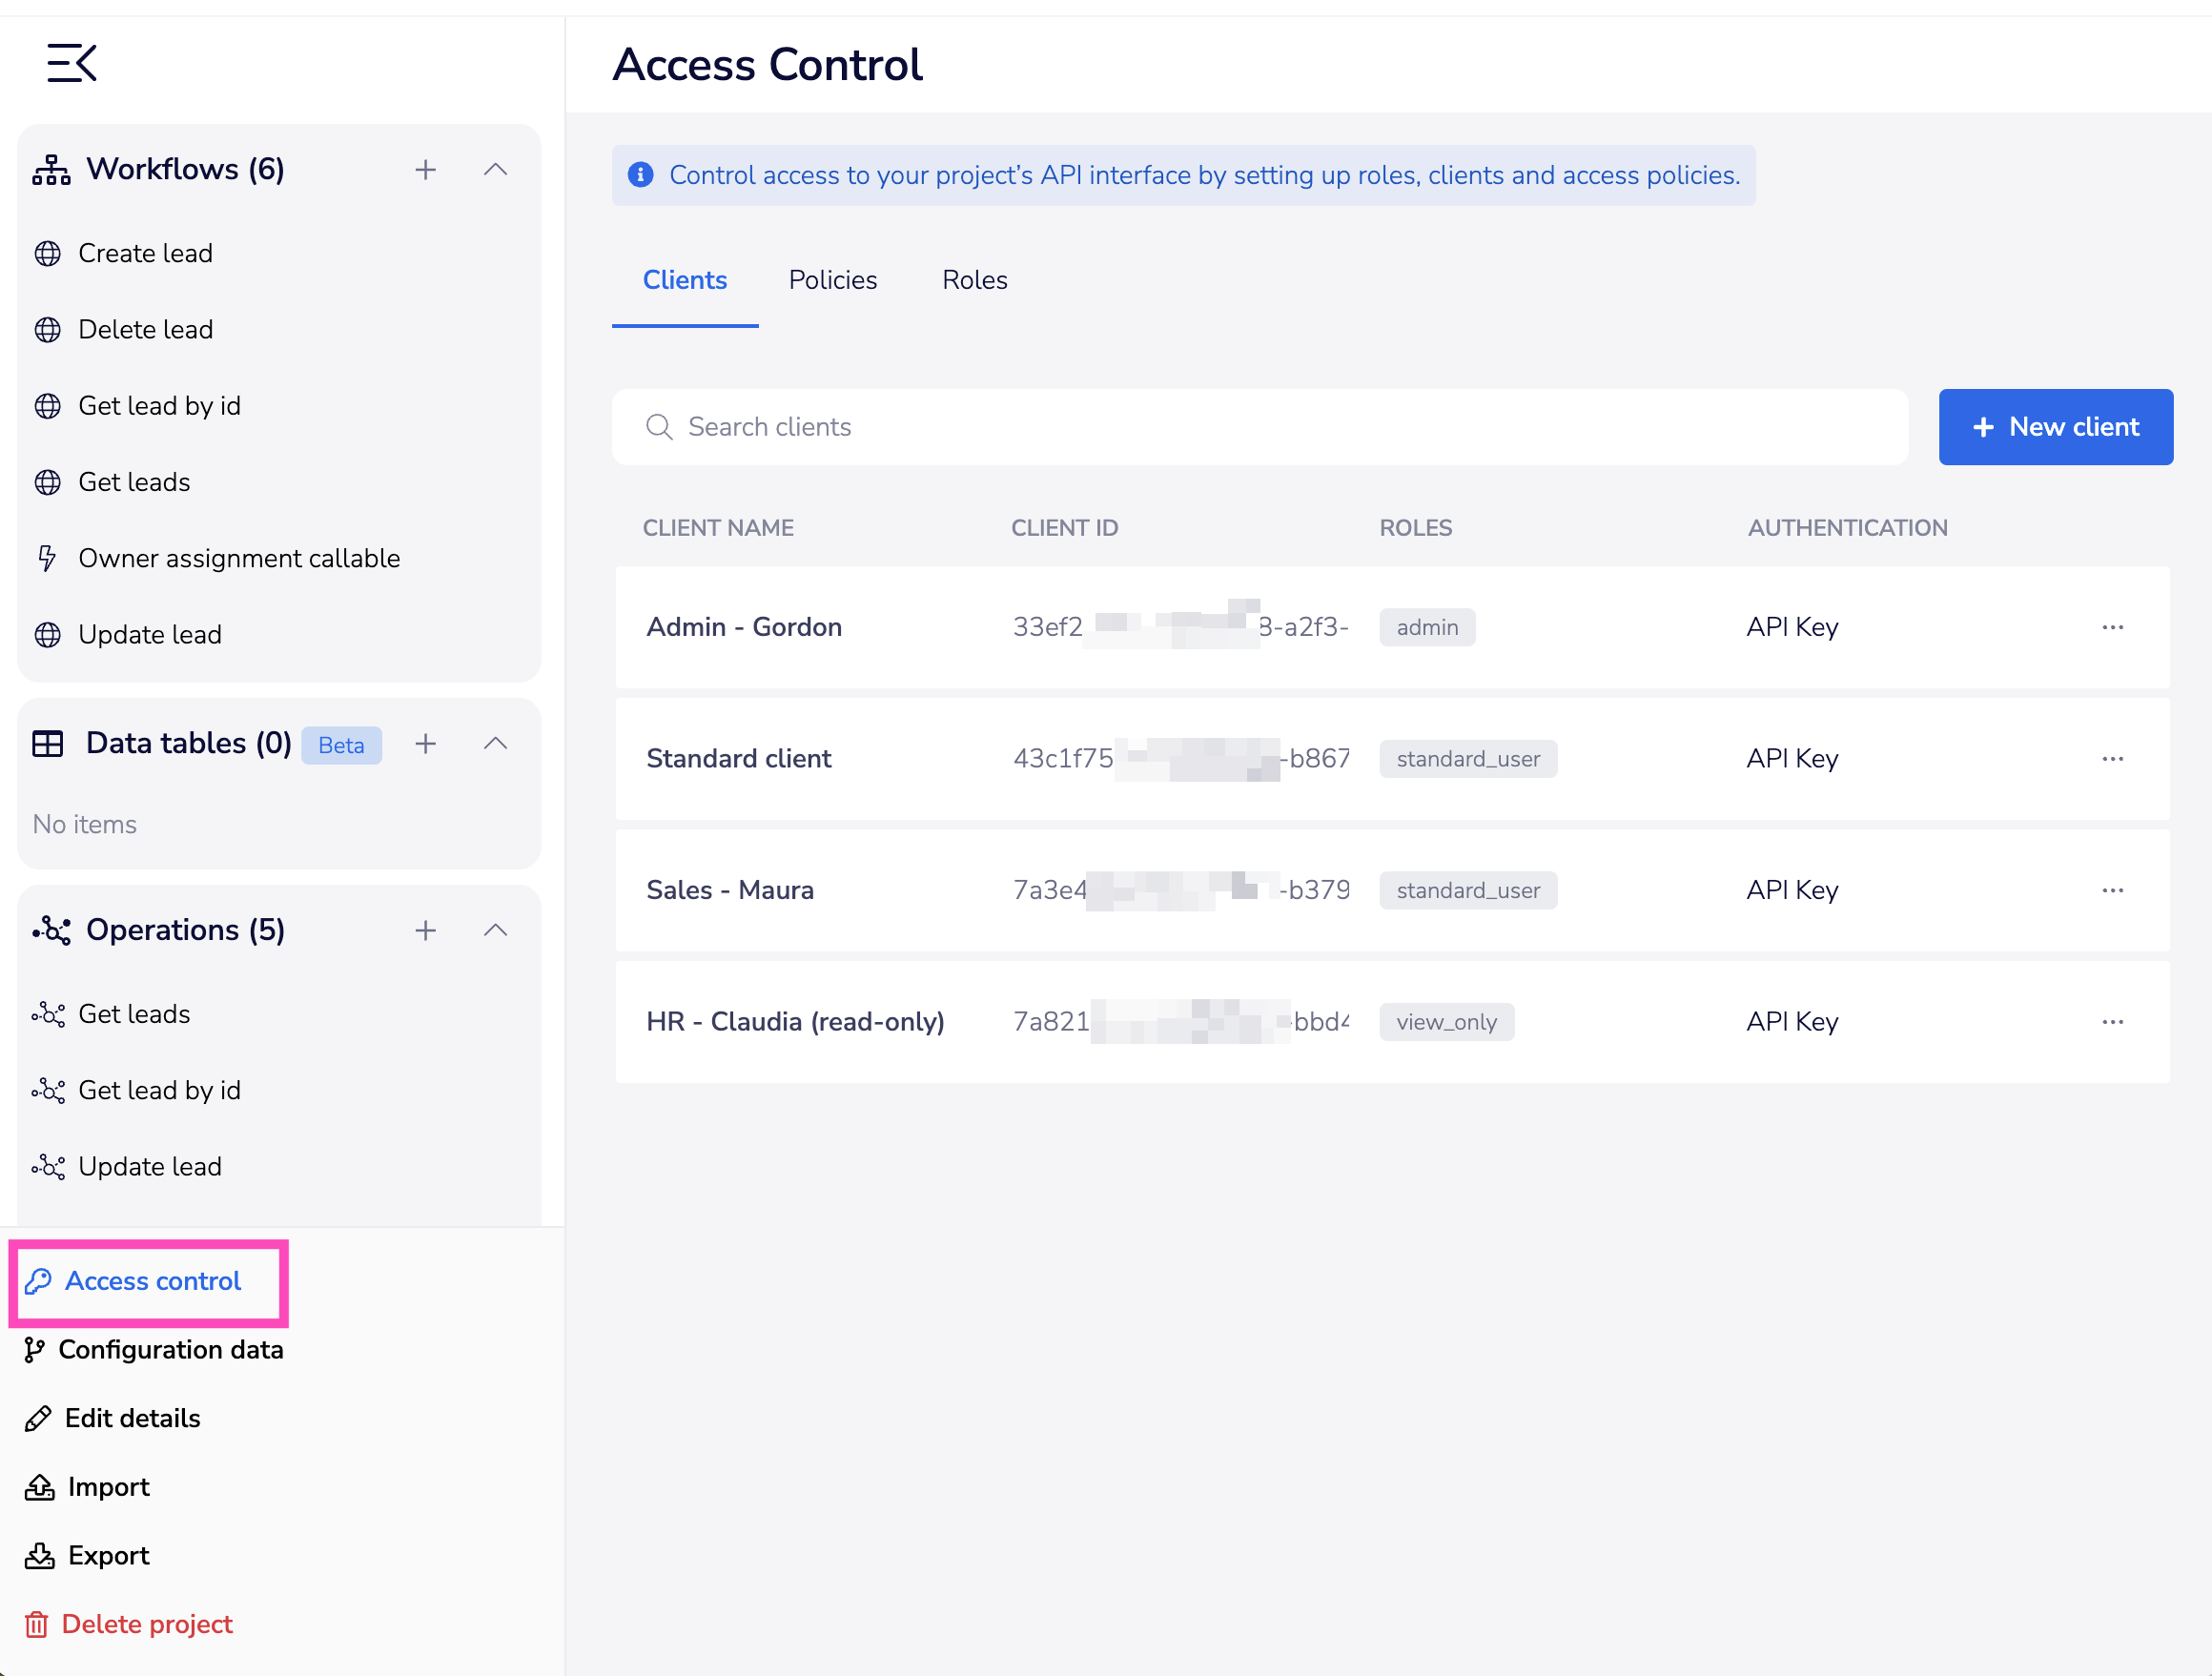
The following screenshot shows an example list of clients with a mixture of read / write / delete access.
The rest of this page will take you through the steps involved in creating clients and issuing API tokens:
1 - Create role
When creating a role all you need to do is name it (generally in a way which gives an indication to the level of access it will be given):
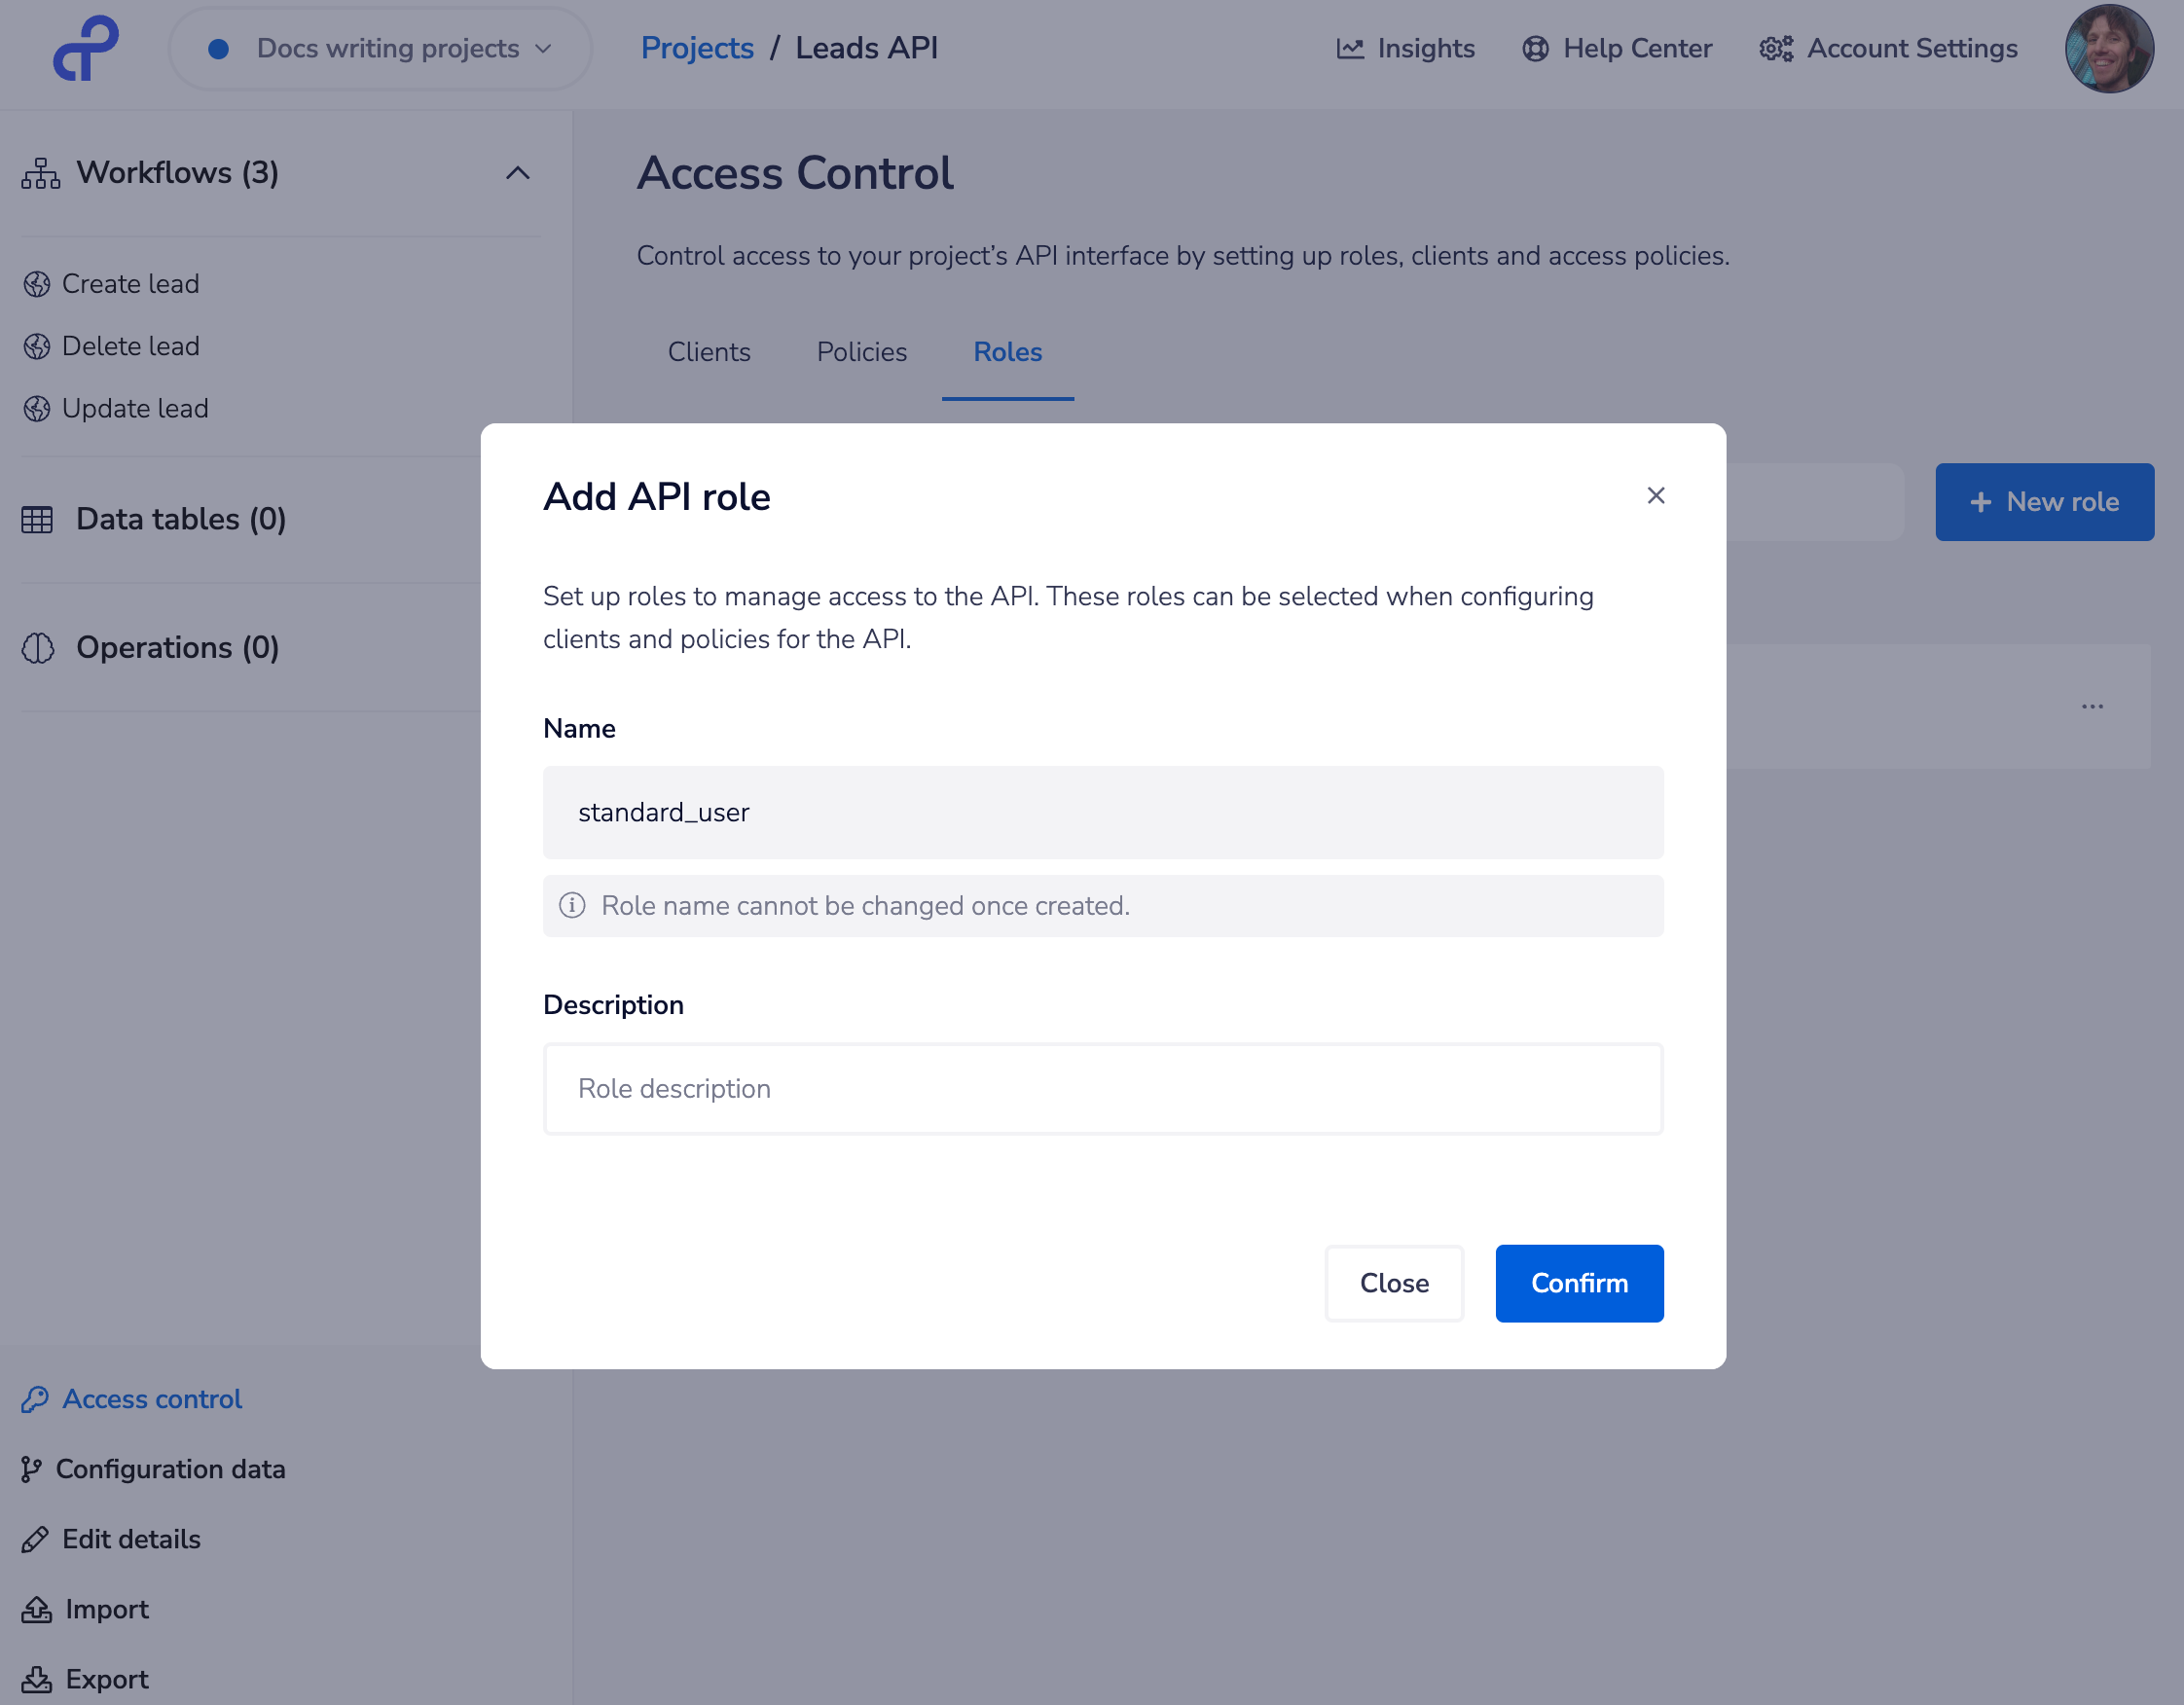
This role can then be attached to a number of policies.
2 - Create security policies
By default any client token has access to all the endpoints in a project
Therefore you will need to explicitly deny access to any appropriate endpoints by creating a 'reject' policy tied to a particular role, as explained below
You can create security policies which can be linked to roles and attached to one or more of your endpoints.
The following screenshot shows an example setup:
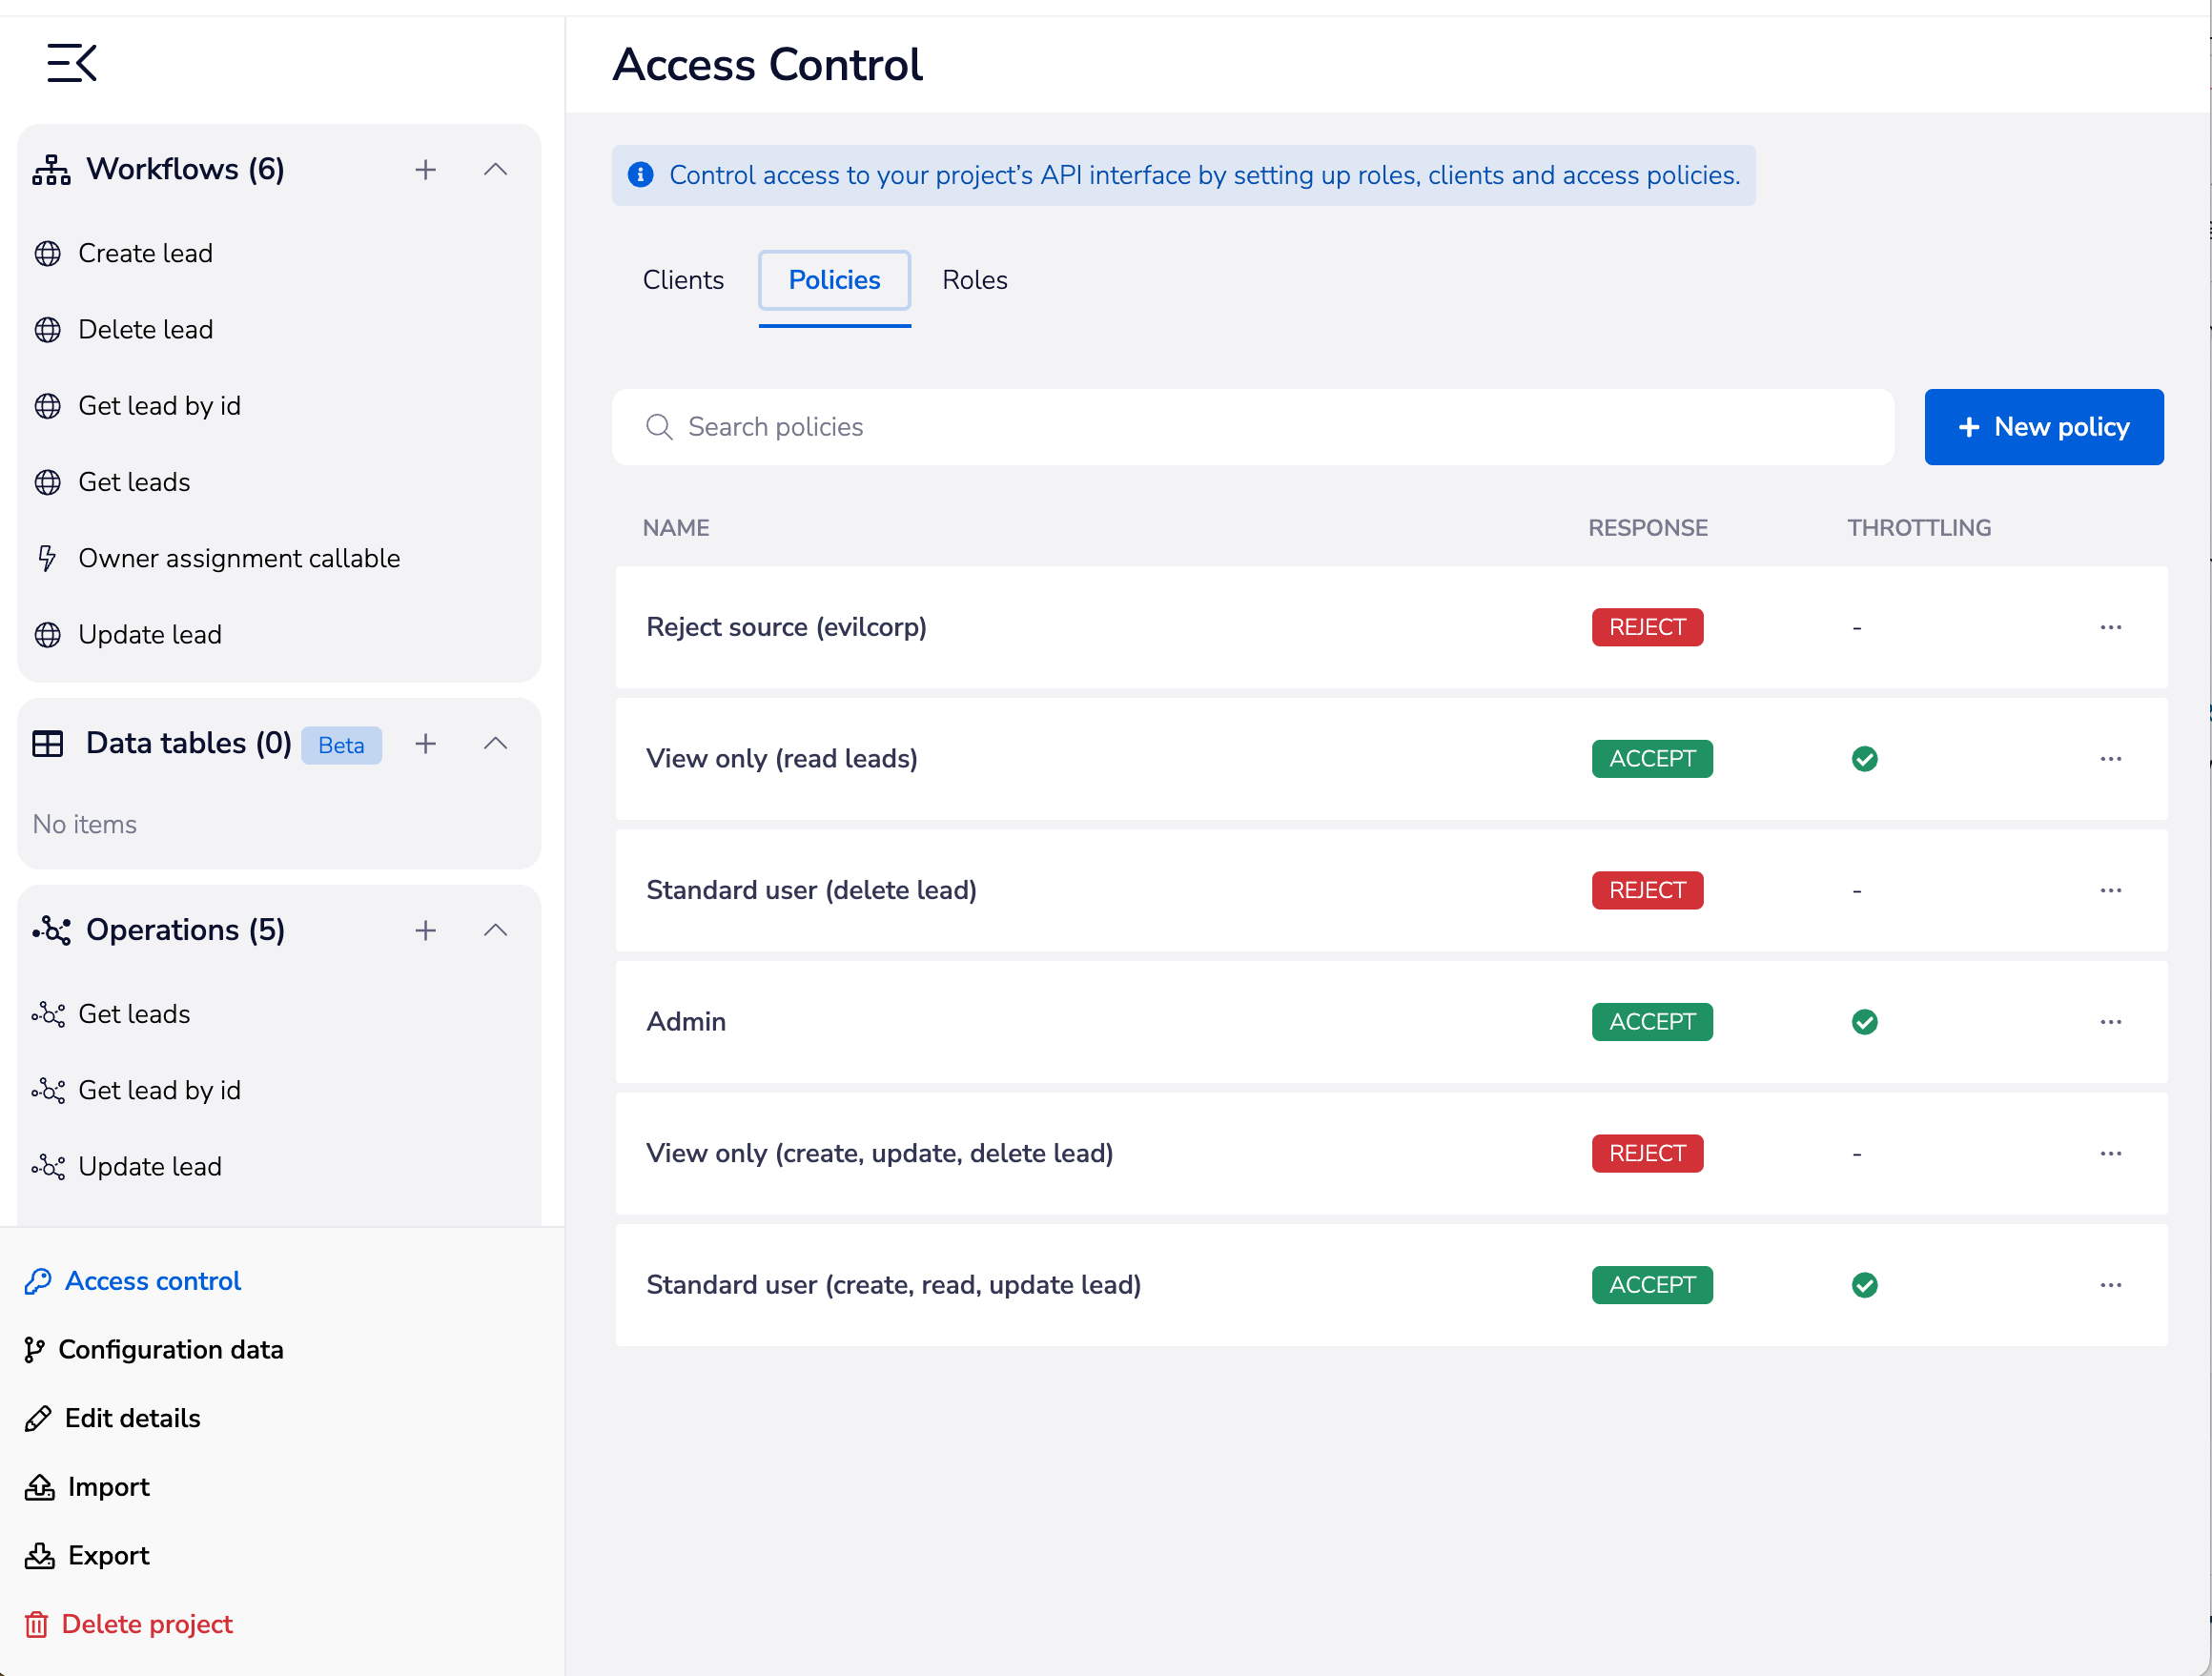
Note that we have created 2 policies for the standard user and view only roles.
One 'accept' policy:
It is not necessary to set an accept policy in order to allow access to endpoints
However, if you wish to set a rate limit for when a particular role accesses an endpoint(s) you will need to attach the rate limit to an accept policy

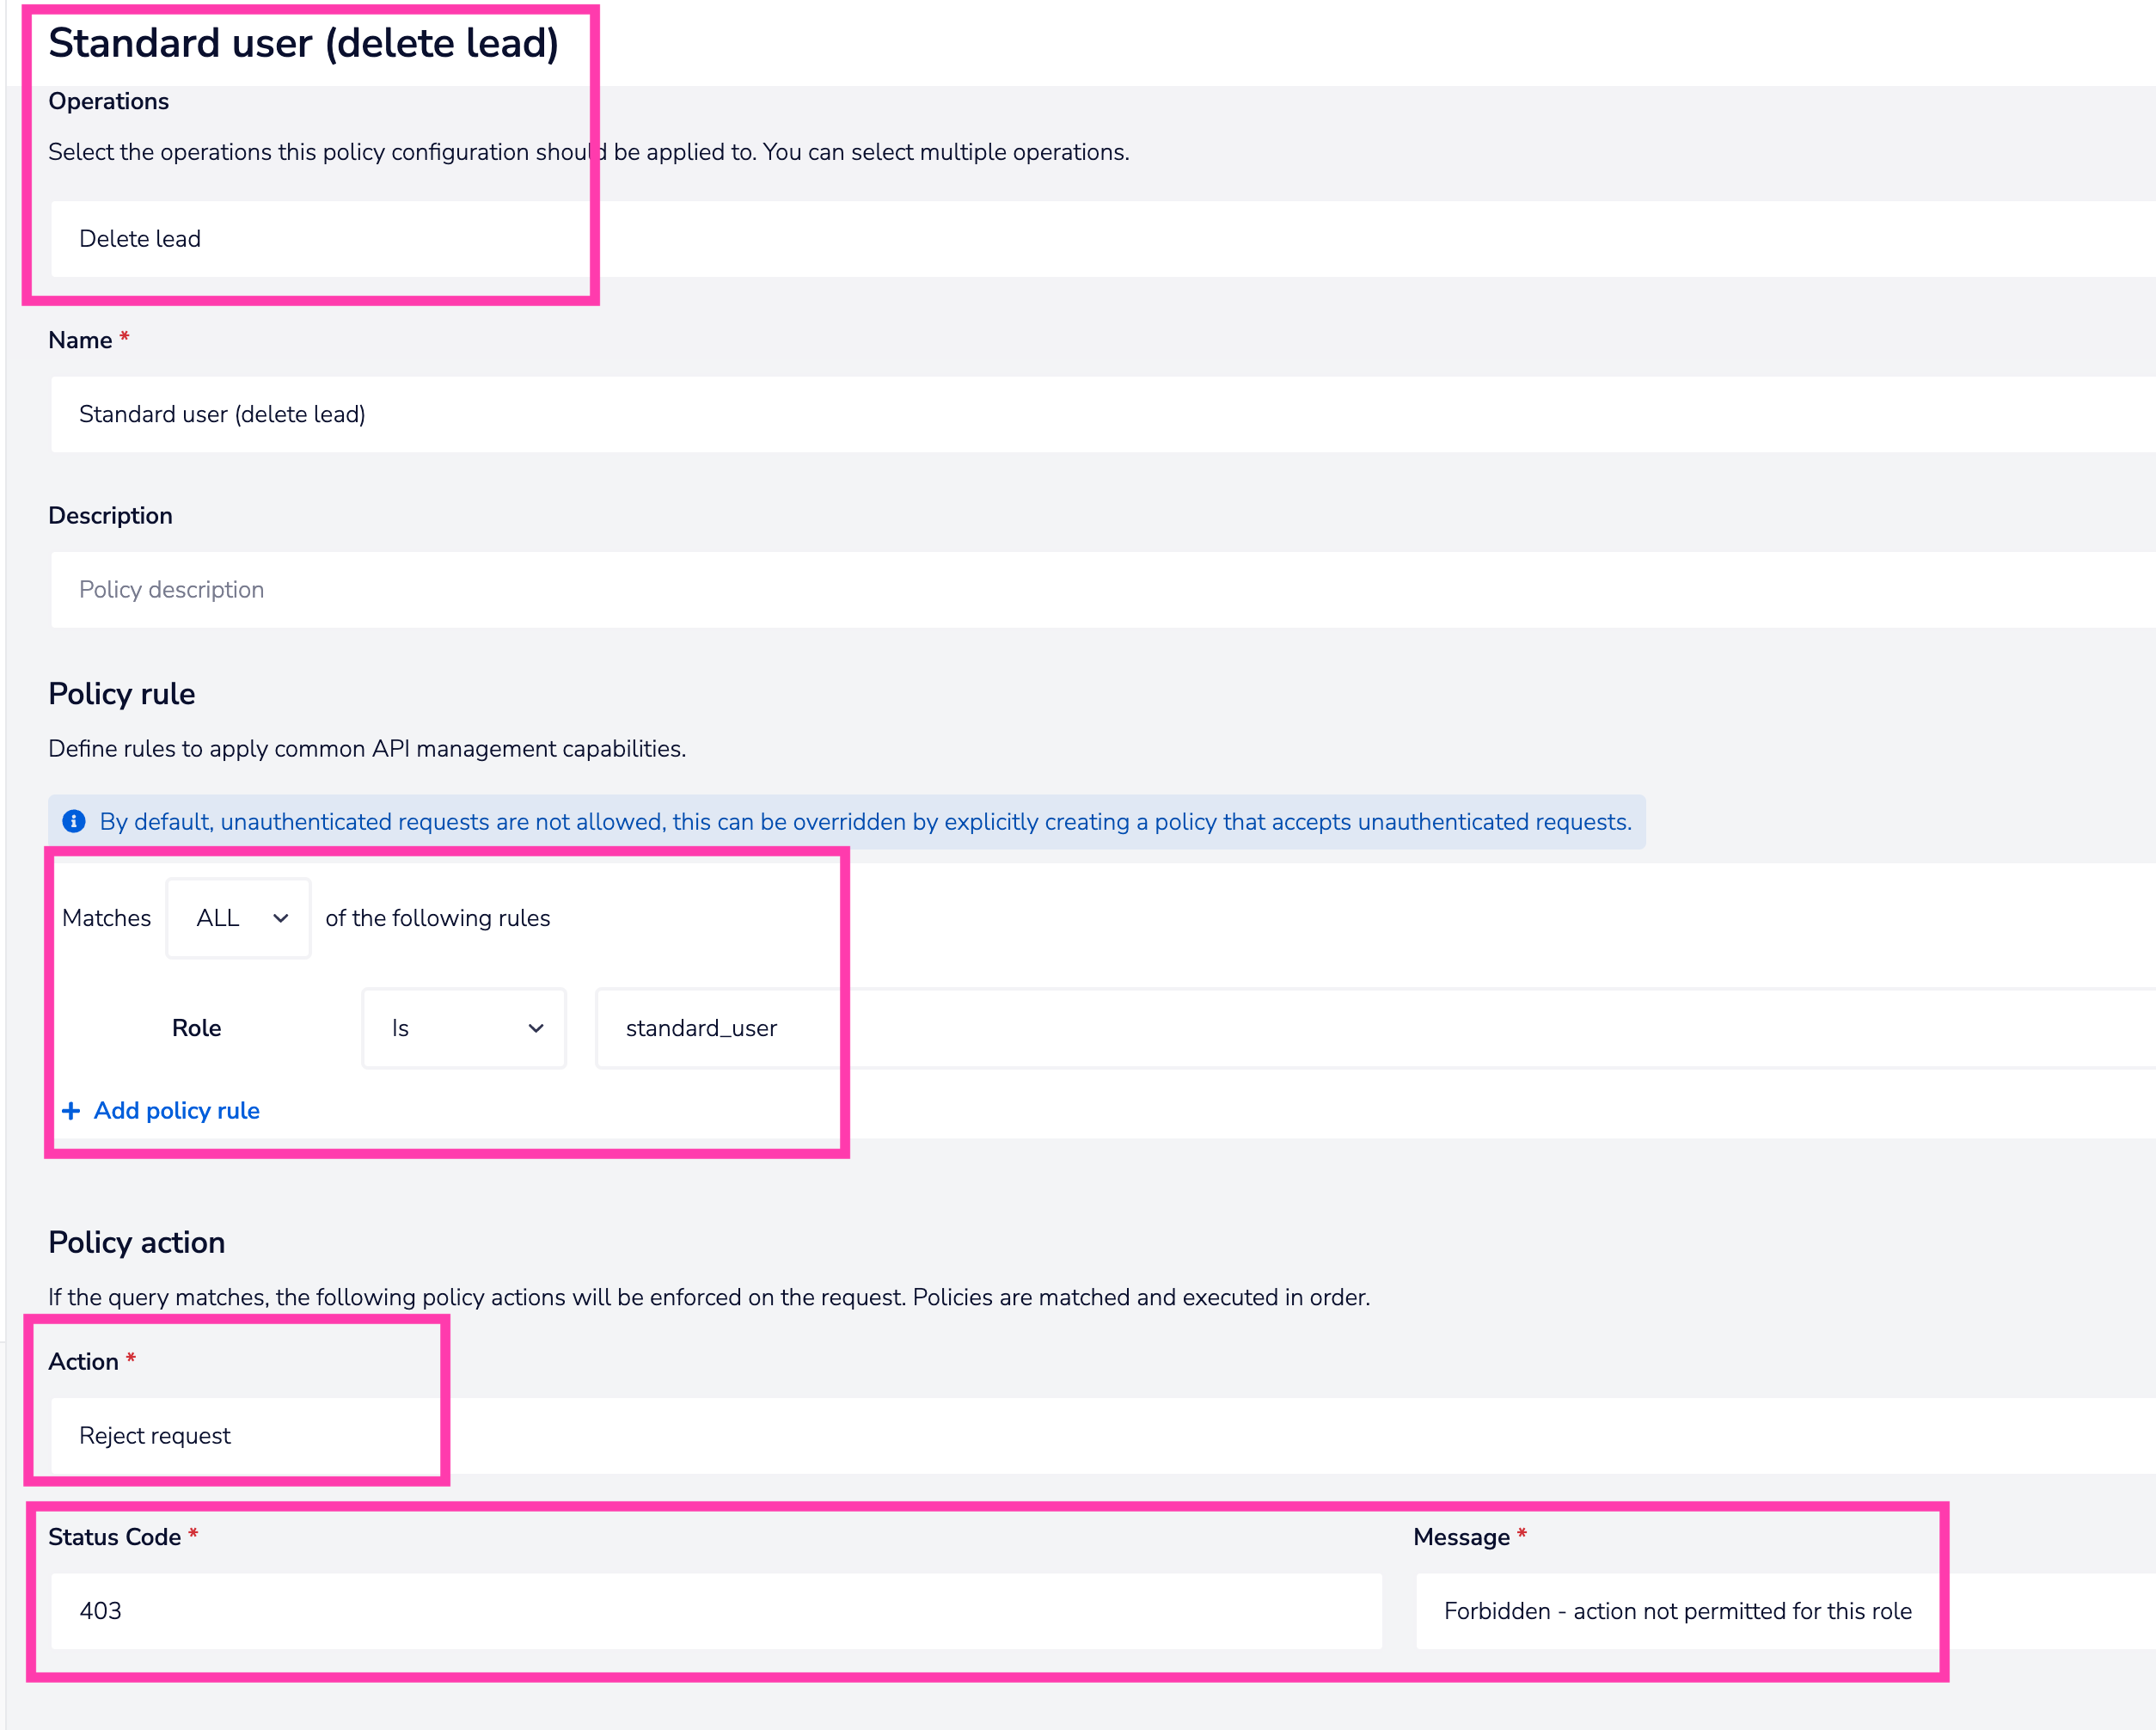
And one 'reject' policy (note that you can set custom status code responses to reject policies):
3 - Create clients / issue tokens
Note that a client is its own separate entity
It is not connected to a Tray user. Client tokens can be shared with any individual - their use does not require access to Tray and they can be used per any normal API token
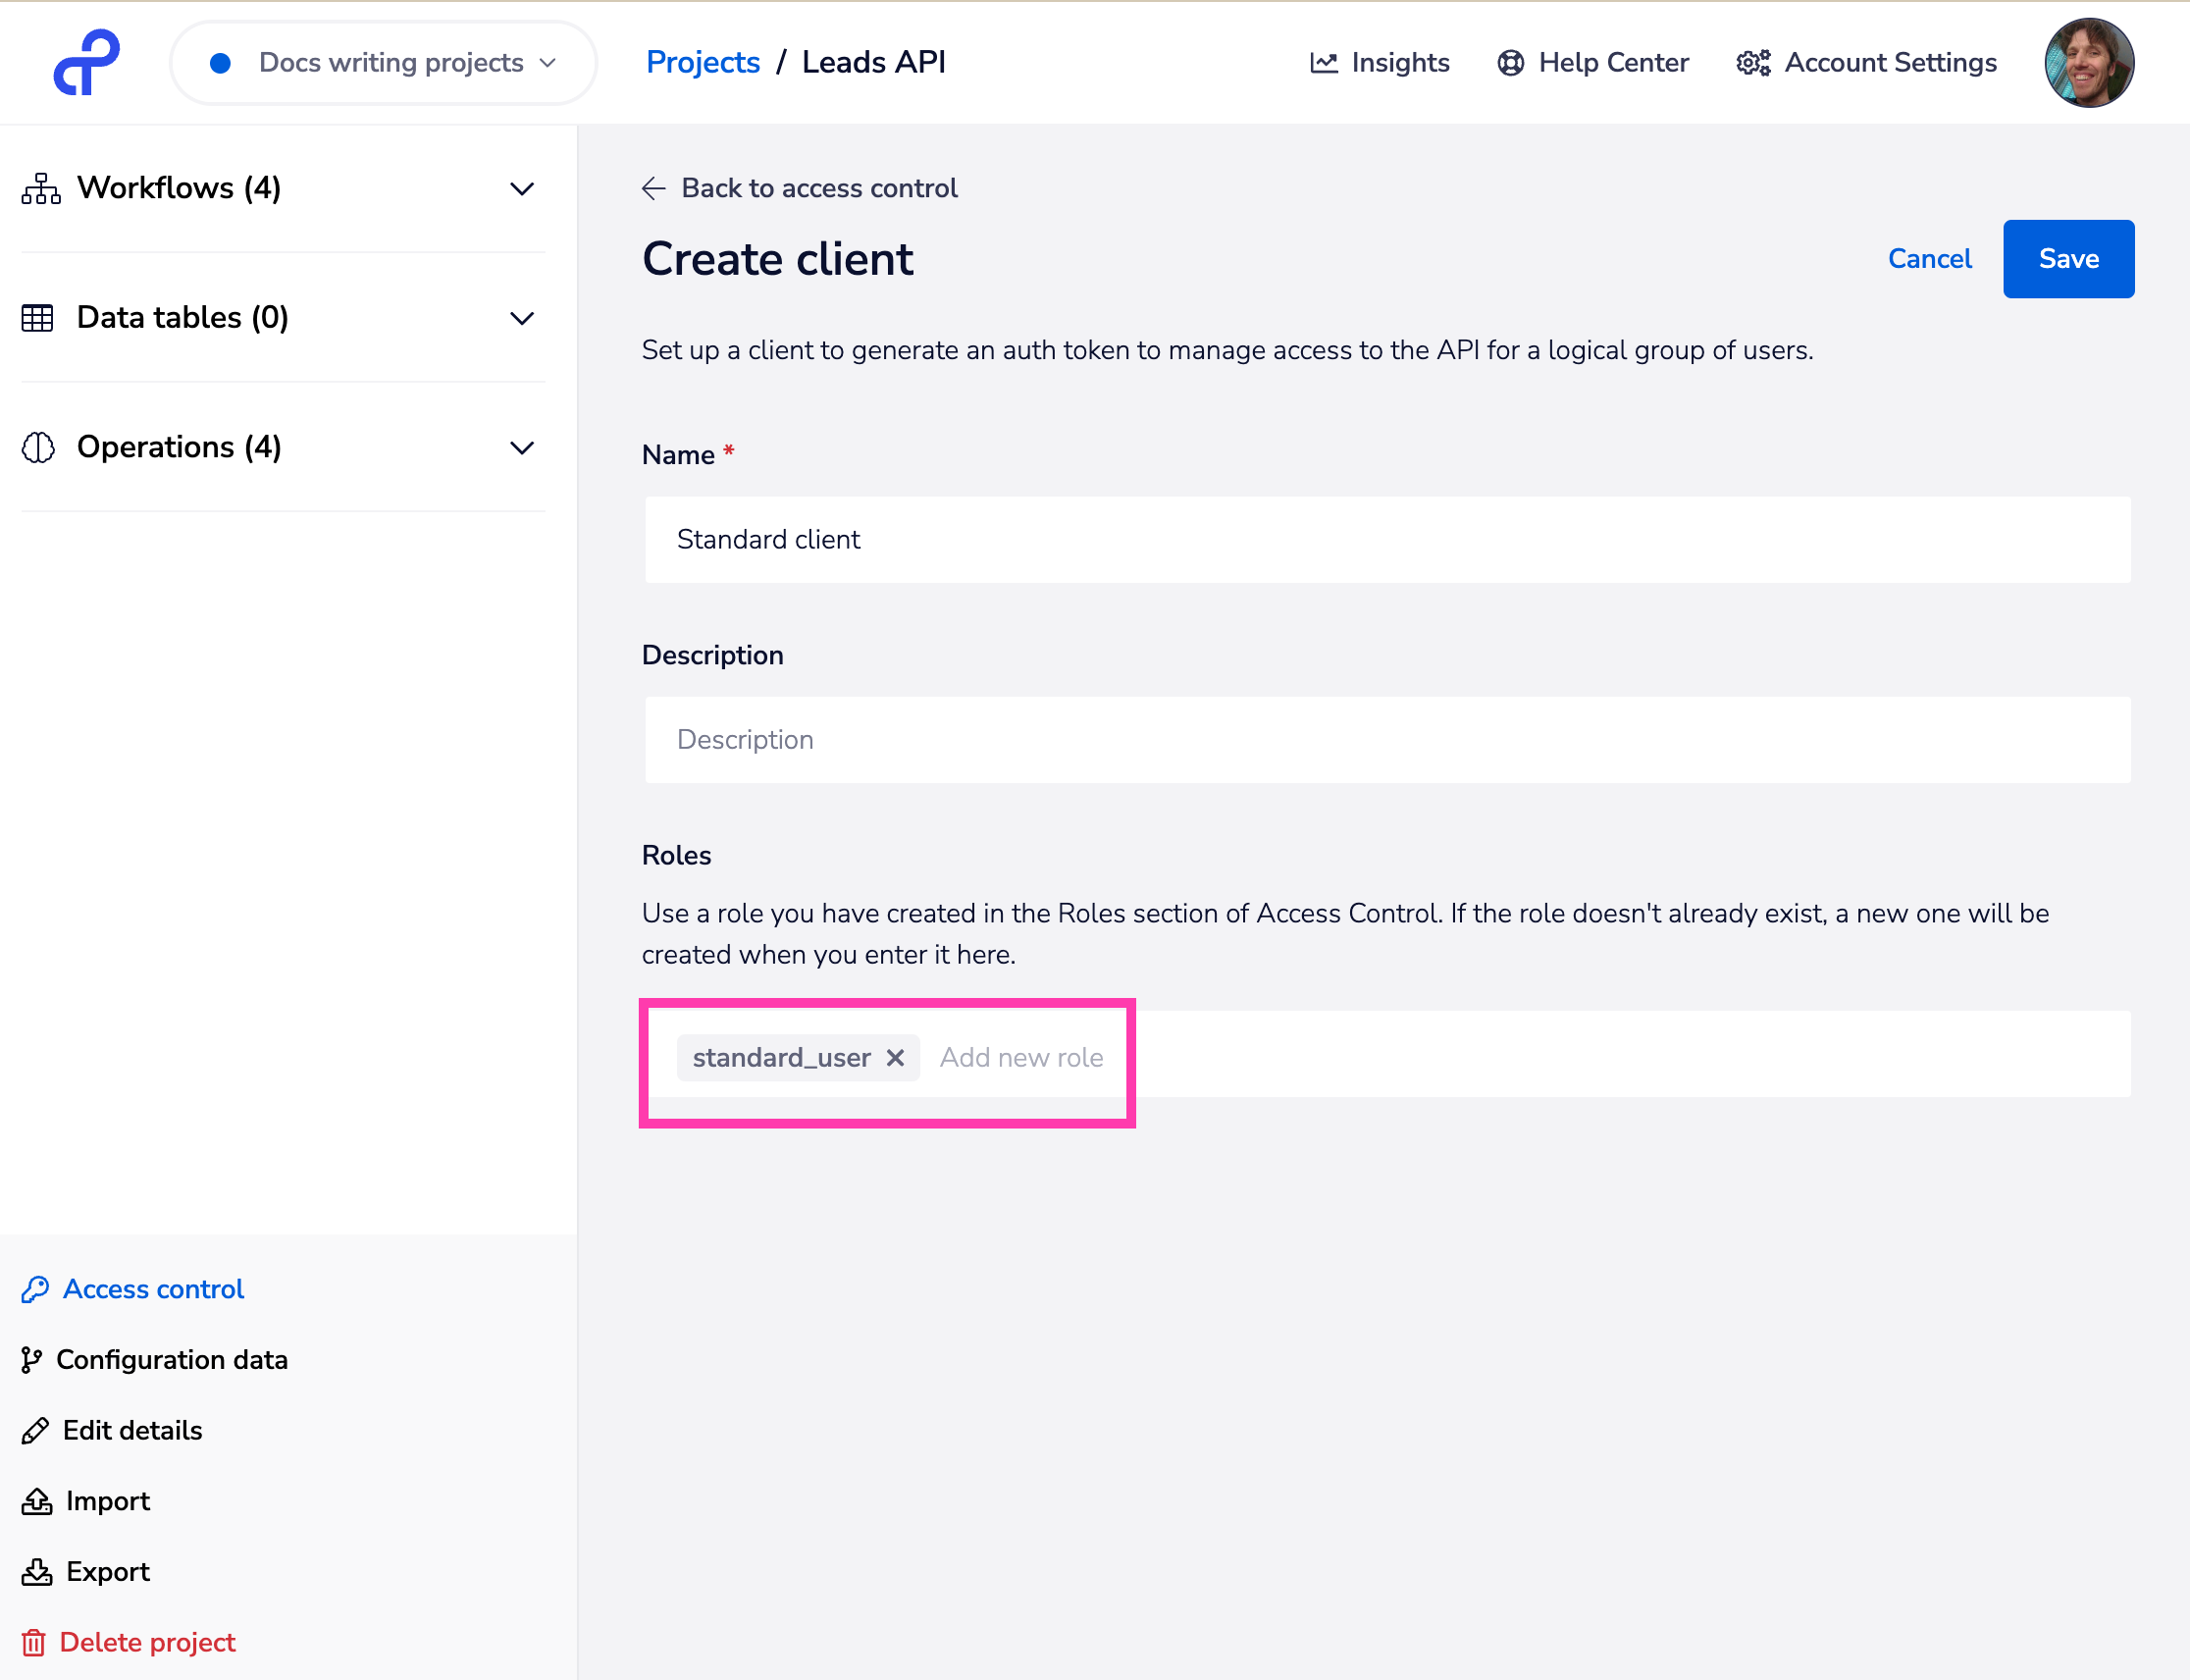
In order to generate an access token you need to create a client.
Note that it is not a prerequisite to create policies. You can create minimum-security clients that will by default have access to all endpoints (authenticated with a bearer token).
In most cases, however, you will want to control access to your endpoints using policies as described above.
When creating a token you need to attach it to a role which may or not be controlled by role-based policies
Access tokens should be stored and shared in a secure password manager:
Rate limiting
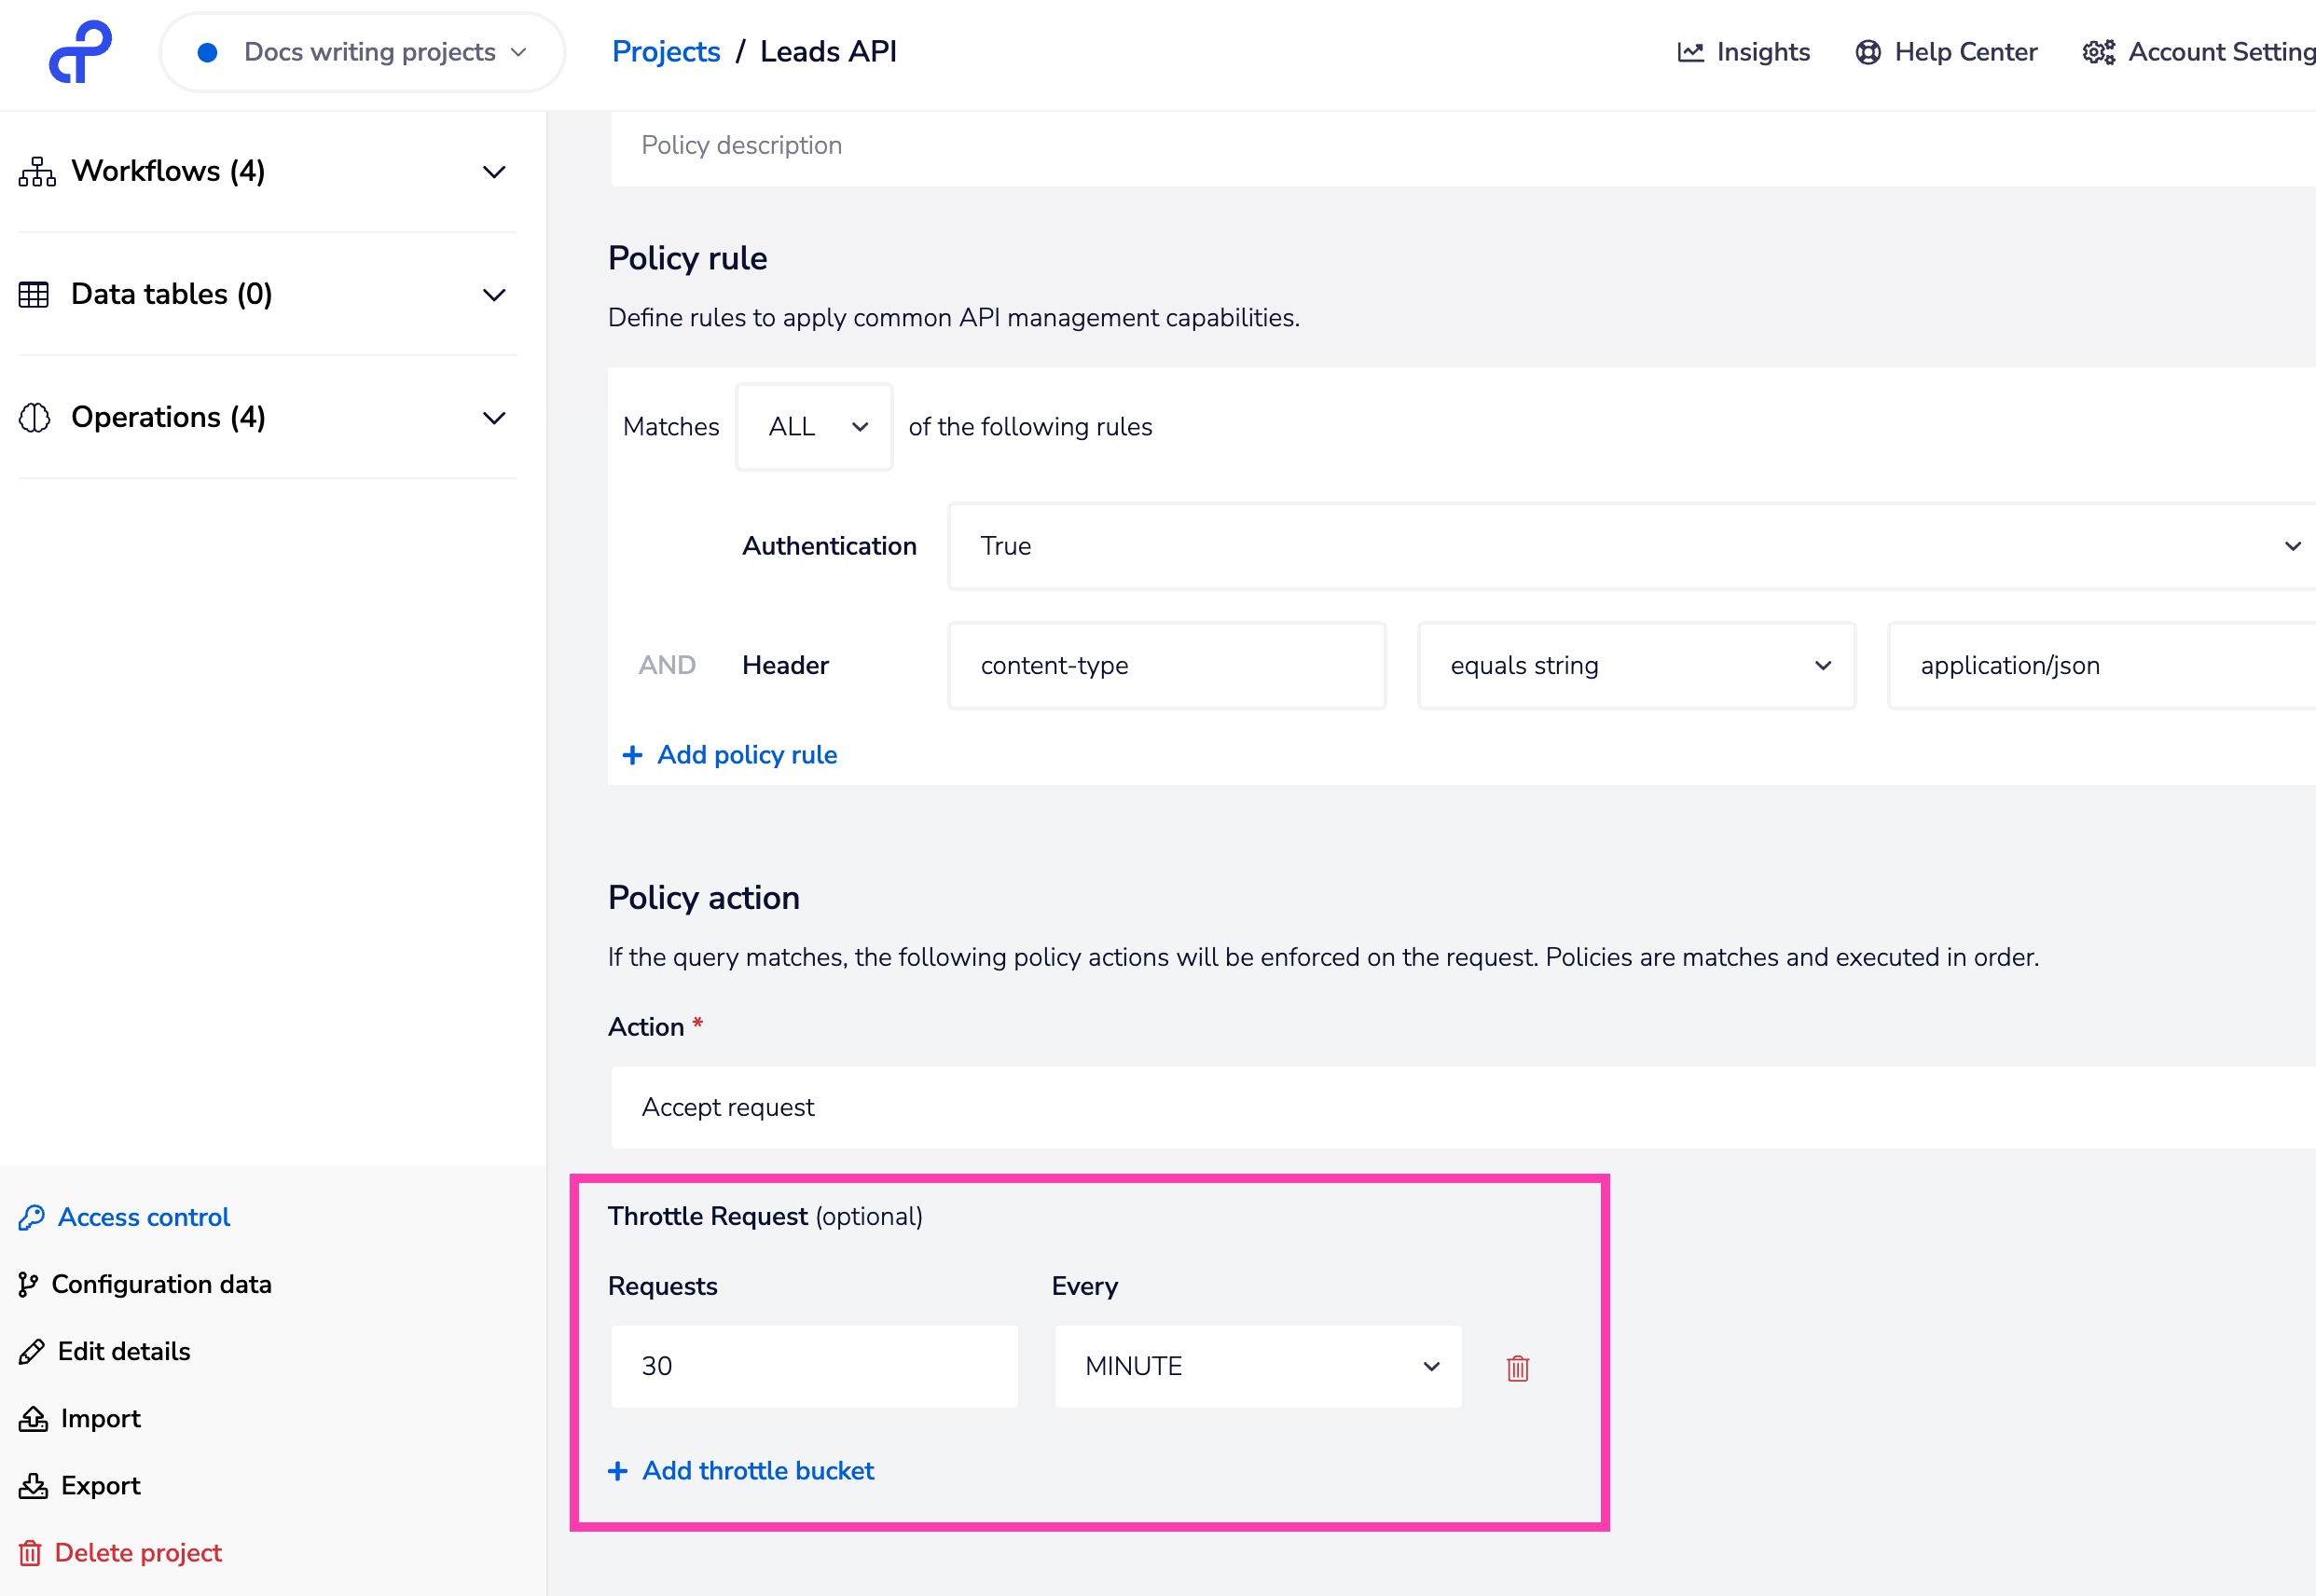
As mentioned above, when creating an accept policy, you can set rate limits in the 'Throttle request' section at the bottom of the page:
Setting additional policy rules
In order to further refine access to your APIs the following rules are available:
| Rule | Explanation |
|---|---|
| **Authentication ** | By default, unauthenticated requests are not allowed This can be overridden by explicitly creating a policy that accepts unauthenticated requests. |
| Role | As explained above you can link accept and reject policies to roles |
| Header | It is possible to allow / reject headers with certain values e.g. calls that come from a particular client or source |
| Json field | This can be used to e.g. block requests that contain certain key words |
As an example of setting an extra rule, you could create an IP blocklist policy based on the 'remote-address' header:

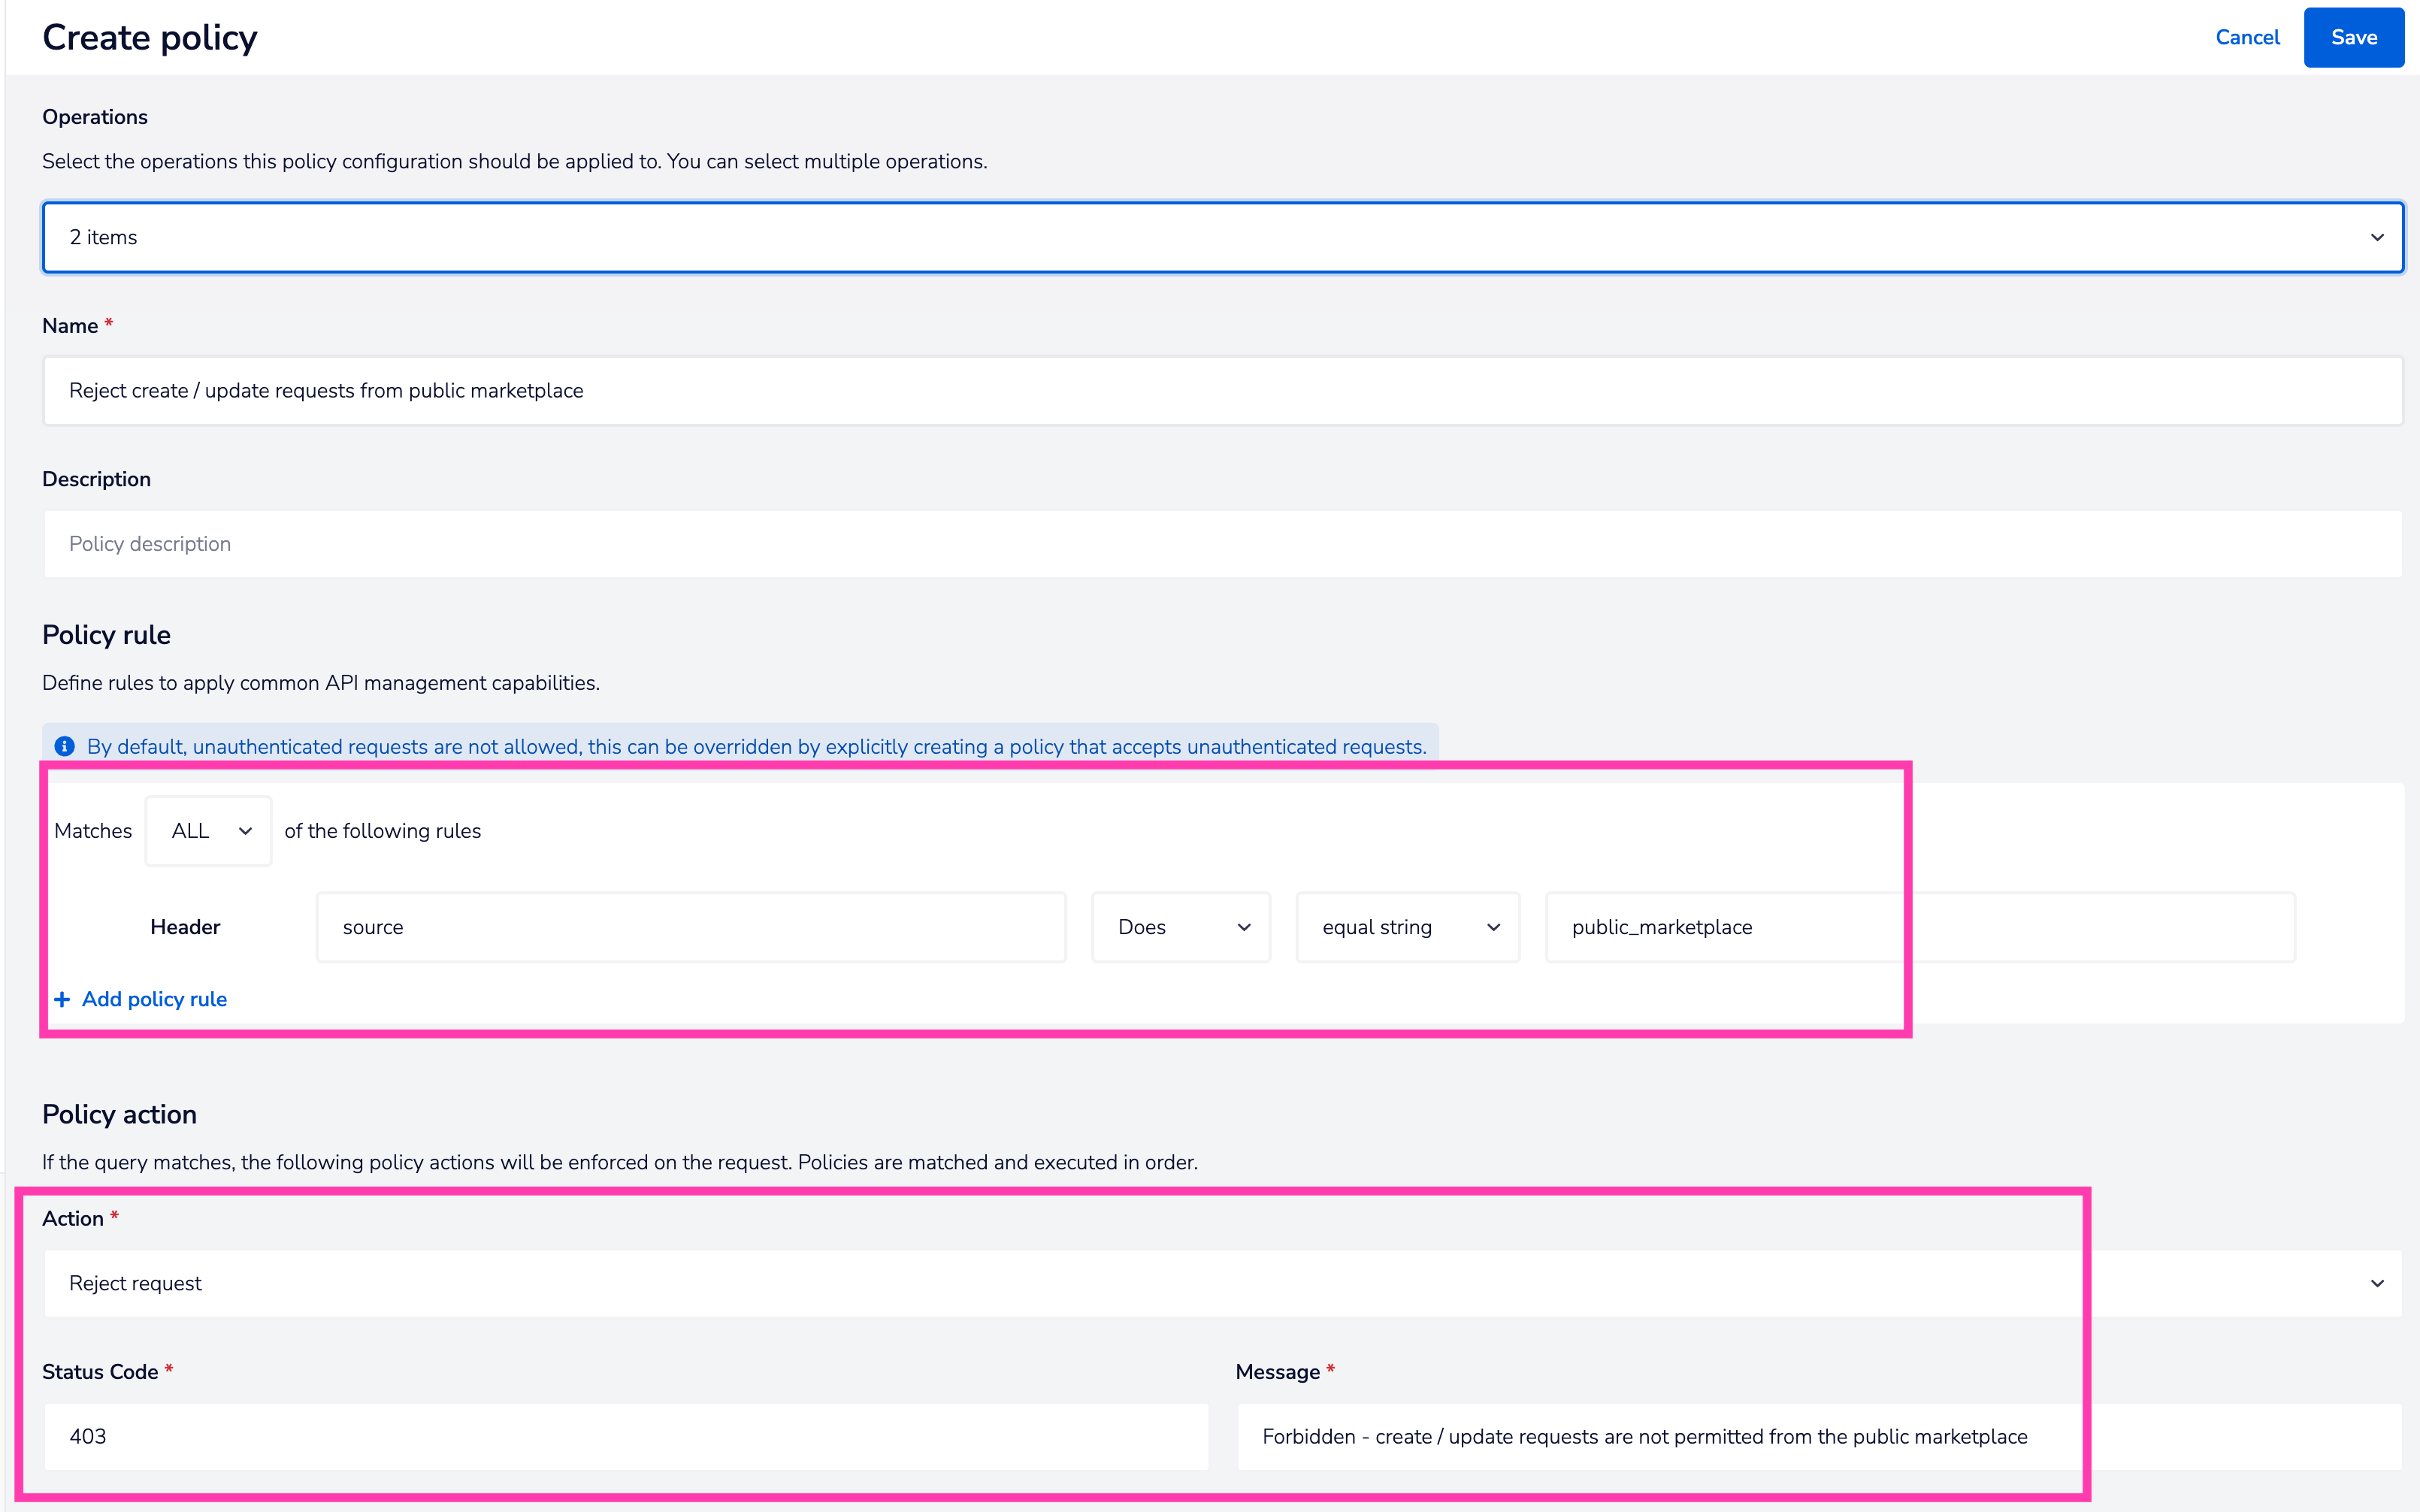
As another example, for internal access control, you could make it compulsory in the request header schema that all requests pass a 'source'.
Then you could make a rule which rejects requests coming from a particular source: