Project Versioning
In the Software Development Life Cycle (SDLC) at Tray, versions act like code commits or release candidates - stable snapshots of the project's state that are documented and can be deployed to higher environments.
Project versioning overview
A version is a snapshot of a project saved at a specific point in time, capturing key project assets such as workflows, configurations, solutions, data tables, vector tables, APIM operations, and basic agent metadata (structure/definitions only; see What's included when assets move). Restoring a version restores this captured state.
In the Software Development Life Cycle (SDLC) at Tray, versions act like code commits or release candidates - stable snapshots of the project's state that are documented and can be deployed to higher environments.
Versions can be easily reverted to in the event of future breaking changes - either by using the 'Restore version' option or by exporting a historical version as JSON and importing it to your desired destination.
- Each version is annotated with a title and description, allowing you to clearly define the purpose of the version, the changes it includes, and any relevant details.
- Each version also provides a list of changes made since the previous version, including details of who made the changes and what those changes were. This helps with auditability and debugging.
You can revert to a previous version, restoring the project to the exact state it was in when the version was created, or you can export the version's data as a JSON file for external use or backup.
Best practices
To effectively manage changes and maintain stability, save versions at key points during the development, similar to committing code or creating pull requests. Here are some recommended times to save a version:
- Before major changes: Save a version before big updates to workflows, config, or solutions, so you can revert if needed.
- After completing stable updates: When a feature or update is finished and tested, save a version to lock in a stable snapshot.
- Before risky or experimental changes: Save a version before making changes that might disrupt the project, providing a safety net.
- Before deploying to higher environments: Capture a version before promoting changes to production or staging.
- Before publishing a solution: Save a version before publishing, ensuring that a concrete, stable package is deployed to solution instances. This ensures traceability and stability when releasing updates.
- At key milestones: Save versions at regular intervals to document progress and aid in audits.
Managing versions
Viewing change history
On the Project Versions Overview page, you can view saved versions and track changes across different sections. Each section represents either "Work in Progress" (unsaved changes) or a specific version (e.g., "Version 2.1 Enabled all workflows"), followed by a list of changes made in that version.
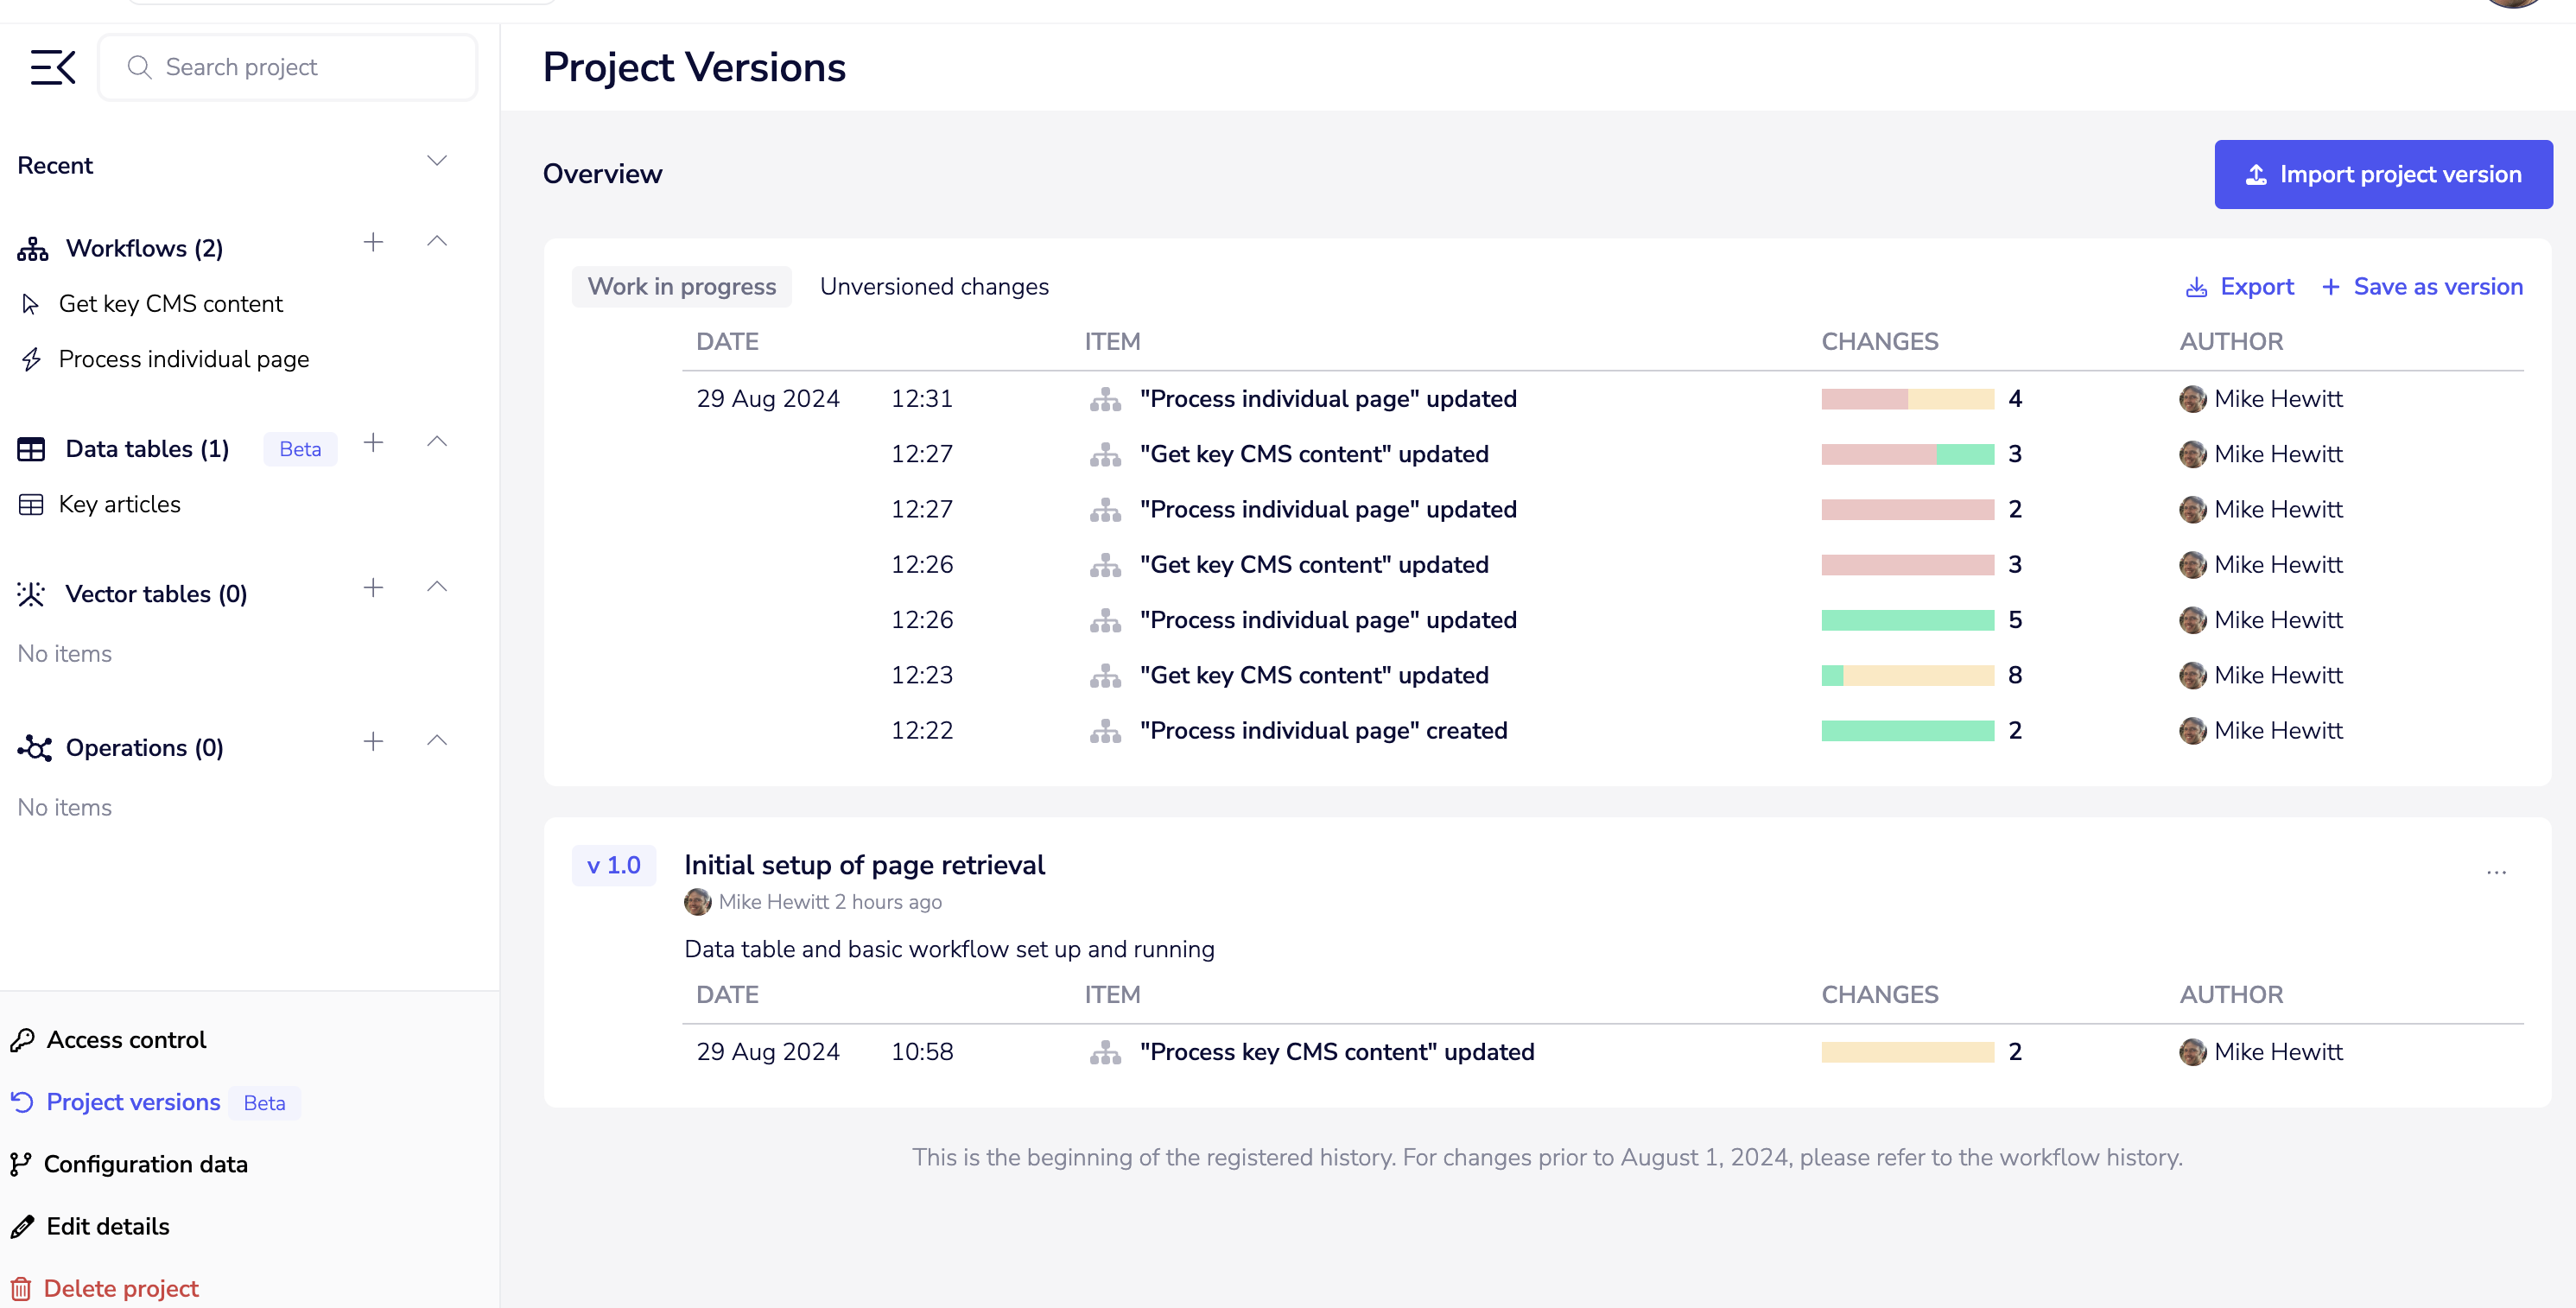
Changes are grouped by project assets, such as:
- Workflows
- **Project configuration **that includes project config and details
- Solution
- Data tables
- Vector tables
- APIM operations
- Agents
There are two composite change types:
- Project import: A grouped set of changes related to the imported assets.
- Project rollback: A grouped set of changes applied when a version is restored.
Each composite change type includes information about the project version that has been imported or restored, if available.
Each change item on the overview page features a visual summary showing the distribution of changes: green for created, yellow for updated, and red for deleted items. A bar chart shows these proportions and the total count, making it easy to assess changes impact easily.
You can drill down into each change to view a more detailed breakdown and the complete change history of the asset, such as the specific history of a workflow.
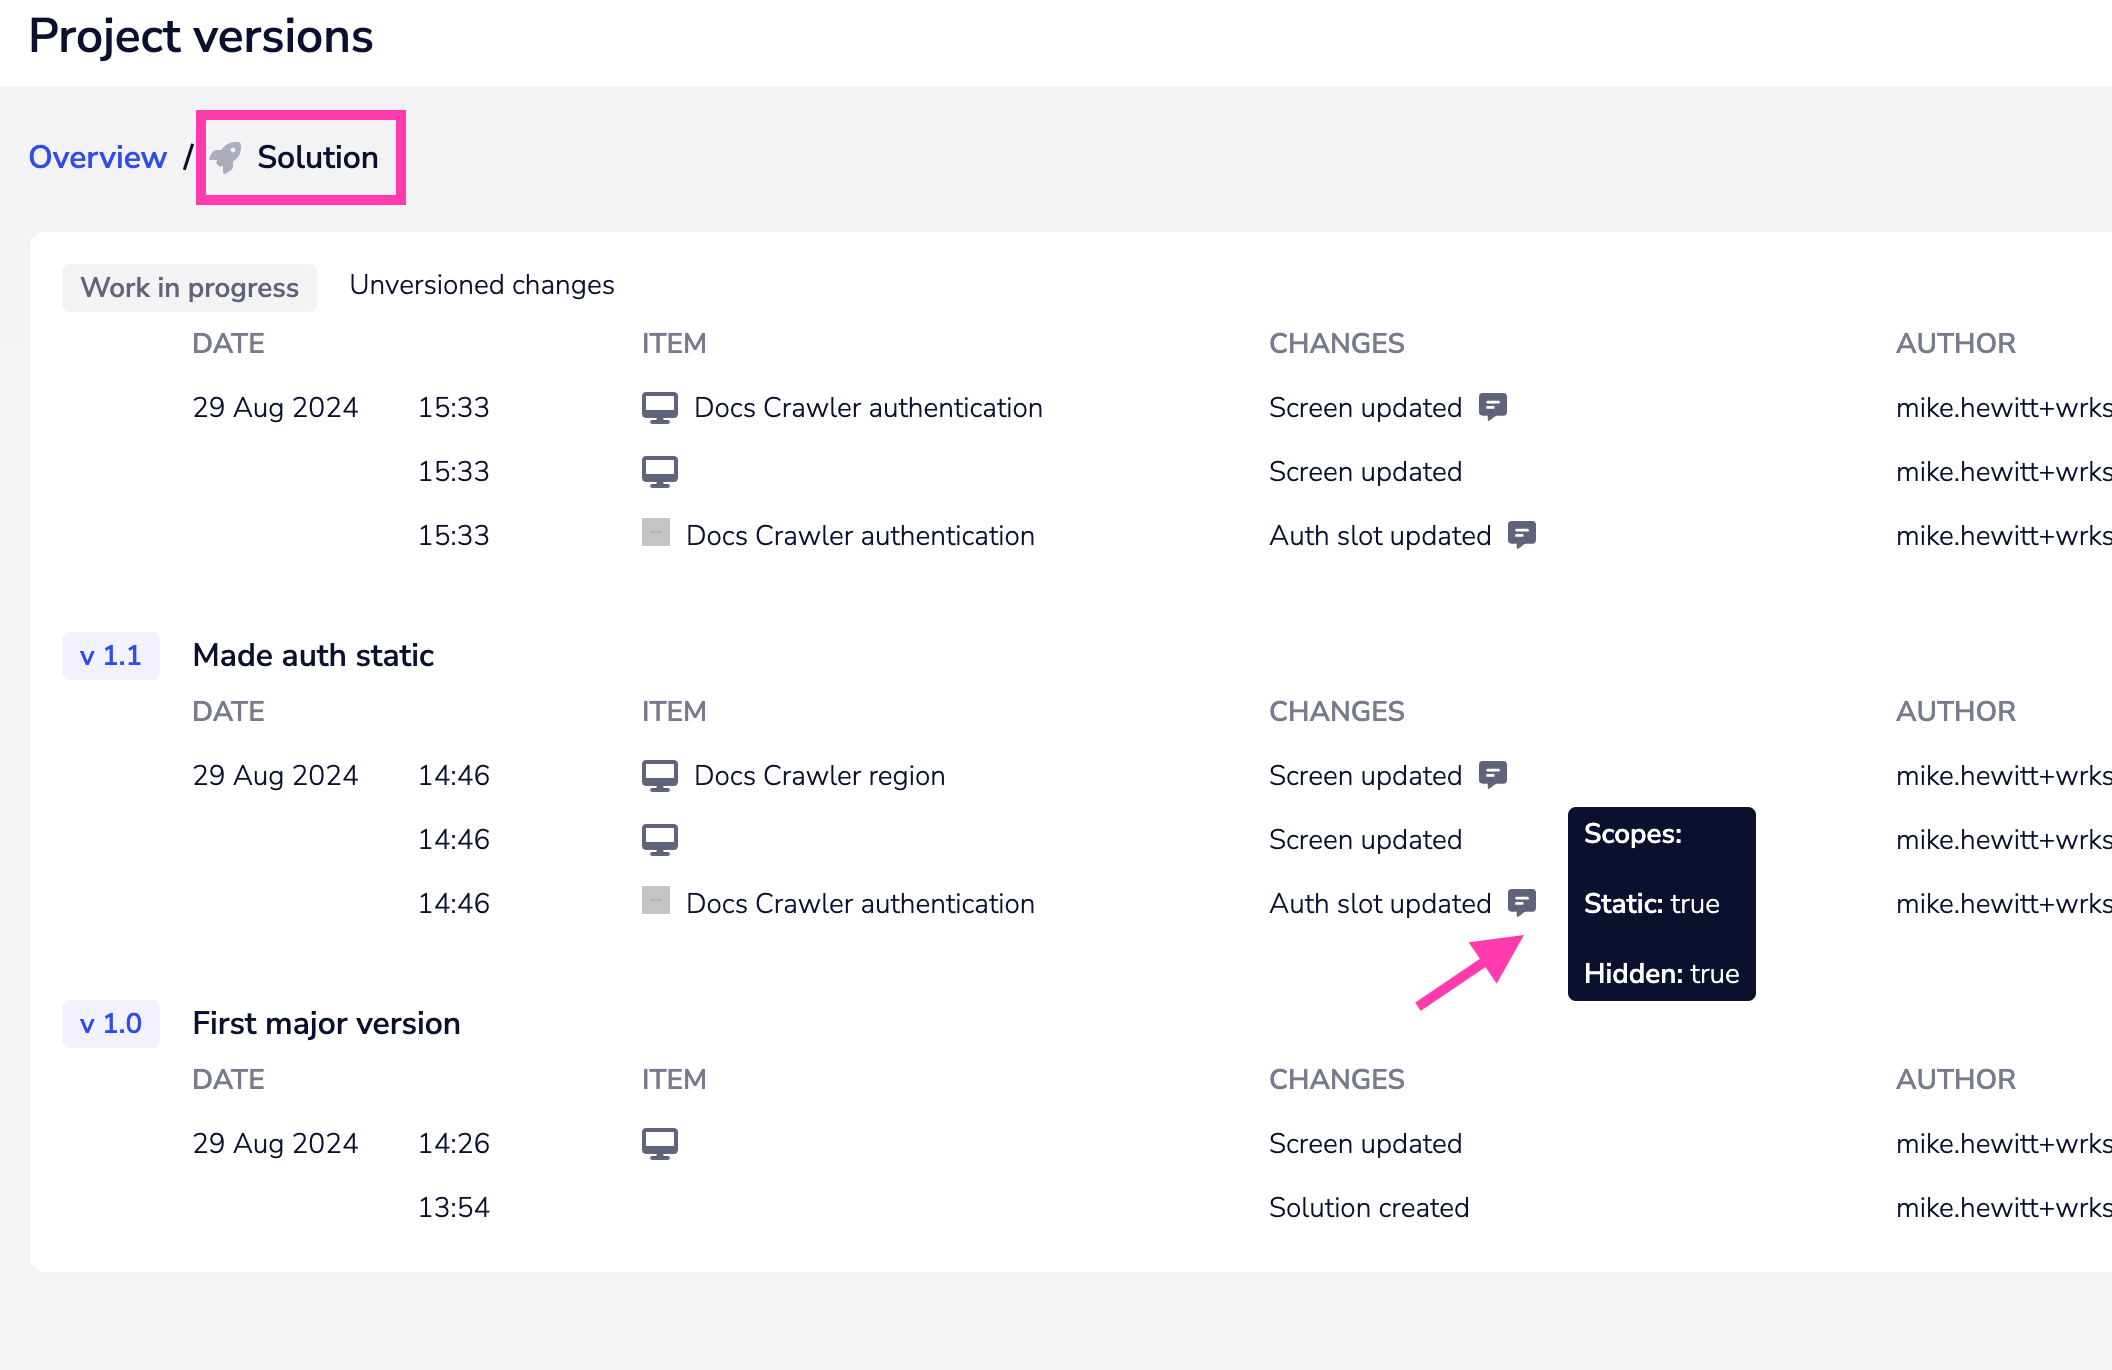
Saving a version
To save a version of your project, navigate to the Project versions overview page and locate the Work in progress section. Saving a version captures a snapshot of the current project state, including its assets such as workflows, project configuration, solutions, data tables, vector tables, APIM operations, and basic agent metadata, for later retrieval.
Steps to save a version:
- Set a title and description:
- Choose a version type:
For embedded projects, it's important to ensure the solution is synced with the project before saving a version. To force a sync, navigate to the solution editor, click "Publish Draft", and select "Publish Later".
Restoring historical changes
Restoring a version restores the captured structure of the project's data tables, vector tables, APIM operations, and agent metadata. As with import, stored data (table rows, vectors) and APIM policies/roles are not part of the version and are not affected by a rollback.
A rollback never destroys your stored data. If restoring a version removes a data table or column - because that structure didn't exist in the version you're rolling back to - the table or column is automatically archived rather than deleted, exactly as it is on import (for data tables, the whole table or just the removed columns; for vector tables, the whole table). The underlying data is left untouched, and because archiving only flags the item's metadata, any workflows that reference an archived column keep hitting live data. You can unarchive an item (or roll forward again) to bring it back.
There are three ways to restore historical changes in your project:
- Restoring a previously saved version Use the "Restore version" option in the version menu on the overview page. This will apply the project state from that version as new changes in the Work in Progress section. Be aware that if some external dependencies may become unavailable since the version was saved (e.g., authentication credentials may no longer exist), restoring the version will result in an error, but you can still export the version as described below.
- Exporting a previously saved version JSON Select the "Export as JSON" option in the version menu on the overview page. This will save the exported project data as a JSON file, which you can then import back into the project. You will need to resolve all dependencies as you would during a typical project import.
- Restoring individual workflows states You can restore specific workflows to their historical states by navigating to the workflow detailed history page. To access this, click on the desired workflow in the project versions overview page and use the "Restore this workflow state" option in the change menu. This will apply the state of the workflow at that specific point in time and create a new change. Note that you can only restore workflow states from the last 30 days.